TRENDnet TEW-821DAP User's Guide - Page 27
Change your IP address, Create schedules, Con Spanning Tree
 |
View all TRENDnet TEW-821DAP manuals
Add to My Manuals
Save this manual to your list of manuals |
Page 27 highlights
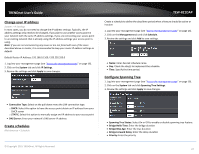
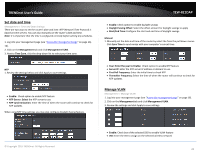
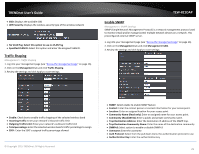
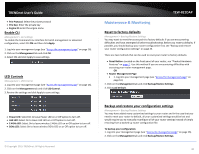
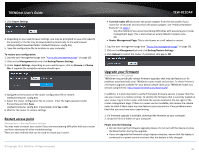
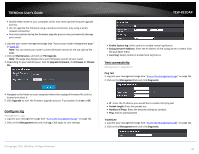
TRENDnet User's Guide Change your IP address System > IP Settings In most cases, you do not need to change the IP address settings. Typically, the IP address settings only needs to be changed, if you plan to use another access point in your network with the same IP address settings, if you are connecting your access point to an existing network that is already using the IP address settings your access point is using. Note: If you are not encountering any issues or are not faced with one of the cases described above or similar, it is recommended to keep your router IP address settings as default. Default Router IP Address: 192.168.10.100 / 255.255.255.0 1. Log into your management page (see "Access the management page" on page 16). 2. Click on the System tab and click IP Settings. 3. Review the settings and click Apply to save changes. TEW-821DAP Create a schedule to define the days/time period when a feature should be active or inactive: 1. Log into your management page (see "Access the management page" on page 16). 2. Click on the Management tab and click Schedule. 3. Review the settings and click Add to save settings. Name: Enter desired schedule name. Day: Check the day(s) to implement the schedule. Time: Specify the time period. Configure Spanning Tree 1. Log into your management page (see "Access the management page" on page 16). 2. Click on the System tab and click Spanning Tree Settings. 3. Review the settings and click Apply to save changes. Connection Type: Select on the pull down menu the LAN connection type. o DHCP: Select this option to have the access point obtain an IP address from your DHCP server o STATIC: Select this option to manually assign and IP address to your access point DNS Server: Enter your network's DNS server IP address Create schedules Maintenance > Schedule © Copyright 2015 TRENDnet. All Rights Reserved. Spanning Tree Status: Select On or Off to enable or disable spanning tree feature. Bridge Hello Time: Enter the bridge duration Bridge Max Age: Enter the max duration Bridge Forward Delay: Enter the delay duration Priority: Enter the priority 27
-
 1
1 -
2
-
3
-
4
-
5
-
6
-
7
-
8
-
9
-
10
-
11
-
12
-
13
-
14
-
15
-
16
-
17
-
18
-
19
-
20
-
21
-
 22
22 -
 23
23 -
 24
24 -
 25
25 -
 26
26 -
 27
27 -
 28
28 -
 29
29 -
 30
30 -
 31
31 -
 32
32 -
33
-
34
-
35
-
36
-
37
-
38
-
39
-
40
-
41
-
42
-
43
-
44
-
45
 |
 |
