TRENDnet TPE-1020WS User's Guide - Page 65
Con parameters for RMON events, Last
 |
View all TRENDnet TPE-1020WS manuals
Add to My Manuals
Save this manual to your list of manuals |
Page 65 highlights
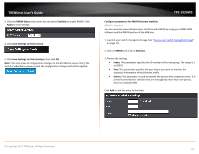
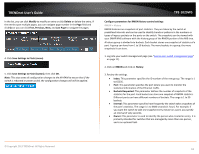
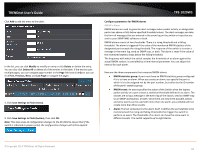
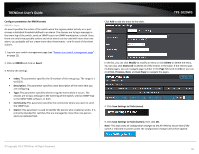
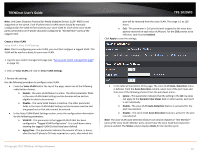
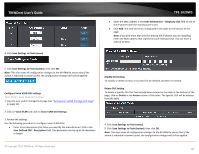
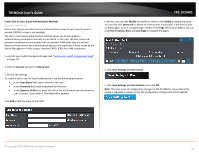
TRENDnet User's Guide Configure parameters for RMON events RMON > Event An event specifies the action of the switch when the ingress packet activity on a port crosses a statistical threshold defined in an alarm. The choices are to log a message in the event log of the switch, send an SNMP trap to an SNMP workstation, or both. Since there are only three possible actions and since events can be used with more than one alarm, you probably will not create more than three events - one for each of the three actions. 1. Log into your switch management page (see "Access your switch management page" on page 11). 2. Click on RMON and click on Event. 3. Review the settings. • Index: This parameter specifies the ID number of the new group. The range is 1 to 65535. • Description: This parameter specifies a text description of the event that you are configuring. • Type: This parameter specifies where to log the event when it occurs. The choices are to log a message in the event log of the Switch, send an SNMP trap to the SNMP NMS software, or both. • Community: This parameter specifies the community where you want to send the SNMP trap. • Owner: This parameter is used to identify the person who created an entry. It is primarily intended for switches that are managed by more than one person, and is an optional field. Click Add to add the entry to the table. TPE-1020WS In the list, you can click Modify to modify an entry or click Delete or delete the entry. You can also click Delete All to delete all of the entries in the table. If the entries span multiple pages, you can navigate page number in the Page field and click Go or you can click First, Previous, Next, and Last Page to navigate the pages. 4. Click Save Settings to Flash (menu). 5. Click Save Settings to Flash (button), then click OK. Note: This step saves all configuration changes to the NV-RAM to ensure that if the switch is rebooted or power cycled, the configuration changes will still be applied. © Copyright 2013 TRENDnet. All Rights Reserved. 65
-
 1
1 -
2
-
3
-
4
-
5
-
6
-
7
-
8
-
9
-
10
-
11
-
12
-
13
-
14
-
15
-
16
-
17
-
18
-
19
-
20
-
21
-
22
-
23
-
24
-
25
-
26
-
27
-
28
-
29
-
30
-
31
-
32
-
33
-
34
-
35
-
36
-
37
-
38
-
39
-
40
-
41
-
42
-
43
-
44
-
45
-
46
-
47
-
48
-
49
-
50
-
51
-
52
-
53
-
54
-
55
-
56
-
57
-
58
-
59
-
 60
60 -
 61
61 -
 62
62 -
 63
63 -
 64
64 -
 65
65 -
 66
66 -
 67
67 -
 68
68 -
 69
69 -
 70
70 -
71
-
72
-
73
-
74
-
75
-
76
-
77
-
78
-
79
-
80
-
81
-
82
-
83
-
84
-
85
-
86
-
87
-
88
-
89
-
90
-
91
-
92
-
93
-
94
-
95
-
96
-
97
-
98
-
99
-
100
-
101
-
102
-
103
-
104
-
105
 |
 |
