Thermador CET366YB Instructions for Use - Page 13
Turning CookSmart® off, Frying recommendations
 |
View all Thermador CET366YB manuals
Add to My Manuals
Save this manual to your list of manuals |
Page 13 highlights
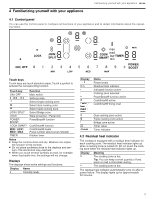
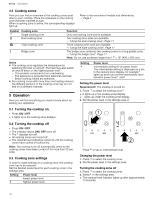
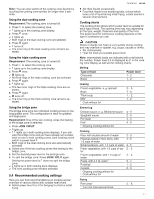
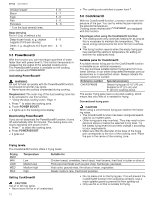
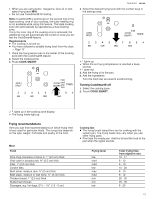
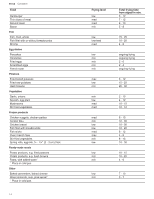
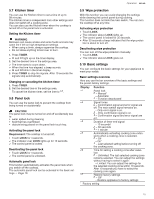
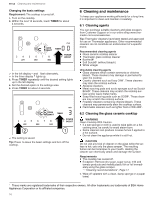
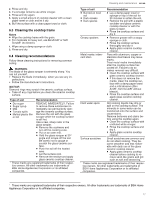
▶ When you are using butter, margarine, olive oil or lard, select frying level MIN. ▶ Do not use CookSmart® for boiling. Note: CookSmart® is positioned on the second ring of the triple cooking zone of your cooktop, the outer heating ring is not available while using this feature. The triple cooking zone will automatically be operated as a dual cooking zone. If only the inner ring of the cooking zone is activated, the additional ring will automatically be turned on once you select the CookSmart® feature. Requirements ¡ The cooktop is turned on. ¡ You have selected a suitable frying level from the chart. → Page 13 1. Place the frying sensor pan in the center of the cooking zone with the CookSmart® feature. 2. Select the cooking zone. 3. Press COOK SMART. JOIN | SPLIT MIN LOW COOK SMART TIMER MED MAX Operation en-us 4. Select the desired frying level with the number keys in the settings area. JOIN | SPLIT MIN LOW COOK SMART TIMER MED MAX a lights up. a When the set frying temperature is reached a beep sounds. a goes out. 5. Add the frying oil to the pan. 6. Add the ingredients. Turn the food over as usual to avoid burning. Turning CookSmart® off 1. Select the cooking zone. 2. Touch COOK SMART. a lights up in the cooking zone display. a The frying levels light up. Frying recommendations Here you can find recommendations on which frying level is best used for particular foods. The frying time depends on the type, weight, thickness and quality of the food. Meat Food Pork chop, boneless or bone-in, 1" (2.5 cm) thick Veal cutlet in breadcrumb, ⅝" (0.5 cm) thick Fillet, 1" (2.5 cm) thick Cordon bleu Beef steak, medium rare, ¾" (2 cm) thick Beef steak, medium or well done, ¾" (2 cm) thick Chicken breast, 1" (2.5 cm) thick Skillet-fried chicken Sausages, e.g. hot dogs, Ø ½ - 1⅛" (1.5 - 3 cm) Cooking tips ¡ The frying levels stated here are for cooking with the system pan. The frying levels may vary when you use other frying pans. ¡ First heat the empty pan. Add the fat and the food to the pan when the signal sounds. Frying level low med med low max med min min low Total frying time from signal in min. 10 - 17 6 - 10 6 - 10 15 - 20 8 - 10 8 - 12 20 - 30 25 - 35 8 - 20 13
-
 1
1 -
2
-
3
-
4
-
5
-
6
-
7
-
 8
8 -
 9
9 -
 10
10 -
 11
11 -
 12
12 -
 13
13 -
 14
14 -
 15
15 -
 16
16 -
 17
17 -
 18
18 -
19
-
20
-
21
-
22
-
23
-
24
-
25
-
26
-
27
-
28
-
29
-
30
-
31
-
32
-
33
-
34
-
35
-
36
-
37
-
38
-
39
-
40
-
41
-
42
-
43
-
44
-
45
-
46
-
47
-
48
-
49
-
50
-
51
-
52
-
53
-
54
-
55
-
56
-
57
-
58
-
59
-
60
-
61
-
62
-
63
-
64
-
65
-
66
-
67
-
68
-
69
-
70
-
71
-
72
 |
 |
