Toshiba Portege M780 PPM78C-007006 Users Manual Canada; English - Page 96
Connecting the USB floppy diskette drive, FDD Kit
 |
View all Toshiba Portege M780 PPM78C-007006 manuals
Add to My Manuals
Save this manual to your list of manuals |
Page 96 highlights
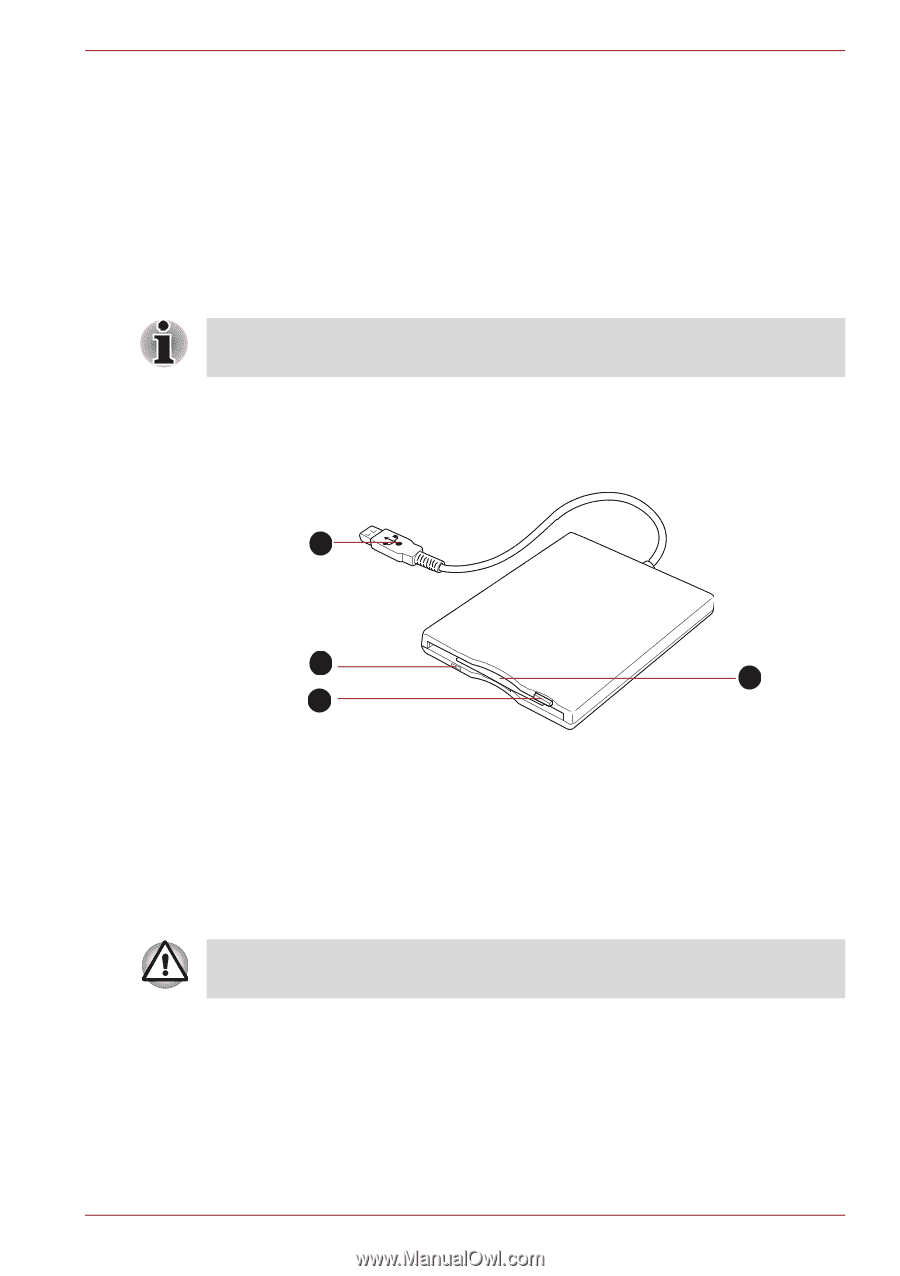
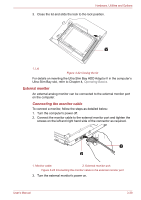
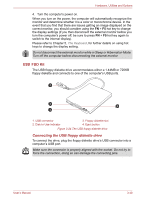
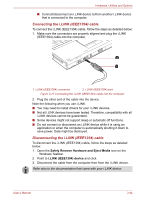
Hardware, Utilities and Options 4. Turn the computer's power on. When you turn on the power, the computer will automatically recognize the monitor and determine whether it is a color or monochrome device. In the event that you find that there are issues getting an image displayed on the correct monitor, you should consider using the FN + F5 hot key to change the display settings (if you then disconnect the external monitor before you turn the computer's power off, be sure to press FN + F5 hot key again to switch to the internal display). Please refer to Chapter 5, The Keyboard, for further details on using hot keys to change the display setting. Do not disconnect the external monitor while in Sleep or Hibernation Mode. Turn off the computer before disconnecting the external monitor. USB FDD Kit The USB floppy diskette drive accommodates either a 1.44MB or 720KB floppy diskette and connects to one of the computer's USB ports. 1 2 3 4 1. USB connector 3. Floppy diskette slot 2. Disk-In-Use Indicator 4. Eject button Figure 3-24 The USB floppy diskette drive Connecting the USB floppy diskette drive To connect the drive, plug the floppy diskette drive's USB connector into a computer's USB port. Make sure the connector is properly aligned with the socket. Do not try to force the connection, doing so can damage the connecting pins. User's Manual 3-40
-
 1
1 -
2
-
3
-
4
-
5
-
6
-
7
-
8
-
9
-
10
-
11
-
12
-
13
-
14
-
15
-
16
-
17
-
18
-
19
-
20
-
21
-
22
-
23
-
24
-
25
-
26
-
27
-
28
-
29
-
30
-
31
-
32
-
33
-
34
-
35
-
36
-
37
-
38
-
39
-
40
-
41
-
42
-
43
-
44
-
45
-
46
-
47
-
48
-
49
-
50
-
51
-
52
-
53
-
54
-
55
-
56
-
57
-
58
-
59
-
60
-
61
-
62
-
63
-
64
-
65
-
66
-
67
-
68
-
69
-
70
-
71
-
72
-
73
-
74
-
75
-
76
-
77
-
78
-
79
-
80
-
81
-
82
-
83
-
84
-
85
-
86
-
87
-
88
-
89
-
90
-
 91
91 -
 92
92 -
 93
93 -
 94
94 -
 95
95 -
 96
96 -
 97
97 -
 98
98 -
 99
99 -
 100
100 -
 101
101 -
102
-
103
-
104
-
105
-
106
-
107
-
108
-
109
-
110
-
111
-
112
-
113
-
114
-
115
-
116
-
117
-
118
-
119
-
120
-
121
-
122
-
123
-
124
-
125
-
126
-
127
-
128
-
129
-
130
-
131
-
132
-
133
-
134
-
135
-
136
-
137
-
138
-
139
-
140
-
141
-
142
-
143
-
144
-
145
-
146
-
147
-
148
-
149
-
150
-
151
-
152
-
153
-
154
-
155
-
156
-
157
-
158
-
159
-
160
-
161
-
162
-
163
-
164
-
165
-
166
-
167
-
168
-
169
-
170
-
171
-
172
-
173
-
174
-
175
-
176
-
177
-
178
-
179
-
180
-
181
-
182
-
183
-
184
-
185
-
186
-
187
-
188
-
189
-
190
-
191
-
192
-
193
-
194
-
195
-
196
-
197
-
198
-
199
-
200
-
201
-
202
-
203
-
204
-
205
-
206
-
207
-
208
-
209
-
210
-
211
-
212
-
213
-
214
-
215
-
216
-
217
-
218
-
219
-
220
-
221
-
222
-
223
-
224
-
225
-
226
-
227
-
228
-
229
-
230
-
231
-
232
-
233
-
234
-
235
-
236
-
237
-
238
-
239
-
240
-
241
-
242
-
243
-
244
-
245
-
246
-
247
-
248
-
249
-
250
-
251
-
252
-
253
-
254
-
255
-
256
-
257
-
258
-
259
-
260
-
261
-
262
-
263
-
264
-
265
-
266
-
267
-
268
 |
 |