ViewSonic VSD220 VSD220 User Guide (English) - Page 25
Using Your VSD220 Smart Display
 |
View all ViewSonic VSD220 manuals
Add to My Manuals
Save this manual to your list of manuals |
Page 25 highlights
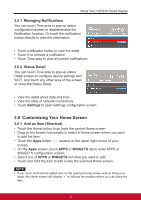
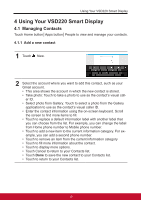
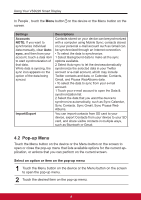
Using Your VSD220 Smart Display 4 Using Your VSD220 Smart Display 4.1 Managing Contacts Touch Home button│Apps button│People to view and manage your contacts. 4.1.1 Add a new contact 1 Touch New. 2 Select the account where you want to add this contact, such as your Gmail account. • This area shows the account in which the new contact is stored. • Take photo: Touch to take a photo to use as the contact's visual caller ID. • Select photo from Gallery: Touch to select a photo from the Gallery application to use as the contact's visual caller ID. • Enter the contact information using the on-screen keyboard. Scroll the screen to find more items to fill. • Touch to replace a default information label with another label that you can choose from the list. For example, you can change the label from Home phone number to Mobile phone number. • Touch to add a new item to the current information category. For example, you can add a second phone number. • Touch to remove an item from the current information category • Touch to fill more information about the contact. • Touch to display more options. • Touch Cancel to return to your Contacts list. • Touch Done to save the new contact to your Contacts list. • Touch to return to your Contacts list. 15
-
 1
1 -
2
-
3
-
4
-
5
-
6
-
7
-
8
-
9
-
10
-
11
-
12
-
13
-
14
-
15
-
16
-
17
-
18
-
19
-
 20
20 -
 21
21 -
 22
22 -
 23
23 -
 24
24 -
 25
25 -
 26
26 -
 27
27 -
 28
28 -
 29
29 -
 30
30 -
31
-
32
-
33
-
34
-
35
-
36
-
37
-
38
-
39
-
40
-
41
-
42
-
43
-
44
-
45
-
46
-
47
-
48
-
49
-
50
-
51
-
52
-
53
-
54
-
55
-
56
-
57
 |
 |