Xerox 6505/N User Guide - Page 87
Printing Custom Sizes, Defining Custom Paper Sizes
 |
View all Xerox 6505/N manuals
Add to My Manuals
Save this manual to your list of manuals |
Page 87 highlights
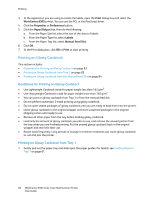
Printing Printing Custom Sizes This section includes: • Defining Custom Paper Sizes on page 87 • Printing on Custom Size Paper on page 89 Note: Custom size paper can be loaded into all trays. Defining Custom Paper Sizes This section includes: • Defining the Custom Paper Size in the Windows PostScript Driver on page 87 • Creating a Custom Paper Size Through the Windows Print Server Properties on page 88 • Creating a Custom Paper Size for the Windows PCL Driver on page 88 • Creating a Custom Paper Size for Macintosh on page 88 Notes: • • • The custom size defined must be within the maximum and minimum size range for the printer paper tray you are using. For details, see the custom size paper ranges given for each tray in Supported Paper on page 58. You can create custom paper sizes for use with both the PostScript and PCL print drivers, but the method for each is different. For optimum results, follow the instructions carefully. If you get an error message when creating a custom size, you might not have permission to save custom paper sizes on your computer. See your system administrator for help. Defining the Custom Paper Size in the Windows PostScript Driver Note: You can save only one custom paper size at a time as you print. Once saved, the dimensions are retained until you change them. To create a custom paper size for the PostScript driver and save it under a unique name for repeat use, see Creating a Custom Paper Size Through the Windows Print Server Properties on page 88. To define a custom paper size using the PostScript print driver: 1. Navigate to your printer directory or list, then right-click the WorkCentre 6505 PS driver and select Properties. 2. In the Properties dialog box, click the Printing Preferences button. 3. On the Paper/Output tab, from the Paper Size list, select Custom Page Size. 4. In the PostScript Custom Size Settings dialog box, select the units of measurement to use. 5. In the Custom Size Settings section, specify the size for the short edge (width) and the long edge (length) of the paper, then click OK. 6. In the Printing Preferences dialog box, click OK. Note: To change the custom size, in the Paper/Output tab, click the Edit button below the Paper Size field. Make the desired changes, and save your changes in all applicable dialog boxes. WorkCentre 6505 Color Laser Multifunction Printer 87 User Guide
-
 1
1 -
2
-
3
-
4
-
5
-
6
-
7
-
8
-
9
-
10
-
11
-
12
-
13
-
14
-
15
-
16
-
17
-
18
-
19
-
20
-
21
-
22
-
23
-
24
-
25
-
26
-
27
-
28
-
29
-
30
-
31
-
32
-
33
-
34
-
35
-
36
-
37
-
38
-
39
-
40
-
41
-
42
-
43
-
44
-
45
-
46
-
47
-
48
-
49
-
50
-
51
-
52
-
53
-
54
-
55
-
56
-
57
-
58
-
59
-
60
-
61
-
62
-
63
-
64
-
65
-
66
-
67
-
68
-
69
-
70
-
71
-
72
-
73
-
74
-
75
-
76
-
77
-
78
-
79
-
80
-
81
-
 82
82 -
 83
83 -
 84
84 -
 85
85 -
 86
86 -
 87
87 -
 88
88 -
 89
89 -
 90
90 -
 91
91 -
 92
92 -
93
-
94
-
95
-
96
-
97
-
98
-
99
-
100
-
101
-
102
-
103
-
104
-
105
-
106
-
107
-
108
-
109
-
110
-
111
-
112
-
113
-
114
-
115
-
116
-
117
-
118
-
119
-
120
-
121
-
122
-
123
-
124
-
125
-
126
-
127
-
128
-
129
-
130
-
131
-
132
-
133
-
134
-
135
-
136
-
137
-
138
-
139
-
140
-
141
-
142
-
143
-
144
-
145
-
146
-
147
-
148
-
149
-
150
-
151
-
152
-
153
-
154
-
155
-
156
-
157
-
158
-
159
-
160
-
161
-
162
-
163
-
164
-
165
-
166
-
167
-
168
-
169
-
170
-
171
-
172
-
173
-
174
-
175
-
176
-
177
-
178
-
179
-
180
-
181
-
182
-
183
-
184
-
185
-
186
-
187
-
188
-
189
-
190
-
191
-
192
-
193
-
194
-
195
-
196
-
197
-
198
-
199
-
200
-
201
-
202
-
203
-
204
-
205
-
206
-
207
-
208
-
209
-
210
-
211
-
212
-
213
-
214
-
215
-
216
-
217
-
218
-
219
-
220
-
221
-
222
-
223
-
224
-
225
-
226
-
227
-
228
-
229
-
230
-
231
-
232
 |
 |
