Xerox 8200B Network Users Guide - Page 22
Other methods of installation, Quick install steps (Microsoft TCP/IP protocol)
 |
UPC - 095205082128
View all Xerox 8200B manuals
Add to My Manuals
Save this manual to your list of manuals |
Page 22 highlights
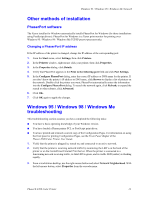
Windows NT 4.x Network Other methods of installation Your printer can also be installed on a Windows NT network using one of these methods: I Microsoft TCP/IP protocol I AppleTalk protocol I The CentreWare IS program on your Advanced Network Management Tools CD-ROM can also be used to monitor and configure the printer. If your printer is connected to a Windows NT network with the TCP/IP protocol enabled, you can use a web browser to monitor and configure your printer through CentreWare IS. I For installing or managing multiple printers on a Windows NT network with the TCP/IP protocol enabled, you can use the Xerox CentreWare MC snap-in to Microsoft Management Console. Refer to the Xerox CentreWare MC User Guide on the Advanced Network Management Tools CD-ROM. Quick install steps (Microsoft TCP/IP protocol) 1. At the Desktop, right-mouse-click the Network Neighborhood icon and select Properties. 2. Click on the Protocols tab and verify that the TCP/IP protocol has been loaded. 3. Select the Services tab and verify that Microsoft TCP/IP Printing is loaded. 4. If this software is not present, install it using the documentation provided by Microsoft, and then return to this document. 5. Open the Control Panel and double-click the Printers icon. 6. Double-click Add Printer; the Add Printer Wizard starts. 7. Verify that My Computer is selected and click Next>. 8. Click Add Port. 9. From the list that appears, select LPR Port. 10. Click New Port. This opens up the Add LPR compatible printer window. 11. Type the IP address of your printer and a printer name of up to 31 characters (no spaces). 12. Select OK. The Wizard returns you to the previous dialog. Verify that the new IP address you entered is in the list and is correct. The check box to the left of the address must be checked; if it is not, check it, and then select Next>. 13. Insert your printer's Software and Documentation CD-ROM into your computer's CD-ROM drive and click Have Disk. 14. Click the Browse button and select the directory containing the Windows NT drivers. 15. Select the *.INF file. 16. Click Open. The Wizard returns you to the previous dialog. Verify that the path and filename are correct and click OK. 17. At the next dialog, enter a name for the printer and select whether you want that printer to be the default. Click Next>. 18. If the printer is not shared, click Next>. To share the printer, enter a Share Name, check the share checkbox, and then click Next>. 19. At the next dialog, it is recommended that you print a test print. Click Finish. Phaser® 8200 Color Printer 17
-
 1
1 -
2
-
3
-
4
-
5
-
6
-
7
-
8
-
9
-
10
-
11
-
12
-
13
-
14
-
15
-
16
-
 17
17 -
 18
18 -
 19
19 -
 20
20 -
 21
21 -
 22
22 -
 23
23 -
 24
24 -
 25
25 -
 26
26 -
 27
27 -
28
-
29
-
30
-
31
-
32
-
33
-
34
-
35
-
36
-
37
-
38
-
39
-
40
-
41
-
42
-
43
-
44
-
45
-
46
-
47
 |
 |
