Xerox 8200B Network Users Guide - Page 24
Windows NT 4.x troubleshooting (TCP/IP), Software and Documentation CD-ROM, Troubleshooting
 |
UPC - 095205082128
View all Xerox 8200B manuals
Add to My Manuals
Save this manual to your list of manuals |
Page 24 highlights
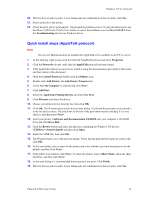
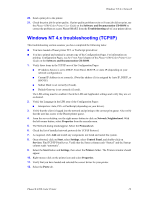
Windows NT 4.x Network 20. Send a print job to the printer. 21. Check the print job for print-quality. If print-quality problems exist or if your job did not print, see the Phaser 8200 Color Printer User Guide on the Software and Documentation CD-ROM to correct the problem or access PhaserSMART from the Troubleshooting tab of your printer driver. Windows NT 4.x troubleshooting (TCP/IP) This troubleshooting section assumes you have completed the following tasks: I You have loaded a Phaser printer PCL or PostScript print driver. I You have printed and retained a current copy of the Configuration Pages. For information on printing Configuration Pages, see the Front Panel chapter of the Phaser 8200 Color Printer User Guide on the Software and Documentation CD-ROM. 1. Verify these items in the TCP/IP area of the Configuration Pages: I IP Address Source is set to DHCP, Front Panel, BOOTP, or Auto IP (depending on your network configuration). I Current IP Address is set correctly. (Note this address if it is assigned by Auto IP, DHCP, or BOOTP.) I Subnet Mask is set correctly (if used). I Default Gateway is set correctly (if used). The LPR setting must be enabled. Check the LPR and AppSocket settings and verify they are set as desired. 2. Verify the Language in the LPR area of the Configuration Pages: I Interpreters: Auto, PCL or PostScript (depending on your driver). 3. Verify that the client is logged into the network and printing to the correct print queue. Also verify that the user has access to the Phaser printer queue. 4. From the server desktop, use the right-mouse button to click on Network Neighborhood. With the left-mouse button, select Properties from the cascade menu. 5. The Network dialog should appear. Select the Protocols tab. 6. Check the list of installed network protocols for TCP/IP Protocol. 7. As required, click Add and install any components not listed and restart the system. 8. Once rebooted, click on Start, select Settings, select Control Panel, and double-click on Services. Find TCP/IP PrintServer. Verify that the Status column reads "Started" and the Startup column reads "automatic". 9. Select the Start button and Settings, then select the Printers folder. The Printers window should appear. 10. Right-mouse-click on the printer icon and select Properties. 11. Verify that you have loaded and selected the correct driver for your printer. 12. Select the Ports tab. Phaser® 8200 Color Printer 19
-
 1
1 -
2
-
3
-
4
-
5
-
6
-
7
-
8
-
9
-
10
-
11
-
12
-
13
-
14
-
15
-
16
-
17
-
18
-
 19
19 -
 20
20 -
 21
21 -
 22
22 -
 23
23 -
 24
24 -
 25
25 -
 26
26 -
 27
27 -
 28
28 -
 29
29 -
30
-
31
-
32
-
33
-
34
-
35
-
36
-
37
-
38
-
39
-
40
-
41
-
42
-
43
-
44
-
45
-
46
-
47
 |
 |
