Xerox 8200B Network Users Guide - Page 25
Windows NT 4.x troubleshooting (AppleTalk
 |
UPC - 095205082128
View all Xerox 8200B manuals
Add to My Manuals
Save this manual to your list of manuals |
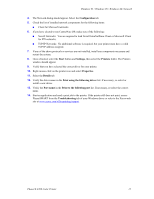
Page 25 highlights
Windows NT 4.x Network 13. Verify that the IP Address in the Print to the following port list is the same as the one from the Configuration Pages. If necessary, re-select the TCP/IP number used for your printer. 14. Click on the General tab, then click Print Test Page. If the printer still does not print, access PhaserSMART from the Troubleshooting tab of your printer driver or refer to the Xerox web site at: www.xerox.com/officeprinting/support. Windows NT 4.x troubleshooting (AppleTalk) This troubleshooting section assumes you have completed the following tasks: I You have loaded a Phaser printer PostScript print driver. I You have printed and retained a current copy of the Configuration Pages. For information on printing Configuration Pages, see Front Panel in the Phaser 8200 Color Printer User Guide on the Software and Documentation CD-ROM. 1. Verify these items in the EtherTalk areas of the Configuration Pages: I The EtherTalk Name is correct. I Enabled is set to Yes. I Zone contains the desired zone name or * (* = means default local zone). 2. Verify that the client is logged into the network and printing to the correct print queue. Also verify that the user has access to the Phaser printer queue. 3. From the server desktop, use the right-mouse button and select Network Neighborhood. With the left-mouse button, select Properties from the cascade menu. 4. The Network dialog should appear. Select the Configuration tab. 5. Check the list of installed network components for AppleTalk Protocol. 6. As required, install any components not listed and restart the system. 7. Once rebooted, select the Start button and Settings, then select the Printers folder. The Printers window should appear. 8. Right-mouse-click on the printer icon and select Properties. 9. Verify that you have selected the correct driver for your printer. 10. Select the Ports tab. 11. Verify the AppleTalk name in the Print to the following port list. If necessary, re-select the correct name or, if not listed, Add a new port, selecting the Zone, then the name, from Steps 1 and 2 above. 12. Click on the General tab, then click Print Test Page. If the printer still does not print, access PhaserSMART from the Troubleshooting tab of your printer driver or refer to the Xerox web site at: www.xerox.com/officeprinting/support. Phaser® 8200 Color Printer 20
-
 1
1 -
2
-
3
-
4
-
5
-
6
-
7
-
8
-
9
-
10
-
11
-
12
-
13
-
14
-
15
-
16
-
17
-
18
-
19
-
 20
20 -
 21
21 -
 22
22 -
 23
23 -
 24
24 -
 25
25 -
 26
26 -
 27
27 -
 28
28 -
 29
29 -
 30
30 -
31
-
32
-
33
-
34
-
35
-
36
-
37
-
38
-
39
-
40
-
41
-
42
-
43
-
44
-
45
-
46
-
47
 |
 |