Xerox 8200B Network Users Guide - Page 35
Quick install steps for MacOS X, version 10.1, Requirements
 |
UPC - 095205082128
View all Xerox 8200B manuals
Add to My Manuals
Save this manual to your list of manuals |
Page 35 highlights
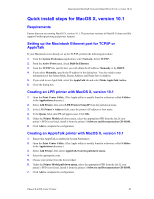
Macintosh EtherTalk Network (MacOS 8.x/9.x/X, version 10.1) Quick install steps for MacOS X, version 10.1 Requirements Ensure that you are running MacOS X, version 10.1. The previous versions of MacOS X does not fully support PostScript printing and printer features. Setting up the Macintosh Ethernet port for TCP/IP or AppleTalk If your Macintosh is not already set up for TCP/IP, perform the following procedure: 1. From the System Preferences application, select Network. Select TCP/IP. 2. From the Active Ports menu, check Built-In Ethernet. 3. From the TCP/IP tab, specify how you will obtain the IP address: Manually or by DHCP. 4. If you select Manually, specify the IP address in the dialog box. You also need to enter information for the Subnet Mask, Router Address, and Name Server Address. 5. If you wish to use AppleTalk, select the AppleTalk tab and select Make AppleTalk Active. 6. Close the dialog box. Creating an LPR printer with MacOS X, version 10.1 1. Open the Print Center Utility. (This Apple utility is usually found in a directory called Utilities in the Applications directory.) 2. Select Add Printer, then select LPR Printers Using IP from the pull-down menu. 3. In the LPR Printer's Address field, enter the printer's IP address or host name. 4. In the Queue field, enter PS (all upper-case). Click OK. 5. Under the Printer Model pull-down menu, select the appropriate PPD from the list. If your printer's PPD is not listed, install it from the printer's Software and Documentation CD-ROM. 6. Click Add to complete the configuration. Creating an AppleTalk printer with MacOS X, version 10.1 1. Ensure that AppleTalk is enabled in System Preferences. 2. Open the Print Center Utility. (This Apple utility is usually found in a directory called Utilities in the Applications directory.) 3. Select Add Printer, then select AppleTalk from the pull-down menu. 4. Select the appropriate zone. 5. Choose your printer from the list provided. 6. Under the Printer Model pull-down menu, select the appropriate PPD from the list. If your printer's PPD is not listed, install it from the printer's Software and Documentation CD-ROM. 7. Click Add to complete the configuration. Phaser® 8200 Color Printer 30
-
 1
1 -
2
-
3
-
4
-
5
-
6
-
7
-
8
-
9
-
10
-
11
-
12
-
13
-
14
-
15
-
16
-
17
-
18
-
19
-
20
-
21
-
22
-
23
-
24
-
25
-
26
-
27
-
28
-
29
-
 30
30 -
 31
31 -
 32
32 -
 33
33 -
 34
34 -
 35
35 -
 36
36 -
 37
37 -
 38
38 -
 39
39 -
 40
40 -
41
-
42
-
43
-
44
-
45
-
46
-
47
 |
 |
