Xerox M20I System Administration Guide - Page 133
Authentication, Configuring Authentication
 |
UPC - 095205244205
View all Xerox M20I manuals
Add to My Manuals
Save this manual to your list of manuals |
Page 133 highlights
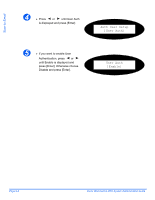
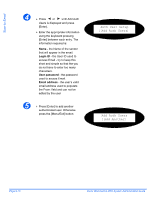
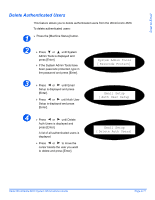
Scan to Email Authentication This feature allows you enable authentication. Configuring Authentication If a user has successfully logged into a device with Authentication enabled the WorkCentre M20i will match the user's login name to their Email address. The user's Email address will then be used to populate the "From" Email address field. This enables recipients of Email jobs to identify the originator of the Email job. NOTE: Users will not be able to change the user's "From" address if Network Authenticated Access is configured. This prevents untraceable Email jobs being sent from the WorkCentre M20i. NOTE: Xerox recommends enabling User Authentication for security reasons as well as for usability. Enabling Authentication To enable authentication: 1 ¾ Press the [Machine Status] button. 2 ¾ Press or until System Admin Tools is displayed and press [Enter]. ¾ If the System Admin Tools have been passcode protected, type in the password and press [Enter]. 3 ¾ Press or until Email Setup is displayed and press [Enter]. ¾ Press or until Auth User Setup is displayed and press [Enter]. System Admin Tools [Passcode Protect] Email Setup [Auth User Setup Xerox WorkCentre M20i System Administration Guide Page 9-7
-
 1
1 -
2
-
3
-
4
-
5
-
6
-
7
-
8
-
9
-
10
-
11
-
12
-
13
-
14
-
15
-
16
-
17
-
18
-
19
-
20
-
21
-
22
-
23
-
24
-
25
-
26
-
27
-
28
-
29
-
30
-
31
-
32
-
33
-
34
-
35
-
36
-
37
-
38
-
39
-
40
-
41
-
42
-
43
-
44
-
45
-
46
-
47
-
48
-
49
-
50
-
51
-
52
-
53
-
54
-
55
-
56
-
57
-
58
-
59
-
60
-
61
-
62
-
63
-
64
-
65
-
66
-
67
-
68
-
69
-
70
-
71
-
72
-
73
-
74
-
75
-
76
-
77
-
78
-
79
-
80
-
81
-
82
-
83
-
84
-
85
-
86
-
87
-
88
-
89
-
90
-
91
-
92
-
93
-
94
-
95
-
96
-
97
-
98
-
99
-
100
-
101
-
102
-
103
-
104
-
105
-
106
-
107
-
108
-
109
-
110
-
111
-
112
-
113
-
114
-
115
-
116
-
117
-
118
-
119
-
120
-
121
-
122
-
123
-
124
-
125
-
126
-
127
-
 128
128 -
 129
129 -
 130
130 -
 131
131 -
 132
132 -
 133
133 -
 134
134 -
 135
135 -
 136
136 -
 137
137 -
 138
138 -
139
-
140
-
141
-
142
-
143
-
144
-
145
-
146
-
147
-
148
-
149
-
150
-
151
-
152
-
153
-
154
-
155
-
156
-
157
-
158
-
159
-
160
-
161
-
162
-
163
-
164
-
165
-
166
-
167
-
168
-
169
-
170
-
171
-
172
-
173
-
174
-
175
-
176
-
177
-
178
-
179
-
180
-
181
-
182
-
183
-
184
-
185
-
186
-
187
-
188
-
189
-
190
-
191
-
192
-
193
-
194
-
195
-
196
-
197
-
198
-
199
-
200
-
201
-
202
-
203
-
204
-
205
-
206
-
207
-
208
-
209
-
210
-
211
-
212
-
213
-
214
-
215
-
216
-
217
-
218
 |
 |