Xerox X64005D-WU User Guide - Page 15
Turn on the power switch on the back of your scanner.
 |
UPC - 785414106493
View all Xerox X64005D-WU manuals
Add to My Manuals
Save this manual to your list of manuals |
Page 15 highlights
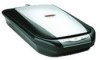
Installation 6. Plug the power adapter plug into the power jack on the back of the scanner and then plug the power supply into an AC (wall) outlet. The following diagram shows the scanner connected to a computer. 7. Turn on the power switch on the back of your scanner. The green status light on the front of the scanner is illuminated, indicating the scanner is receiving power. Green status light Your computer recognizes that a scanner has been plugged into the USB port and automatically loads the appropriate software from the CD to run the scanner. 10 Xerox 6400 Scanner User's Guide
-
 1
1 -
2
-
3
-
4
-
5
-
6
-
7
-
8
-
9
-
 10
10 -
 11
11 -
 12
12 -
 13
13 -
 14
14 -
 15
15 -
 16
16 -
 17
17 -
 18
18 -
 19
19 -
 20
20 -
21
-
22
-
23
-
24
-
25
-
26
-
27
-
28
-
29
-
30
-
31
-
32
-
33
-
34
-
35
-
36
-
37
-
38
-
39
-
40
-
41
-
42
-
43
-
44
-
45
-
46
-
47
-
48
-
49
-
50
-
51
-
52
-
53
-
54
-
55
-
56
-
57
-
58
-
59
-
60
-
61
-
62
-
63
-
64
-
65
-
66
-
67
-
68
-
69
-
70
-
71
-
72
-
73
-
74
-
75
-
76
-
77
-
78
-
79
-
80
-
81
-
82
-
83
-
84
-
85
-
86
-
87
-
88
-
89
-
90
-
91
-
92
-
93
-
94
-
95
-
96
-
97
-
98
-
99
-
100
-
101
-
102
-
103
 |
 |

Installation
10
Xerox 6400 Scanner User’s Guide
6.
Plug the power adapter plug into the power jack on the back of
the scanner and then plug the power supply into an AC (wall)
outlet.
The following diagram shows the scanner connected to a
computer.
7.
Turn on the power switch on the back of your scanner.
The green status light on the front of the scanner is illuminated,
indicating the scanner is receiving power.
Your computer recognizes that a scanner has been plugged
into the USB port and automatically loads the appropriate
software from the CD to run the scanner.
Green status light