Xerox XDM1525D-WU User Manual - Page 19
scan a bit slower than the 15 s per minute, and 30 images
 |
View all Xerox XDM1525D-WU manuals
Add to My Manuals
Save this manual to your list of manuals |
Page 19 highlights
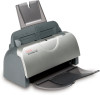
Installation 3. Turn on the power switch, located on the back of the scanner to the left of the power port. The status light comes on and flashes indicating that the scanner is receiving power. If you are using Windows XP Service Pack 2, and have plugged the USB cable into a USB 1.1 port, an information bubble may open explaining that "A HI-SPEED USB device is plugged into a non-HI-SPEED USB hub". Plug the USB cable into a USB 2.0 port (if available) or just disregard the message. If you leave it plugged into the USB 1.1 port, your scanner may scan a bit slower than the 15 pages per minute, and 30 images per minute available with a USB 2.0 port. 4. Your computer then recognizes that a scanner has been plugged into the USB port and automatically loads the appropriate software to run the scanner. Do not proceed until you receive a message that your computer has found the new hardware, or updated the driver database. If your computer is running Windows XP, you will see the following message. 14 DocuMate 152 Scanner User's Guide
-
 1
1 -
2
-
3
-
4
-
5
-
6
-
7
-
8
-
9
-
10
-
11
-
12
-
13
-
 14
14 -
 15
15 -
 16
16 -
 17
17 -
 18
18 -
 19
19 -
 20
20 -
 21
21 -
 22
22 -
 23
23 -
 24
24 -
25
-
26
-
27
-
28
-
29
-
30
-
31
-
32
-
33
-
34
-
35
-
36
-
37
-
38
-
39
-
40
-
41
-
42
-
43
-
44
-
45
-
46
-
47
-
48
-
49
-
50
-
51
-
52
-
53
-
54
-
55
-
56
-
57
-
58
-
59
-
60
-
61
-
62
-
63
-
64
-
65
-
66
-
67
-
68
-
69
-
70
-
71
-
72
-
73
-
74
-
75
-
76
-
77
-
78
-
79
-
80
-
81
-
82
-
83
-
84
-
85
-
86
-
87
-
88
-
89
-
90
-
91
-
92
-
93
-
94
-
95
-
96
-
97
-
98
-
99
-
100
-
101
-
102
-
103
-
104
-
105
-
106
-
107
-
108
-
109
-
110
-
111
-
112
-
113
-
114
-
115
-
116
-
117
-
118
-
119
-
120
-
121
-
122
-
123
-
124
-
125
-
126
-
127
-
128
 |
 |
