Xerox XK35C User Guide - Page 27
the Display. Press - review
 |
UPC - 095205000351
View all Xerox XK35C manuals
Add to My Manuals
Save this manual to your list of manuals |
Page 27 highlights
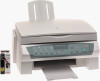
Installing & Aligning the Ink Cartridges (continued) 12 If you pressed Start to either of the two LED messages, the alignment procedure will start. An alignment test pattern sheet will print during which time the Display will show L-P . Review this sheet in response to the next series of six LED messages. See an illustration of the alignment sheet in Section 5 Maintenance/Cartridge Alignment. 13 For the first alignment message, the Display will show "A" plus a number, as, A15 . Look this number up on the alignment sheet. If the printed lines associated with this number are aligned better than any of the other printed lines in group "A", press Start. If there is another set of printed lines that are aligned better, press the appropriate Copy Size/Scroll button until the number associated with the best-aligned set appears in the Display. Press Start. NOTE: The machine will time out after one minute if Start is not pressed, and will return to Standby Mode. The Display will then show 001 . Press Menu repeatedly until you see the code U02 displayed, then press Start to repeat the cartridge alignment process. 14 The Display will show the next alignment message in the series. Repeat step 13 for these remaining five steps, from "B" through "F". 15 The Ink Cartridge alignment is completed. Proceed to the next section Using the Automatic Paper Feeder. Getting Started 13
-
 1
1 -
2
-
3
-
4
-
5
-
6
-
7
-
8
-
9
-
10
-
11
-
12
-
13
-
14
-
15
-
16
-
17
-
18
-
19
-
20
-
21
-
 22
22 -
 23
23 -
 24
24 -
 25
25 -
 26
26 -
 27
27 -
 28
28 -
 29
29 -
 30
30 -
 31
31 -
 32
32 -
33
-
34
-
35
-
36
-
37
-
38
-
39
-
40
-
41
-
42
-
43
-
44
-
45
-
46
-
47
-
48
-
49
-
50
-
51
-
52
-
53
-
54
-
55
-
56
-
57
-
58
-
59
-
60
-
61
-
62
-
63
-
64
-
65
-
66
-
67
-
68
-
69
-
70
-
71
-
72
-
73
-
74
-
75
-
76
-
77
-
78
-
79
-
80
-
81
-
82
-
83
-
84
-
85
-
86
-
87
-
88
-
89
-
90
-
91
-
92
-
93
-
94
-
95
-
96
-
97
-
98
-
99
-
100
 |
 |
