Yamaha POCKETRAK 2G Reference Manual - Page 26
Setting the recording timer - digital recorder
 |
UPC - 086792884912
View all Yamaha POCKETRAK 2G manuals
Add to My Manuals
Save this manual to your list of manuals |
Page 26 highlights
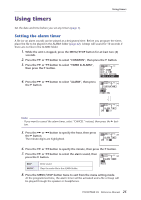
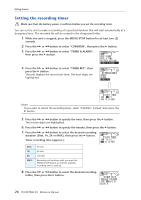
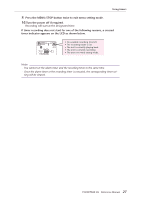
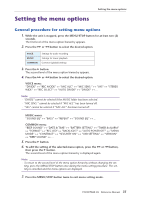
Using timers Setting the recording timer Make sure that the battery power is sufficient before you set the recording timer. You can set the unit to make a recording of a specified duration that will start automatically at a designated time. The recorded file will be created in the designated folder. 1. While the unit is stopped, press the MENU/STOP button for at least two (2) seconds. 2. Press the Y or T button to select "COMMON", then press the W button. 3. Press the Y or T button to select "TIMER & ALARM", then press the W button. 4. Press the Y or T button to select "TIMER REC", then press the W button. The unit displays the record start time. The hour digits are highlighted. Note: · If you want to cancel the recording timer, select "CANCEL" instead, then press the W button. 5. Press the Y or T button to specify the hour, then press the W button. The minute digits are highlighted. 6. Press the Y or T button to specify the minute, then press the W button. 7. Press the Y or T button to select the desired recording duration (30m, 1h, 2h or MAX), then press the W button. Timer recording time (approx.): 30m: 1h: 2h: MAX: 30 min 60 min. 120 min. Recording will continue until you press the MENU/STOP button or until the available recording time is used up. 8. Press the Y or T button to select the desired recording folder, then press the W button. 26 POCKETRAK 2G Reference Manual
-
 1
1 -
2
-
3
-
4
-
5
-
6
-
7
-
8
-
9
-
10
-
11
-
12
-
13
-
14
-
15
-
16
-
17
-
18
-
19
-
20
-
 21
21 -
 22
22 -
 23
23 -
 24
24 -
 25
25 -
 26
26 -
 27
27 -
 28
28 -
 29
29 -
 30
30 -
 31
31 -
32
-
33
-
34
-
35
-
36
-
37
-
38
-
39
-
40
-
41
-
42
-
43
-
44
-
45
-
46
-
47
-
48
-
49
-
50
-
51
-
52
-
53
-
54
 |
 |