Yamaha PSR-A5000 PSR-A5000 Reference Manual_EN - Page 26
Assembly-Assigning a Source Pattern to Each Channel, Channel Edit
 |
View all Yamaha PSR-A5000 manuals
Add to My Manuals
Save this manual to your list of manuals |
Page 26 highlights
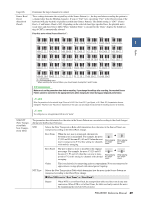
Assembly-Assigning a Source Pattern to Each Channel The explanations here apply to step 4 of the Basic Procedure on page 21. The "Assembly" display shows each channel data of the current Section, and where it has been copied from (Style, Section, and channel). For each channel, touch the Style name, Section name, or Channel name as necessary to select the desired item. Channels with data are displayed as "On" (in green). By turning on/off here, you can select whether each channel is played or not during audition playback. NOTE • An Audio part cannot be copied from another Style. If you want to use a specific Audio part, make sure to select the corresponding Audio Style before calling up the Style Creator display. • If you select an Audio Style as starting data, the Audio part cannot be replaced with different data. NOTICE The edited Style will be lost if you change to another Style or turn off the power to the instrument without carrying out the Save operation (step 7 on page 21). Channel Edit The explanations here apply to step 5 of the Basic Procedure on page 21. The "Channel Edit" display lets you edit already recorded channel data. Select the Target channel and then edit the desired parameters. After editing the desired parameter, touch [Execute] to actually enter the edits for each setup window. When execution is completed, this button changes to [Undo], letting you restore the original data if you are not satisfied with the results. The Undo function only has one level; only the immediately previous operation can be undone. NOTE If you select an Audio Style as starting data, the Audio part will be used as is. The Audio part cannot be deleted, edited or created from scratch. 26 PSR-A5000 Reference Manual
-
 1
1 -
2
-
3
-
4
-
5
-
6
-
7
-
8
-
9
-
10
-
11
-
12
-
13
-
14
-
15
-
16
-
17
-
18
-
19
-
20
-
 21
21 -
 22
22 -
 23
23 -
 24
24 -
 25
25 -
 26
26 -
 27
27 -
 28
28 -
 29
29 -
 30
30 -
 31
31 -
32
-
33
-
34
-
35
-
36
-
37
-
38
-
39
-
40
-
41
-
42
-
43
-
44
-
45
-
46
-
47
-
48
-
49
-
50
-
51
-
52
-
53
-
54
-
55
-
56
-
57
-
58
-
59
-
60
-
61
-
62
-
63
-
64
-
65
-
66
-
67
-
68
-
69
-
70
-
71
-
72
-
73
-
74
-
75
-
76
-
77
-
78
-
79
-
80
-
81
-
82
-
83
-
84
-
85
-
86
-
87
-
88
-
89
-
90
-
91
-
92
-
93
-
94
-
95
-
96
-
97
-
98
-
99
-
100
-
101
-
102
-
103
-
104
-
105
-
106
-
107
-
108
-
109
-
110
-
111
-
112
-
113
-
114
-
115
-
116
-
117
-
118
-
119
-
120
-
121
-
122
-
123
-
124
-
125
-
126
-
127
-
128
-
129
-
130
-
131
-
132
-
133
 |
 |
