Yamaha PSR-E473 PSR-E473/PSR-EW425 Owners Manual - Page 47
Track Structure of a Song, Recording a User Song to a Specified Track, User 1
 |
View all Yamaha PSR-E473 manuals
Add to My Manuals
Save this manual to your list of manuals |
Page 47 highlights
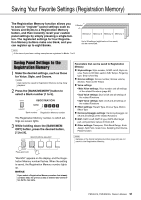
Recording Your Performance NOTICE Never attempt to turn the power off when "Writing!" is shown in the display. Doing so can result in data loss. NOTE If you are using a Style or the Groove Creator for a performance, you can also automatically end recording in the following ways. • Style: Press the [INTRO/ENDING/rit.] button, and wait for playback of the Style to end. • Groove Creator: Press the [MUSICAL CLIMAX] but- ton, and wait for playback of the Groove to end. 6 To play back the recorded Song, press the [ ] (Start/Stop) button. NOTE When recording Groove playback with the Retrigger function, note that the beat indicator in the display and the metronome and Arpeggio playback are not synchronized with playback of the recorded Song. Limitations when recording a Song • The on/off status of ACMP cannot be changed. • Playback cannot be changed between Style and Groove. • The Groove number can be changed, but the Style number cannot. • When you use Style/Groove, the following parameters cannot be changed: Reverb Type, Chorus Type, Time Signature, and Style/Groove Creator Volume. • Performances with Quick Sampling pads [A] to [D] cannot be recorded. • The audio input from an external device (playback sound on the connected computer or audio device) cannot be recorded. Track Structure of a Song A Song contains six tracks. Melody Tracks [1/RIGHT] to [5] For recording melody performances. Accompaniment Track [A] For recording a chord progression (for the Style) or key changes (for the Groove). Melody Tracks Accompaniment- Track If you make a recording without specifying a track, the melody is recorded to Track [1/RIGHT] and the accompaniment (Style chords/Groove keys) is recorded to Track [A]. At this time, if an existing User Song was selected beforehand, the data on Track [1/ RIGHT] and Track [A] for that Song will be overwritten. You can also record each track one by one (e.g., only the right-hand part or the left-hand part) to create a complete piece that may be difficult to play all at once. Recording a User Song to a Specified Track This section explains how to record a User Song to a specified track. This is useful when you want to record additional performances to an already recorded User Song, or re-record only one track of an already recorded User Song. 1 Press the [SONG/AUDIO] button. The SONG icon appears. If the AUDIO icon appears, press the [SONG/ AUDIO] button again. If "No USB" is displayed instead of the SONG icon, wait a few seconds for the SONG icon to appear. 031User 1 2 Rotate the dial to select the desired User Song from 031 to 040 (User 1 to 10) as the recording target. PSR-E473, PSR-EW425 Owner's Manual 47
-
 1
1 -
2
-
3
-
4
-
5
-
6
-
7
-
8
-
9
-
10
-
11
-
12
-
13
-
14
-
15
-
16
-
17
-
18
-
19
-
20
-
21
-
22
-
23
-
24
-
25
-
26
-
27
-
28
-
29
-
30
-
31
-
32
-
33
-
34
-
35
-
36
-
37
-
38
-
39
-
40
-
41
-
 42
42 -
 43
43 -
 44
44 -
 45
45 -
 46
46 -
 47
47 -
 48
48 -
 49
49 -
 50
50 -
 51
51 -
 52
52 -
53
-
54
-
55
-
56
-
57
-
58
-
59
-
60
-
61
-
62
-
63
-
64
-
65
-
66
-
67
-
68
-
69
-
70
-
71
-
72
-
73
-
74
-
75
-
76
 |
 |
