ZyXEL G-270S User Guide - Page 73
Wireless Network Connection Status, Properties, Preferred networks, Move up, Move down, Remove
 |
View all ZyXEL G-270S manuals
Add to My Manuals
Save this manual to your list of manuals |
Page 73 highlights
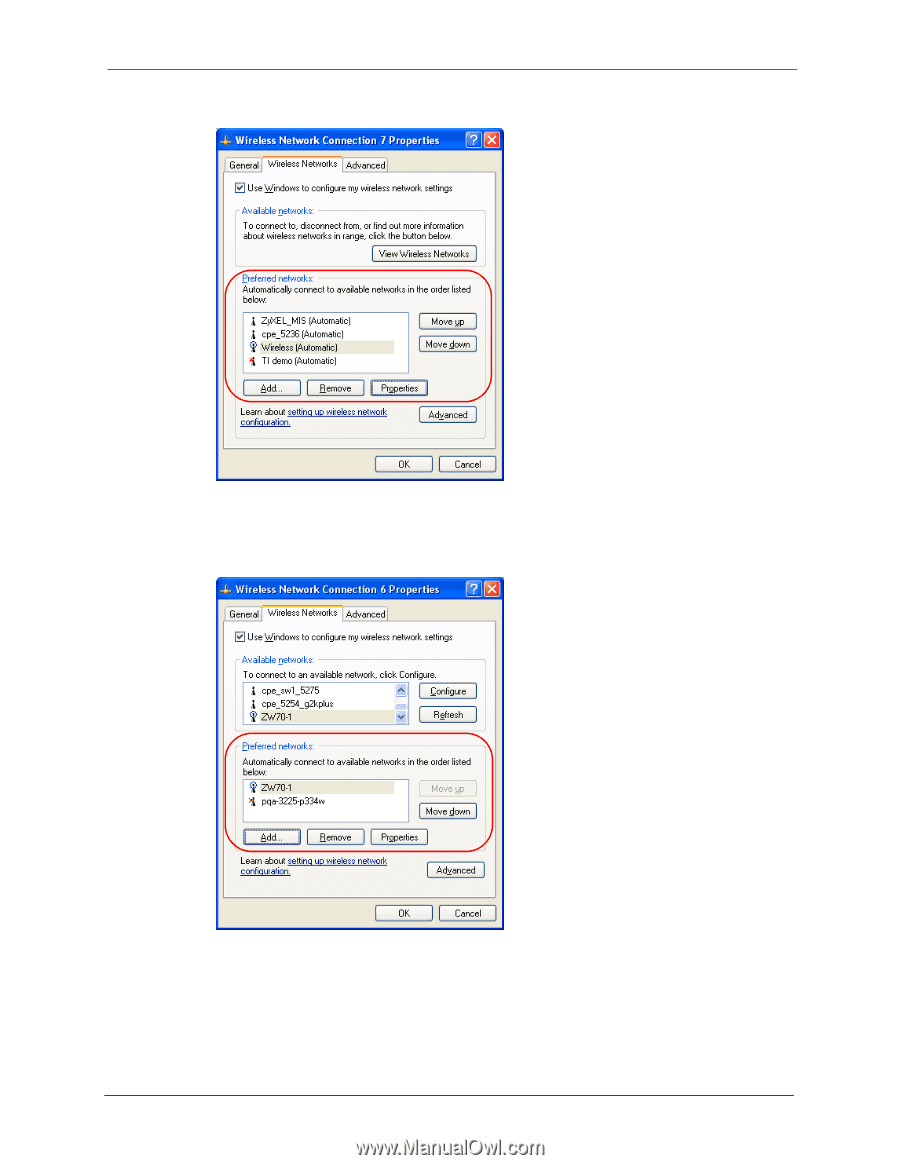
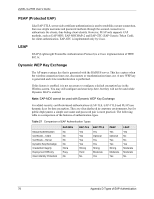
ZyXEL G-270S User's Guide Figure 49 Windows XP SP2: Wireless Networks: Preferred Networks Windows XP SP1: In the Wireless Network Connection Status screen, click Properties and the Wireless Networks tab to open the screen as shown. Figure 50 Windows XP SP1: Wireless Networks: Preferred Networks 2 Whenever the ZyXEL wireless LAN adapter tries to connect to a new network, the new network is added in the Preferred networks table automatically. Select a network and click Move up or Move down to change it's order, click Remove to delete it or click Properties to view the security, authentication or connection information of the selected network. Click Add to add a preferred network into the list manually. Appendix C Management with Wireless Zero Configuration 73
-
 1
1 -
2
-
3
-
4
-
5
-
6
-
7
-
8
-
9
-
10
-
11
-
12
-
13
-
14
-
15
-
16
-
17
-
18
-
19
-
20
-
21
-
22
-
23
-
24
-
25
-
26
-
27
-
28
-
29
-
30
-
31
-
32
-
33
-
34
-
35
-
36
-
37
-
38
-
39
-
40
-
41
-
42
-
43
-
44
-
45
-
46
-
47
-
48
-
49
-
50
-
51
-
52
-
53
-
54
-
55
-
56
-
57
-
58
-
59
-
60
-
61
-
62
-
63
-
64
-
65
-
66
-
67
-
 68
68 -
 69
69 -
 70
70 -
 71
71 -
 72
72 -
 73
73 -
 74
74 -
 75
75 -
 76
76 -
 77
77 -
 78
78 -
79
-
80
-
81
 |
 |