2009 Lexus IS 350 Navigation Manual - Page 104
2009 Lexus IS 350 Manual

Page 104 highlights
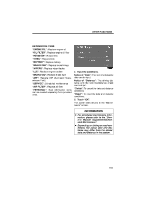
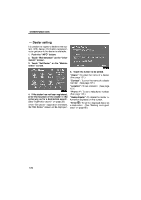
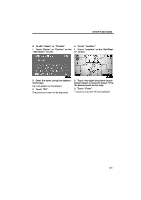
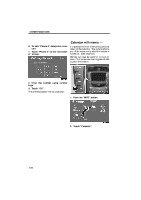
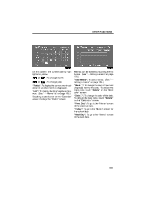
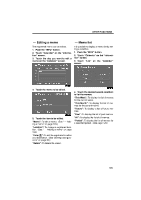
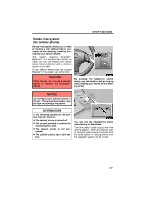
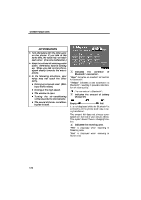
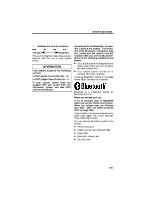
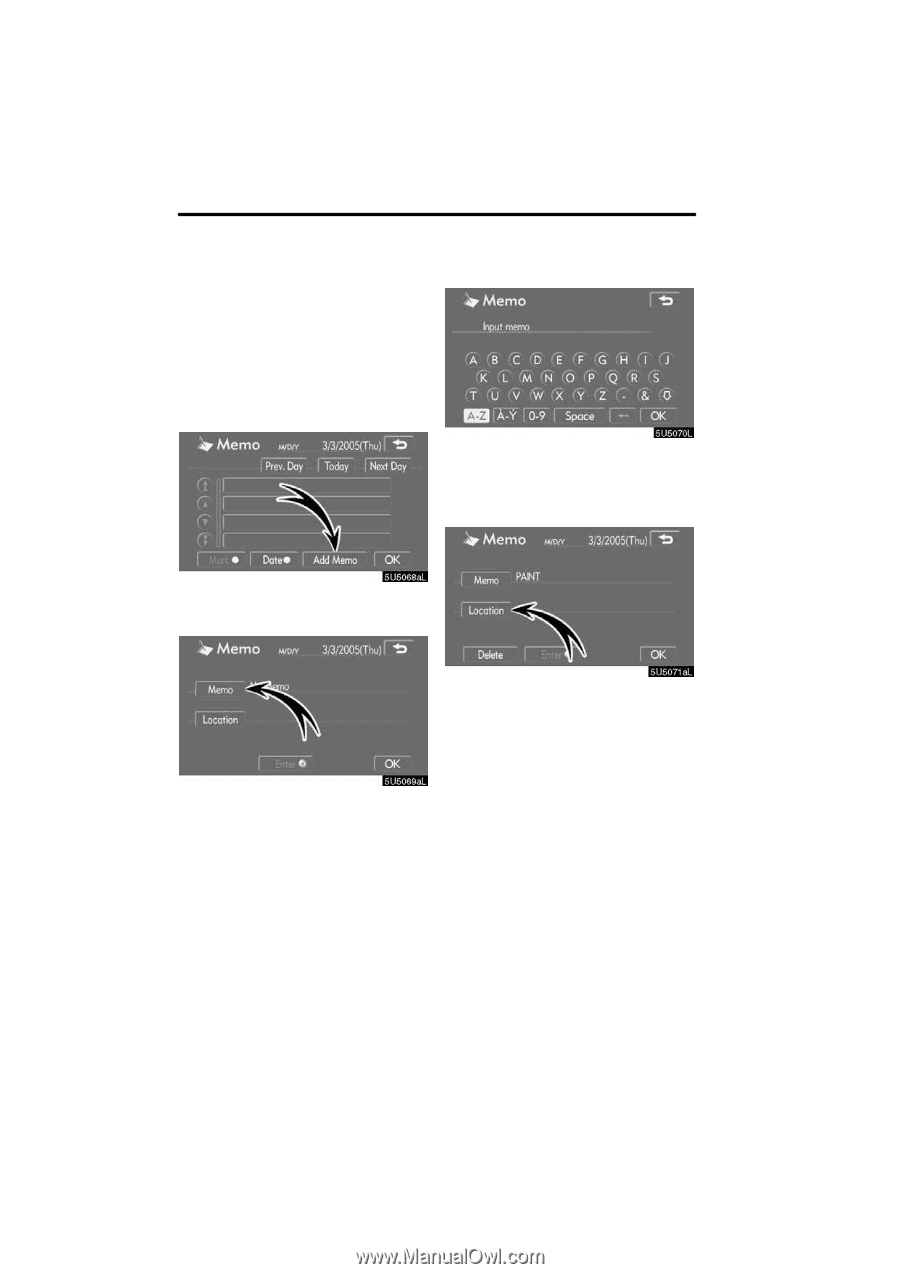
OTHER FUNCTIONS - Adding a memo If a memo is added, the system informs of the memo entry when the system is started on the memo date. (See page 23.) 1. Push the "INFO" button. 2. Touch "Calendar" on the "Information" screen. 3. Touch the date you want to add a memo on the "Calendar" screen. 6. Enter text using the keys. Up to 24 letters can be entered. After entering the text, touch "OK" at the bottom right of the screen. 4. Touch "Add Memo". Up to 100 memos can be added. 7. When registering information on the memo, touch "Location". A screen similar to the destination search screen appears. Search the same way as searching a destination. (See "Destination search" on page 39.) 5. Touch "Memo". 124
-
 1
1 -
2
-
3
-
4
-
5
-
6
-
7
-
8
-
9
-
10
-
11
-
12
-
13
-
14
-
15
-
16
-
17
-
18
-
19
-
20
-
21
-
22
-
23
-
24
-
25
-
26
-
27
-
28
-
29
-
30
-
31
-
32
-
33
-
34
-
35
-
36
-
37
-
38
-
39
-
40
-
41
-
42
-
43
-
44
-
45
-
46
-
47
-
48
-
49
-
50
-
51
-
52
-
53
-
54
-
55
-
56
-
57
-
58
-
59
-
60
-
61
-
62
-
63
-
64
-
65
-
66
-
67
-
68
-
69
-
70
-
71
-
72
-
73
-
74
-
75
-
76
-
77
-
78
-
79
-
80
-
81
-
82
-
83
-
84
-
85
-
86
-
87
-
88
-
89
-
90
-
91
-
92
-
93
-
94
-
95
-
96
-
97
-
98
-
 99
99 -
 100
100 -
 101
101 -
 102
102 -
 103
103 -
 104
104 -
 105
105 -
 106
106 -
 107
107 -
 108
108 -
 109
109 -
110
-
111
-
112
-
113
-
114
-
115
-
116
-
117
-
118
-
119
-
120
-
121
-
122
-
123
-
124
-
125
-
126
-
127
-
128
-
129
-
130
-
131
-
132
-
133
-
134
-
135
-
136
-
137
-
138
-
139
-
140
-
141
-
142
-
143
-
144
-
145
-
146
-
147
-
148
-
149
-
150
-
151
-
152
-
153
-
154
-
155
-
156
-
157
-
158
-
159
-
160
-
161
-
162
-
163
-
164
-
165
-
166
-
167
-
168
-
169
-
170
-
171
-
172
-
173
-
174
-
175
-
176
-
177
-
178
-
179
-
180
-
181
-
182
-
183
-
184
-
185
-
186
-
187
-
188
-
189
-
190
-
191
-
192
-
193
-
194
-
195
-
196
-
197
-
198
-
199
-
200
-
201
-
202
-
203
-
204
-
205
-
206
-
207
-
208
-
209
-
210
-
211
-
212
-
213
-
214
-
215
-
216
-
217
-
218
-
219
-
220
-
221
-
222
-
223
-
224
-
225
-
226
-
227
-
228
-
229
-
230
-
231
-
232
-
233
-
234
-
235
-
236
-
237
-
238
-
239
-
240
-
241
-
242
-
243
-
244
-
245
-
246
-
247
-
248
-
249
-
250
-
251
-
252
-
253
-
254
-
255
-
256
-
257
-
258
-
259
-
260
-
261
-
262
-
263
-
264
-
265
-
266
-
267
-
268
-
269
-
270
-
271
-
272
-
273
-
274
-
275
-
276
-
277
-
278
-
279
-
280
-
281
-
282
-
283
-
284
-
285
-
286
-
287
-
288
-
289
-
290
-
291
-
292
-
293
-
294
-
295
-
296
-
297
-
298
-
299
-
300
 |
 |
OTHER FUNCTIONS
124
If a memo is added, the system informs of
the memo entry when the system is started
on the memo date.
(See page 23.)
1.
Push the °INFO± button.
2.
Touch °Calendar± on the °Informa-
tion± screen.
3.
Touch the date you want to add a
memo on the °Calendar± screen.
4.
Touch °Add Memo±.
Up to 100 memos can be added.
5.
Touch °Memo±.
6.
Enter text using the keys.
Up to 24 letters can be entered.
After entering the text, touch
°OK±
at the
bottom right of the screen.
7.
When registering information on the
memo, touch °Location±.
A screen similar to the destination search
screen appears. Search the same way as
searching a destination. (See °Destination
search± on page 39.)
² Adding a memo