2009 Lexus IS 350 Navigation Manual - Page 34
2009 Lexus IS 350 Manual
Page 34 highlights
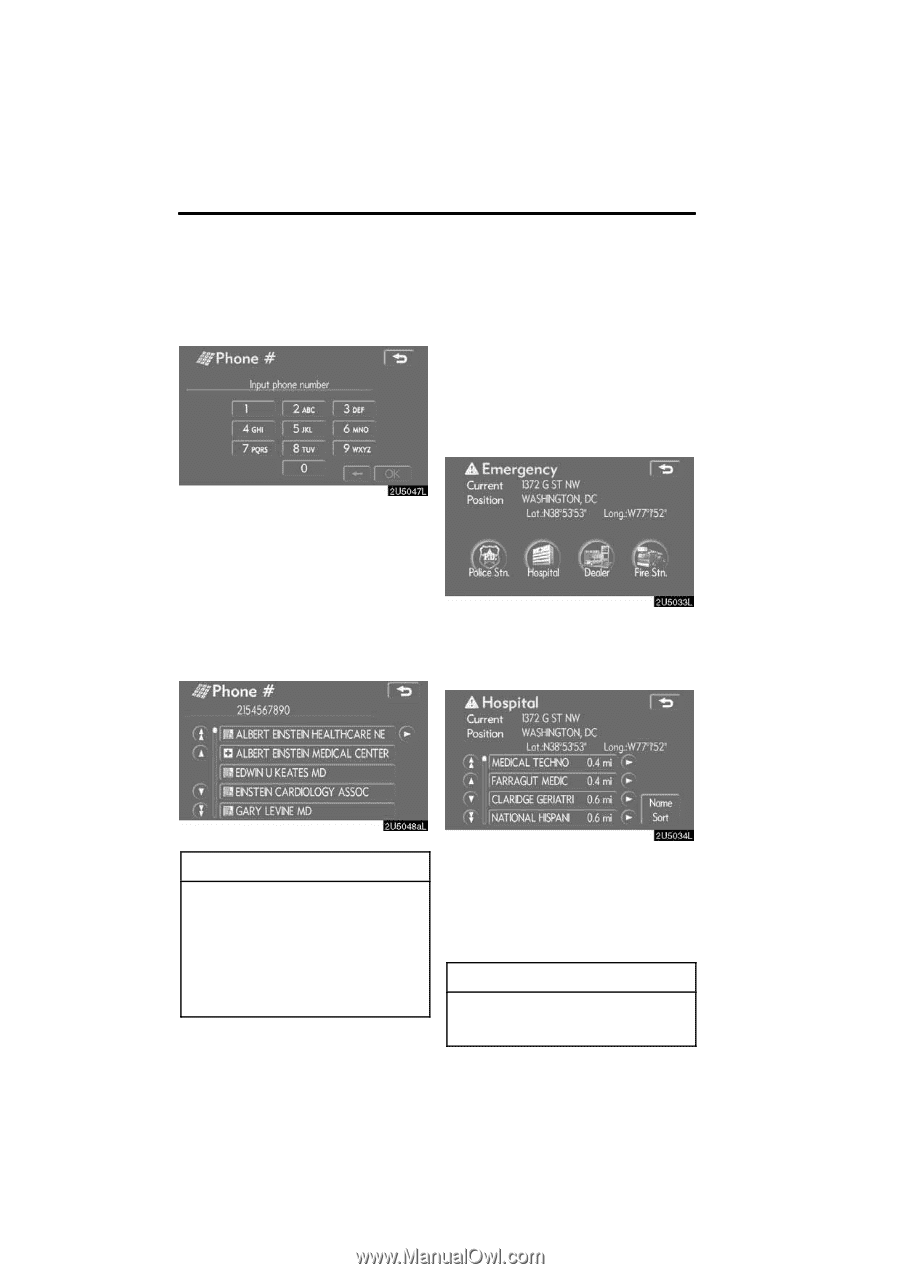
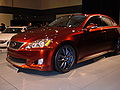
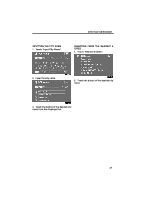
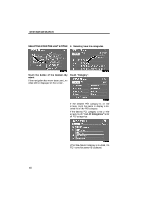
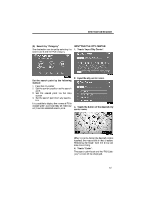
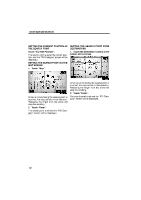
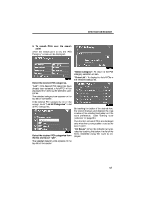
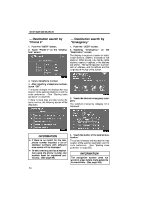
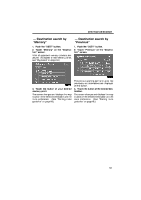
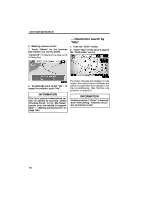
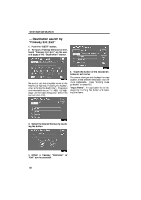
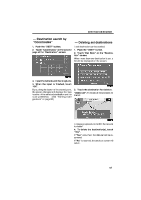
DESTINATION SEARCH - Destination search by "Phone #" 1. Push the "DEST" button. 2. Touch "Phone #" on the "Destination" screen. - Destination search by "Emergency" 1. Push the "DEST" button. 2. Touching "Emergency" on the "Destination" screen. The display changes to a screen to select police stations, dealers, hospitals or fire stations. While driving, only nearby police stations, dealers, hospitals, or fire stations are shown. The current position is shown with an address, and the latitude and the longitude at the top of the screen. 3. Input a telephone number. 4. After inputting a telephone number, touch "OK". The screen changes and displays the map location of the selected destination and the route preference. (See "Starting route guidance" on page 60.) If there is more than one site having the same number, the following screen will be displayed. 3. Touch the desired emergency category. The selected emergency category list is displayed. INFORMATION D If there is no match for the telephone number inputted, a list of identical numbers with different area codes will be displayed. D To set a memory point as a destination using the phone number, the number must be registered previously. (See page 99.) 4. Touch the button of the desired destination. The screen changes and displays the map location of the selected destination and the route preference. (See "Starting route guidance" on page 60.) INFORMATION The navigation system does not guide in areas where route guidance is unavailable. (See page 295.) 54
-
 1
1 -
2
-
3
-
4
-
5
-
6
-
7
-
8
-
9
-
10
-
11
-
12
-
13
-
14
-
15
-
16
-
17
-
18
-
19
-
20
-
21
-
22
-
23
-
24
-
25
-
26
-
27
-
28
-
 29
29 -
 30
30 -
 31
31 -
 32
32 -
 33
33 -
 34
34 -
 35
35 -
 36
36 -
 37
37 -
 38
38 -
 39
39 -
40
-
41
-
42
-
43
-
44
-
45
-
46
-
47
-
48
-
49
-
50
-
51
-
52
-
53
-
54
-
55
-
56
-
57
-
58
-
59
-
60
-
61
-
62
-
63
-
64
-
65
-
66
-
67
-
68
-
69
-
70
-
71
-
72
-
73
-
74
-
75
-
76
-
77
-
78
-
79
-
80
-
81
-
82
-
83
-
84
-
85
-
86
-
87
-
88
-
89
-
90
-
91
-
92
-
93
-
94
-
95
-
96
-
97
-
98
-
99
-
100
-
101
-
102
-
103
-
104
-
105
-
106
-
107
-
108
-
109
-
110
-
111
-
112
-
113
-
114
-
115
-
116
-
117
-
118
-
119
-
120
-
121
-
122
-
123
-
124
-
125
-
126
-
127
-
128
-
129
-
130
-
131
-
132
-
133
-
134
-
135
-
136
-
137
-
138
-
139
-
140
-
141
-
142
-
143
-
144
-
145
-
146
-
147
-
148
-
149
-
150
-
151
-
152
-
153
-
154
-
155
-
156
-
157
-
158
-
159
-
160
-
161
-
162
-
163
-
164
-
165
-
166
-
167
-
168
-
169
-
170
-
171
-
172
-
173
-
174
-
175
-
176
-
177
-
178
-
179
-
180
-
181
-
182
-
183
-
184
-
185
-
186
-
187
-
188
-
189
-
190
-
191
-
192
-
193
-
194
-
195
-
196
-
197
-
198
-
199
-
200
-
201
-
202
-
203
-
204
-
205
-
206
-
207
-
208
-
209
-
210
-
211
-
212
-
213
-
214
-
215
-
216
-
217
-
218
-
219
-
220
-
221
-
222
-
223
-
224
-
225
-
226
-
227
-
228
-
229
-
230
-
231
-
232
-
233
-
234
-
235
-
236
-
237
-
238
-
239
-
240
-
241
-
242
-
243
-
244
-
245
-
246
-
247
-
248
-
249
-
250
-
251
-
252
-
253
-
254
-
255
-
256
-
257
-
258
-
259
-
260
-
261
-
262
-
263
-
264
-
265
-
266
-
267
-
268
-
269
-
270
-
271
-
272
-
273
-
274
-
275
-
276
-
277
-
278
-
279
-
280
-
281
-
282
-
283
-
284
-
285
-
286
-
287
-
288
-
289
-
290
-
291
-
292
-
293
-
294
-
295
-
296
-
297
-
298
-
299
-
300
 |
 |