2011 Mercedes CLS-Class Owner's Manual - Page 92
2011 Mercedes CLS-Class Manual

Page 92 highlights
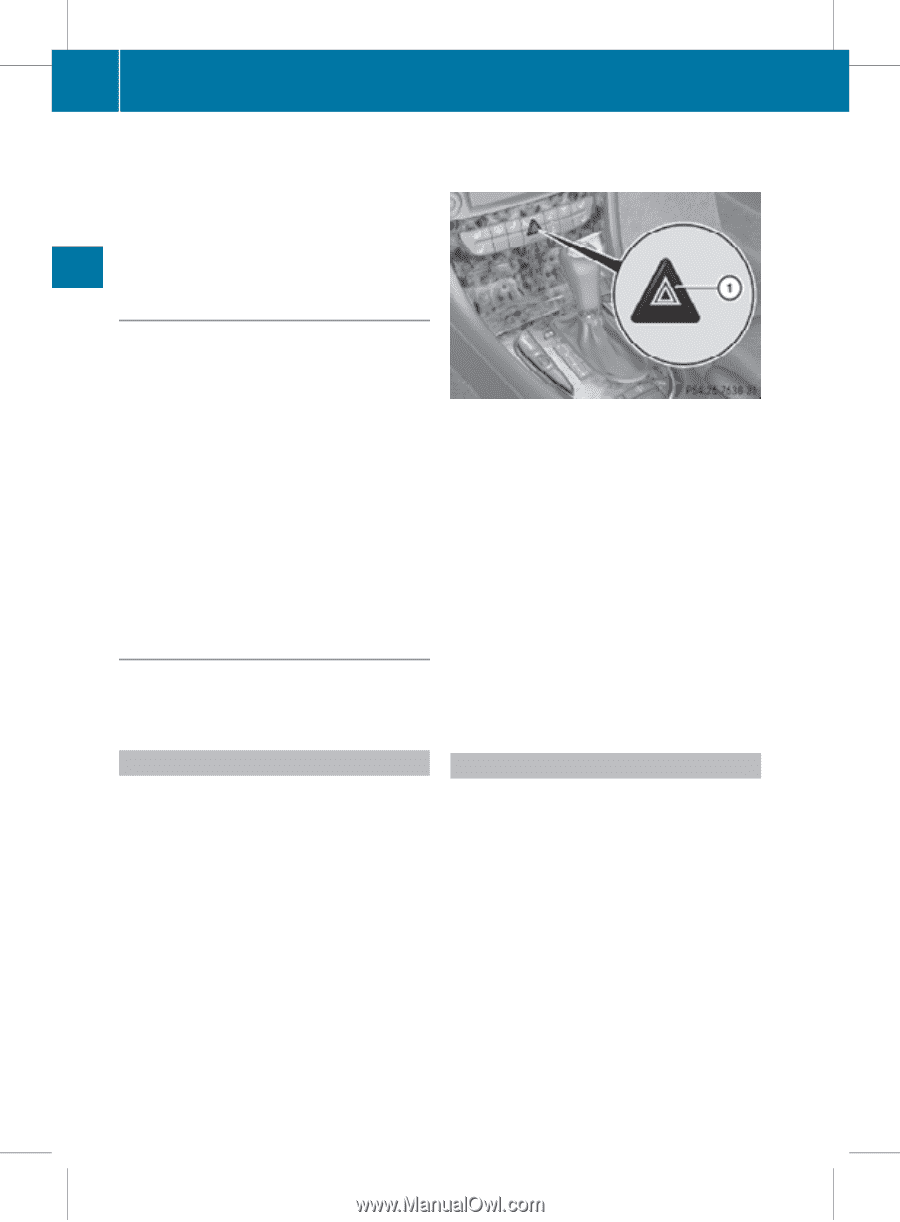
219_AKB; 4; 54, en-US d2ureepe, 2009-05-11T16:21:02+02:00 - Seite 90 Version: 2.11.8.1 90 Lighting To signal minor directional changes: X Press the combination switch only to the point of resistance in direction of arrow ; or ? and release. The corresponding turn signal lamps will flash three times. The hazard warning flasher switch is located on the center console. Controls in detail High beam X Turn the exterior lamp switch to position L (Y page 87). X Switching on: Push the combination switch in direction of arrow :. The high-beam headlamp indicator lamp K in the instrument cluster comes on. X Switching off: Pull the combination switch in direction of arrow = to its original position. X Switching on: Press hazard warning flasher switch :. All turn signal lamps are flashing. i Also note the information on high-beam headlamps with activated automatic headlamp mode (Y page 87) or the daytime running lamp mode (Y page 88). High-beam flasher X i With the hazard warning flasher activated and the combination switch set for either left or right turn, only the respective left or right turn signals will operate when the ignition is switched on. X Switching off: Press hazard warning flasher switch : again. i If the hazard warning flasher has been activated automatically, press hazard warning flasher switch : to switch it off. Headlamp cleaning system The headlamps will be cleaned with a highpressure water jet automatically when the engine is running and you have Rswitched Switching on: Pull the combination switch briefly in direction of arrow =. Hazard warning flasher The hazard warning flasher can be switched on at all times, even with the SmartKey removed from the starter switch. The hazard warning flasher comes on automatically when an air bag deploys. on the headlamps and Rthe windshield wipers have wiped the windshield with washer fluid five times The counter resets when you switch off the ignition. For information on filling up the washer reservoir, see "Washer system and headlamp cleaning system" (Y page 181).
-
 1
1 -
2
-
3
-
4
-
5
-
6
-
7
-
8
-
9
-
10
-
11
-
12
-
13
-
14
-
15
-
16
-
17
-
18
-
19
-
20
-
21
-
22
-
23
-
24
-
25
-
26
-
27
-
28
-
29
-
30
-
31
-
32
-
33
-
34
-
35
-
36
-
37
-
38
-
39
-
40
-
41
-
42
-
43
-
44
-
45
-
46
-
47
-
48
-
49
-
50
-
51
-
52
-
53
-
54
-
55
-
56
-
57
-
58
-
59
-
60
-
61
-
62
-
63
-
64
-
65
-
66
-
67
-
68
-
69
-
70
-
71
-
72
-
73
-
74
-
75
-
76
-
77
-
78
-
79
-
80
-
81
-
82
-
83
-
84
-
85
-
86
-
 87
87 -
 88
88 -
 89
89 -
 90
90 -
 91
91 -
 92
92 -
 93
93 -
 94
94 -
 95
95 -
 96
96 -
 97
97 -
98
-
99
-
100
-
101
-
102
-
103
-
104
-
105
-
106
-
107
-
108
-
109
-
110
-
111
-
112
-
113
-
114
-
115
-
116
-
117
-
118
-
119
-
120
-
121
-
122
-
123
-
124
-
125
-
126
-
127
-
128
-
129
-
130
-
131
-
132
-
133
-
134
-
135
-
136
-
137
-
138
-
139
-
140
-
141
-
142
-
143
-
144
-
145
-
146
-
147
-
148
-
149
-
150
-
151
-
152
-
153
-
154
-
155
-
156
-
157
-
158
-
159
-
160
-
161
-
162
-
163
-
164
-
165
-
166
-
167
-
168
-
169
-
170
-
171
-
172
-
173
-
174
-
175
-
176
-
177
-
178
-
179
-
180
-
181
-
182
-
183
-
184
-
185
-
186
-
187
-
188
-
189
-
190
-
191
-
192
-
193
-
194
-
195
-
196
-
197
-
198
-
199
-
200
-
201
-
202
-
203
-
204
-
205
-
206
-
207
-
208
-
209
-
210
-
211
-
212
-
213
-
214
-
215
-
216
-
217
-
218
-
219
-
220
-
221
-
222
-
223
-
224
-
225
-
226
-
227
-
228
-
229
-
230
-
231
-
232
-
233
-
234
-
235
-
236
-
237
-
238
-
239
-
240
-
241
-
242
-
243
-
244
-
245
-
246
-
247
-
248
-
249
-
250
-
251
-
252
-
253
-
254
-
255
-
256
-
257
-
258
-
259
-
260
-
261
-
262
-
263
-
264
-
265
-
266
-
267
-
268
-
269
-
270
-
271
-
272
-
273
-
274
-
275
-
276
-
277
-
278
-
279
-
280
-
281
-
282
-
283
-
284
-
285
-
286
-
287
-
288
-
289
-
290
-
291
-
292
-
293
-
294
-
295
-
296
-
297
-
298
-
299
-
300
-
301
-
302
-
303
-
304
-
305
-
306
-
307
-
308
 |
 |