1994 Pontiac Bonneville Owner's Manual - Page 222
1994 Pontiac Bonneville Manual
Page 222 highlights
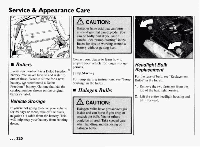
3. Twist the bulb assembly 1/6 turn and pull out the bulb assembly. 4. Unclip the bulb assembly from the wiring harness and replace the bulb assembly. Reverse steps 1-3 to replace the bulb assembly and headlight housing. Make sure the tab ("A") is locked into the slot ("B") in the radiator support before tightening the screws. Taillight Bulb Replacement For the type of bulb, see "Replacement Bulbs" in the Index. 1. In the trunk, remove the two plastic nuts holding the carpeting in pjace. 2. Pull the carpet away from the rear corner of the trunk. 221 0 . .
-
 1
1 -
2
-
3
-
4
-
5
-
6
-
7
-
8
-
9
-
10
-
11
-
12
-
13
-
14
-
15
-
16
-
17
-
18
-
19
-
20
-
21
-
22
-
23
-
24
-
25
-
26
-
27
-
28
-
29
-
30
-
31
-
32
-
33
-
34
-
35
-
36
-
37
-
38
-
39
-
40
-
41
-
42
-
43
-
44
-
45
-
46
-
47
-
48
-
49
-
50
-
51
-
52
-
53
-
54
-
55
-
56
-
57
-
58
-
59
-
60
-
61
-
62
-
63
-
64
-
65
-
66
-
67
-
68
-
69
-
70
-
71
-
72
-
73
-
74
-
75
-
76
-
77
-
78
-
79
-
80
-
81
-
82
-
83
-
84
-
85
-
86
-
87
-
88
-
89
-
90
-
91
-
92
-
93
-
94
-
95
-
96
-
97
-
98
-
99
-
100
-
101
-
102
-
103
-
104
-
105
-
106
-
107
-
108
-
109
-
110
-
111
-
112
-
113
-
114
-
115
-
116
-
117
-
118
-
119
-
120
-
121
-
122
-
123
-
124
-
125
-
126
-
127
-
128
-
129
-
130
-
131
-
132
-
133
-
134
-
135
-
136
-
137
-
138
-
139
-
140
-
141
-
142
-
143
-
144
-
145
-
146
-
147
-
148
-
149
-
150
-
151
-
152
-
153
-
154
-
155
-
156
-
157
-
158
-
159
-
160
-
161
-
162
-
163
-
164
-
165
-
166
-
167
-
168
-
169
-
170
-
171
-
172
-
173
-
174
-
175
-
176
-
177
-
178
-
179
-
180
-
181
-
182
-
183
-
184
-
185
-
186
-
187
-
188
-
189
-
190
-
191
-
192
-
193
-
194
-
195
-
196
-
197
-
198
-
199
-
200
-
201
-
202
-
203
-
204
-
205
-
206
-
207
-
208
-
209
-
210
-
211
-
212
-
213
-
214
-
215
-
216
-
 217
217 -
 218
218 -
 219
219 -
 220
220 -
 221
221 -
 222
222 -
 223
223 -
 224
224 -
 225
225 -
 226
226 -
 227
227 -
228
-
229
-
230
-
231
-
232
-
233
-
234
-
235
-
236
-
237
-
238
-
239
-
240
-
241
-
242
-
243
-
244
-
245
-
246
-
247
-
248
-
249
-
250
-
251
-
252
-
253
-
254
-
255
-
256
-
257
-
258
-
259
-
260
-
261
-
262
-
263
-
264
-
265
-
266
-
267
-
268
-
269
-
270
-
271
-
272
-
273
-
274
-
275
-
276
-
277
-
278
-
279
-
280
-
281
-
282
-
283
-
284
-
285
-
286
-
287
-
288
-
289
-
290
 |
 |

3.
Twist
the
bulb
assembly
1/6
turn
and
pull
out
the
bulb
assembly.
4.
Unclip
the
bulb
assembly
from
the
wiring
harness
and
replace
the
bulb
assembly.
Reverse steps
1-3
to replace the
bulb
assembly and headlight housing.
Make sure the tab
(“A”)
is locked into
the slot
(“B”)
in the radiator support
before tightening the screws.
Taillight
Bulb
Replacement
For the type of bulb, see “Replacement
Bulbs”
in
the
Index.
1.
2.
In the trunk, remove the two plastic
nuts
holding
the carpeting
in
pjace.
Pull the carpet away from the rear
corner of the trunk.
221
0 . .