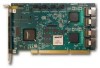
3Ware 9550SXU16MLB10 User Guide - Page 97
Ordering Units in 3BM, Partitioning and Formatting Units, Up, Down, Administrative, Tools
 |
UPC - 693494971613
View all 3Ware 9550SXU16MLB10 manuals
Add to My Manuals
Save this manual to your list of manuals |
Page 97 highlights
Creating a New Unit Ordering Units in 3BM If you configure multiple units in 3BM and you want to install the OS on one of them so that you can boot from that unit, that unit must be the first unit. You can change the order of the units in 3BM. To change the order of units in 3BM 1 At the main 3BM screen, in the list of exportable units, highlight the unit you want to move. 2 Press the Page Up key to move the unit up the list; press the Page Down key to move the unit down the list. Position the unit you want to be bootable at the top of the list of exportable units. 3 When you are finished working in 3BM, press F8 to save your changes and exit. Partitioning and Formatting Units After you create a unit, whether through 3BM or 3DM, it needs to be formatted, partitioned, and mounted before it can be used. To partition and format under Windows 1 Boot the system and log in as a system administrator. 2 Partition and format the new arrays or disks using the Administrative Tools from the Start menu: a Choose Computer Management from the Administrative Tools menu. b Select Storage. c Select Disk Management. 4 Follow the steps that appear on-screen to write a signature to the drive. 5 Right-click on the drive and select Create Volume. 6 Follow the steps that appear on-screen to create a volume and to assign a drive letter. To partition and format under Linux 1 Boot the system and log in as root. 2 Open a terminal window. www.3ware.com 91
-
 1
1 -
2
-
3
-
4
-
5
-
6
-
7
-
8
-
9
-
10
-
11
-
12
-
13
-
14
-
15
-
16
-
17
-
18
-
19
-
20
-
21
-
22
-
23
-
24
-
25
-
26
-
27
-
28
-
29
-
30
-
31
-
32
-
33
-
34
-
35
-
36
-
37
-
38
-
39
-
40
-
41
-
42
-
43
-
44
-
45
-
46
-
47
-
48
-
49
-
50
-
51
-
52
-
53
-
54
-
55
-
56
-
57
-
58
-
59
-
60
-
61
-
62
-
63
-
64
-
65
-
66
-
67
-
68
-
69
-
70
-
71
-
72
-
73
-
74
-
75
-
76
-
77
-
78
-
79
-
80
-
81
-
82
-
83
-
84
-
85
-
86
-
87
-
88
-
89
-
90
-
91
-
 92
92 -
 93
93 -
 94
94 -
 95
95 -
 96
96 -
 97
97 -
 98
98 -
 99
99 -
 100
100 -
 101
101 -
 102
102 -
103
-
104
-
105
-
106
-
107
-
108
-
109
-
110
-
111
-
112
-
113
-
114
-
115
-
116
-
117
-
118
-
119
-
120
-
121
-
122
-
123
-
124
-
125
-
126
-
127
-
128
-
129
-
130
-
131
-
132
-
133
-
134
-
135
-
136
-
137
-
138
-
139
-
140
-
141
-
142
-
143
-
144
-
145
-
146
-
147
-
148
-
149
-
150
-
151
-
152
-
153
-
154
-
155
-
156
-
157
-
158
-
159
-
160
-
161
-
162
-
163
-
164
-
165
-
166
-
167
-
168
-
169
-
170
-
171
-
172
-
173
-
174
-
175
-
176
-
177
-
178
-
179
-
180
-
181
-
182
-
183
-
184
-
185
-
186
-
187
-
188
-
189
-
190
-
191
-
192
-
193
-
194
-
195
-
196
-
197
-
198
-
199
-
200
-
201
-
202
 |
 |
