Brother International BAS-326G PS Instruction Manual - English - Page 69
Installing the feed plate, STANDARD ADJUSTMENTS, End feed plate installation mode
 |
View all Brother International BAS-326G PS manuals
Add to My Manuals
Save this manual to your list of manuals |
Page 69 highlights
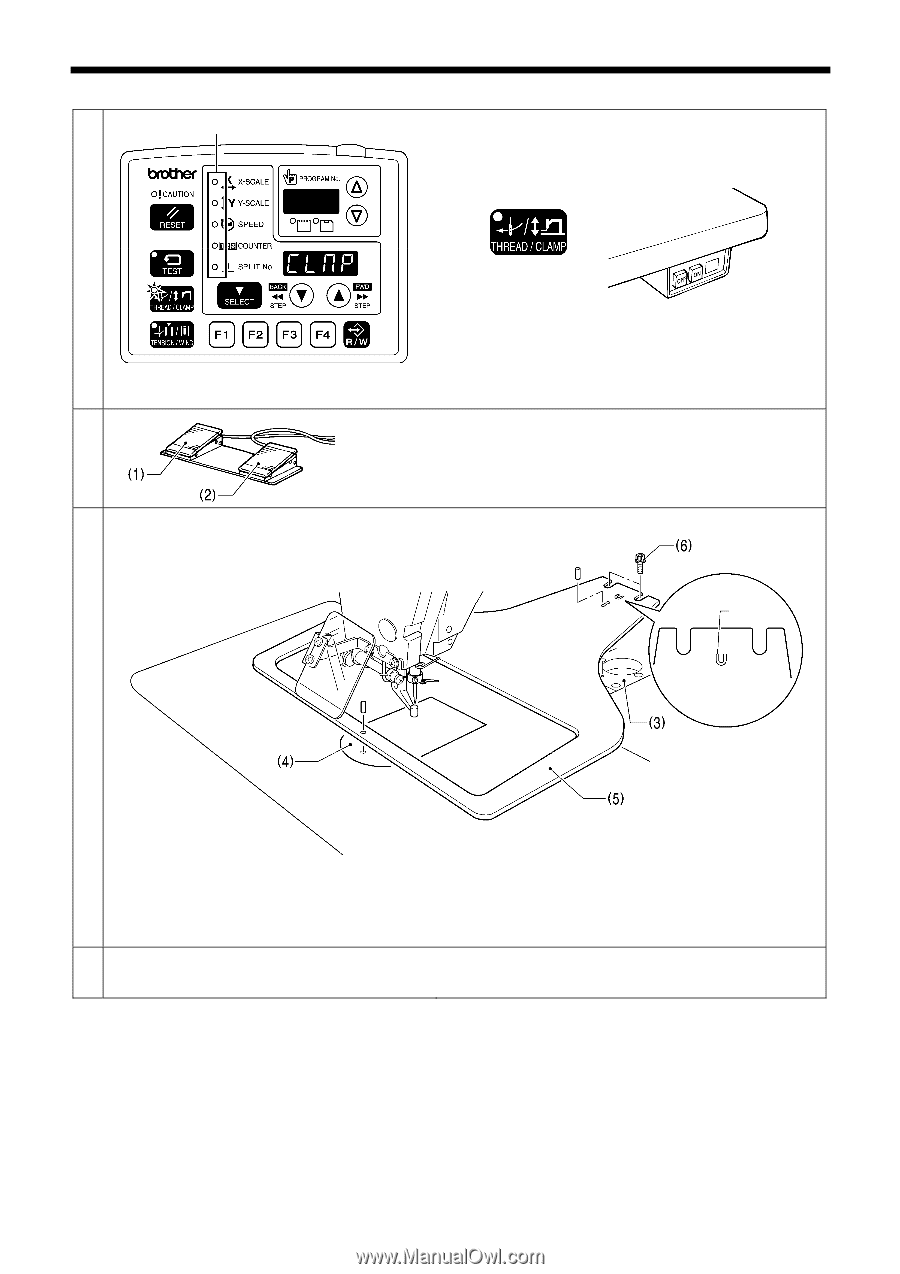
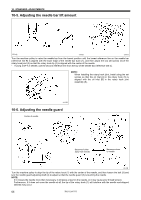
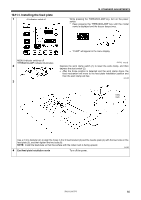
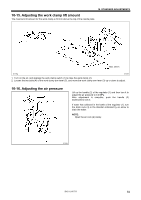
10-11-1. Installing the feed plate 1 All indicators switch off 10. STANDARD ADJUSTMENTS While pressing the THREAD/CLAMP key, turn on the power switch. * Keep pressing the THREAD/CLAMP key until the model name is displayed and the buzzer beeps once. • "CLMP" will appear in the menu display. MENU indicator switches off THREAD/CLAMP indicator illuminates 2 3 5005Q 4421Q Depress the work clamp switch (1) to lower the work clamp, and then depress the start switch (2). • After the home position is detected and the work clamp drops, the feed mechanism will move to the feed plate installation position and then the work clamp will rise. 4014M Index mark Use a 2 mm diameter pin to align the holes in the X feed bracket (3) and the needle plate (4) with the two holes in the feed plate (5), and then tighten the two bolts (6). NOTE: Install the feed plate so that the surface with the index mark is facing upward. 2164B 4 End feed plate installation mode Turn off the power. BAS-326G PS 60
-
 1
1 -
2
-
3
-
4
-
5
-
6
-
7
-
8
-
9
-
10
-
11
-
12
-
13
-
14
-
15
-
16
-
17
-
18
-
19
-
20
-
21
-
22
-
23
-
24
-
25
-
26
-
27
-
28
-
29
-
30
-
31
-
32
-
33
-
34
-
35
-
36
-
37
-
38
-
39
-
40
-
41
-
42
-
43
-
44
-
45
-
46
-
47
-
48
-
49
-
50
-
51
-
52
-
53
-
54
-
55
-
56
-
57
-
58
-
59
-
60
-
61
-
62
-
63
-
 64
64 -
 65
65 -
 66
66 -
 67
67 -
 68
68 -
 69
69 -
 70
70 -
 71
71 -
 72
72 -
 73
73 -
 74
74 -
75
-
76
-
77
-
78
-
79
-
80
-
81
-
82
-
83
-
84
 |
 |