Brother International BE-1204B Stand Alone Type Instruction Manual - English - Page 136
Manual operation of the mending, Case of Mending usage, The between the brought
 |
View all Brother International BE-1204B manuals
Add to My Manuals
Save this manual to your list of manuals |
Page 136 highlights
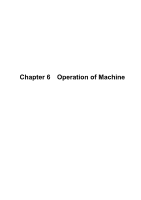
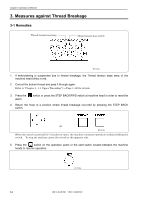
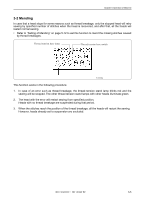
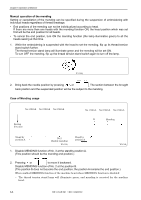
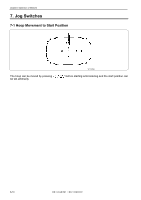
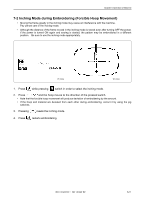
Chapter 6 Operation of Machine Manual operation of the mending Setting or cancellation of the mending can be specified during the suspension of embroidering with individual heads regardless of thread breakage. • End positions of the mending can not be individualized according to head. If there are more than one heads with the mending function ON, the head position which was set first will be the end position for all heads. • To cancel the end position, turn ON the mending function (the lamp illuminates green) to all the heads sewing at that time. 1. While the embroidering is suspended with the head to set the mending, flip up its thread tension stand switch further. The thread tension stand lamp will illuminate green and the mending will be set ON. To turn OFF the mending, flip up the thread tension stand switch again to turn off the lamp. W1259Q 2. Bring back the needle position by pressing or . The section between the brought back position and the suspended position will be the subject to the mending. Case of Mending usage No.1 Stitch No.2 Stitch No.3 Stitch Sewing direction No.1 Stitch No.2 Stitch No.3 Stitch B Mending Stand by position A No.3 Disable mending W1275Q Stand by position A 1. Disable MENDING function of No. 3 at the standby position A. (This position should be the mending end position.) W1276Q 2. Pressing or to move it backward. Disable MENDING function of No. 2 at the position B. (The position B does not become the end position; the position A remains the end position.) When enabled MENDING function of the machine head whose MENDING function is disabled: • The thread tension stand lamp will illuminate green, and mending is executed for the machine head. 6-6 BE-1204B-BC • BE-1206B-BC
-
 1
1 -
2
-
3
-
4
-
5
-
6
-
7
-
8
-
9
-
10
-
11
-
12
-
13
-
14
-
15
-
16
-
17
-
18
-
19
-
20
-
21
-
22
-
23
-
24
-
25
-
26
-
27
-
28
-
29
-
30
-
31
-
32
-
33
-
34
-
35
-
36
-
37
-
38
-
39
-
40
-
41
-
42
-
43
-
44
-
45
-
46
-
47
-
48
-
49
-
50
-
51
-
52
-
53
-
54
-
55
-
56
-
57
-
58
-
59
-
60
-
61
-
62
-
63
-
64
-
65
-
66
-
67
-
68
-
69
-
70
-
71
-
72
-
73
-
74
-
75
-
76
-
77
-
78
-
79
-
80
-
81
-
82
-
83
-
84
-
85
-
86
-
87
-
88
-
89
-
90
-
91
-
92
-
93
-
94
-
95
-
96
-
97
-
98
-
99
-
100
-
101
-
102
-
103
-
104
-
105
-
106
-
107
-
108
-
109
-
110
-
111
-
112
-
113
-
114
-
115
-
116
-
117
-
118
-
119
-
120
-
121
-
122
-
123
-
124
-
125
-
126
-
127
-
128
-
129
-
130
-
 131
131 -
 132
132 -
 133
133 -
 134
134 -
 135
135 -
 136
136 -
 137
137 -
 138
138 -
 139
139 -
 140
140 -
 141
141 -
142
-
143
-
144
-
145
-
146
-
147
-
148
-
149
-
150
-
151
-
152
-
153
-
154
-
155
-
156
-
157
-
158
-
159
-
160
-
161
-
162
-
163
-
164
-
165
-
166
-
167
-
168
-
169
-
170
-
171
-
172
-
173
-
174
-
175
-
176
-
177
-
178
-
179
-
180
-
181
-
182
-
183
-
184
-
185
-
186
 |
 |