Brother International MFC-9010CN Users Manual - English - Page 94
Calibration, Auto Registration, Frequency
 |
UPC - 012502622383
View all Brother International MFC-9010CN manuals
Add to My Manuals
Save this manual to your list of manuals |
Page 94 highlights
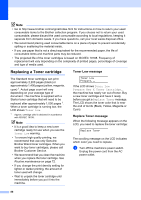
Calibration C The output density for each color may vary depending on the environment the machine is in such as temperature and humidity. Calibration helps you to improve the color density. a Press Menu, 3, 5. b Press a or b to select Calibrate. c Press OK. d Press 1 to select Yes. e Press Stop/Exit. You can reset the calibration parameters back to those set at the factory. a Press Menu, 3, 5. b Press a or b to Reset. c Press OK. d Press 1 to select Yes. e Press Stop/Exit. Note • If an error message is displayed, press Stop/Exit and try again. For more information, see Error and maintenance messages on page 61. • If you print using Windows® printer driver, you need to perform the calibration from the Windows® printer driver. See Advanced tab in the Software User's Guide on the CD-ROM. • If you print using the Macintosh printer driver, you need to perform the calibration using the status monitor. See Status Monitor in the Software User's Guide on the CD-ROM. When the Status Monitor is open, choose Control / Color Calibration from the menu bar. Auto Registration C Registration C If solid areas of color or images have cyan, magenta or yellow fringes, you can use the auto-registration feature to correct the problem. a Press Menu, 3, 6, 1. b To start, press 1. To exit, press 2. c Press Stop/Exit. Frequency C You can set the machine to carry out auto registration regularly, and also how often it occurs. a Press Menu, 3, 6, 2. b Press a or b to choose Low, Medium, High or Off. Press OK. c Press Stop/Exit. 82
-
 1
1 -
2
-
3
-
4
-
5
-
6
-
7
-
8
-
9
-
10
-
11
-
12
-
13
-
14
-
15
-
16
-
17
-
18
-
19
-
20
-
21
-
22
-
23
-
24
-
25
-
26
-
27
-
28
-
29
-
30
-
31
-
32
-
33
-
34
-
35
-
36
-
37
-
38
-
39
-
40
-
41
-
42
-
43
-
44
-
45
-
46
-
47
-
48
-
49
-
50
-
51
-
52
-
53
-
54
-
55
-
56
-
57
-
58
-
59
-
60
-
61
-
62
-
63
-
64
-
65
-
66
-
67
-
68
-
69
-
70
-
71
-
72
-
73
-
74
-
75
-
76
-
77
-
78
-
79
-
80
-
81
-
82
-
83
-
84
-
85
-
86
-
87
-
88
-
 89
89 -
 90
90 -
 91
91 -
 92
92 -
 93
93 -
 94
94 -
 95
95 -
 96
96 -
 97
97 -
 98
98 -
 99
99 -
100
-
101
-
102
-
103
-
104
-
105
-
106
-
107
-
108
-
109
-
110
-
111
-
112
-
113
-
114
-
115
-
116
-
117
-
118
-
119
-
120
-
121
-
122
-
123
-
124
-
125
-
126
-
127
-
128
-
129
-
130
-
131
-
132
-
133
-
134
-
135
-
136
-
137
-
138
-
139
-
140
-
141
-
142
-
143
-
144
-
145
-
146
-
147
-
148
 |
 |