Brother International PEDESIGN 6.0 Users Manual - English - Page 151
Splitting off parts of stitch data
 |
View all Brother International PEDESIGN 6.0 manuals
Add to My Manuals
Save this manual to your list of manuals |
Page 151 highlights
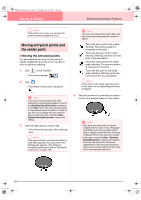
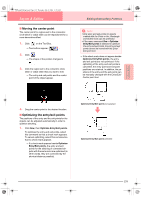
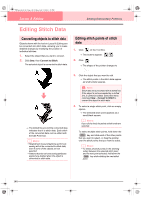
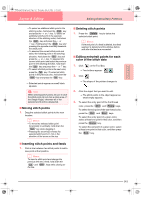
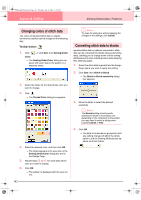
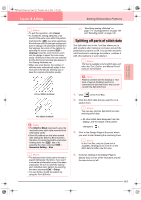
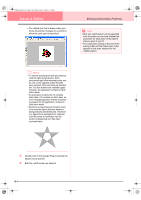
PeDesignV6Eng.book Page 143 Thursday, July 8, 2004 11:59 AM Layout & Editing Editing Embroidery Patterns Advanced Opreation Layout & Editing b Memo: • To quit the operation, click Cancel. • To modify the sewing attributes of all blocks of the same color within the pattern, hold down the Alt key while selecting a block whose color or sew type settings you want to change. (An alternate method is to first ungroup the colors of the pattern by selecting the menu command Edit - Ungroup.) Use the zoom tools to zoom into the design to select the color more easily. All blocks of that color are selected and the block color and sew type appear in the Sewing Attributes bar. • When you scale blocks, the number of stitches sewn automatically adapt to the new size of the blocks, allowing you to keep the original embroidery quality. Without Stitch to Block With Stitch to Block a Note: • The Stitch to Block command cannot be used with some stitch data imported from embroidery cards. • Some fill patterns are lost when scaled after setting the Stitch to Block function, therefore it is recommended to scale while holding down the Ctrl key or by selecting the menu command Edit - Numerical Setting - Size. b Memo: • The selected color blocks can be moved or scaled individually, therefore, if you want to move the whole pattern once it has been ungrouped, be sure to carefully regroup each individual color pattern by selecting the menu command Edit - Group. • You can further modify the pattern by using the Point Edit tool. c "Specifying sewing attributes" on page 171, "Scaling patterns" on page 132 and "Selecting points" on page 135 Splitting off parts of stitch data The Split stitch tool in the Tool Box allows you to split a pattern after tracing an enclosure around the parts that you want to cut off. You can then move the cutoff sections to rearrange the pattern, combine it with other patterns or even delete it. b Memo: This tool is available only for stitch data, and when the Text, Outline, and Manual Punch tools are not selected. a Note: Patterns created with the drawing or Text tools of Layout & Editing need to be converted into stitches before they can be cut with the Split stitch tool. 1. Click on the Tool Box. 2. Click the stitch data that you want to cut a section from. b Memo: You can also click the Split stitch tool after selecting stitch data. → All other stitch data disappear from the display, and the shape of the pointer changes to . 3. Click in the Design Page at the point where you want to start drawing the enclosing lines. b Memo: In the Tool Box, only the Zoom tool is available, allowing you to zoom in on the stitch data to better view the area. 4. Continue clicking in the Design Page to specify each corner of the enclosure around the area to be cut off. 143
-
 1
1 -
2
-
3
-
4
-
5
-
6
-
7
-
8
-
9
-
10
-
11
-
12
-
13
-
14
-
15
-
16
-
17
-
18
-
19
-
20
-
21
-
22
-
23
-
24
-
25
-
26
-
27
-
28
-
29
-
30
-
31
-
32
-
33
-
34
-
35
-
36
-
37
-
38
-
39
-
40
-
41
-
42
-
43
-
44
-
45
-
46
-
47
-
48
-
49
-
50
-
51
-
52
-
53
-
54
-
55
-
56
-
57
-
58
-
59
-
60
-
61
-
62
-
63
-
64
-
65
-
66
-
67
-
68
-
69
-
70
-
71
-
72
-
73
-
74
-
75
-
76
-
77
-
78
-
79
-
80
-
81
-
82
-
83
-
84
-
85
-
86
-
87
-
88
-
89
-
90
-
91
-
92
-
93
-
94
-
95
-
96
-
97
-
98
-
99
-
100
-
101
-
102
-
103
-
104
-
105
-
106
-
107
-
108
-
109
-
110
-
111
-
112
-
113
-
114
-
115
-
116
-
117
-
118
-
119
-
120
-
121
-
122
-
123
-
124
-
125
-
126
-
127
-
128
-
129
-
130
-
131
-
132
-
133
-
134
-
135
-
136
-
137
-
138
-
139
-
140
-
141
-
142
-
143
-
144
-
145
-
 146
146 -
 147
147 -
 148
148 -
 149
149 -
 150
150 -
 151
151 -
 152
152 -
 153
153 -
 154
154 -
 155
155 -
 156
156 -
157
-
158
-
159
-
160
-
161
-
162
-
163
-
164
-
165
-
166
-
167
-
168
-
169
-
170
-
171
-
172
-
173
-
174
-
175
-
176
-
177
-
178
-
179
-
180
-
181
-
182
-
183
-
184
-
185
-
186
-
187
-
188
-
189
-
190
-
191
-
192
-
193
-
194
-
195
-
196
-
197
-
198
-
199
-
200
-
201
-
202
-
203
-
204
-
205
-
206
-
207
-
208
-
209
-
210
-
211
-
212
-
213
-
214
-
215
-
216
-
217
-
218
-
219
-
220
-
221
-
222
-
223
-
224
-
225
-
226
-
227
-
228
-
229
-
230
-
231
-
232
-
233
-
234
-
235
-
236
-
237
-
238
-
239
-
240
-
241
-
242
-
243
-
244
-
245
-
246
-
247
-
248
-
249
-
250
-
251
-
252
-
253
-
254
-
255
-
256
-
257
-
258
-
259
-
260
-
261
-
262
-
263
-
264
-
265
-
266
-
267
-
268
-
269
-
270
-
271
-
272
 |
 |