Brother International S-7200B Instruction Manual - English - Page 19
Test operation (Operating the treadle), Turning on the power, Test operation
 |
View all Brother International S-7200B manuals
Add to My Manuals
Save this manual to your list of manuals |
Page 19 highlights
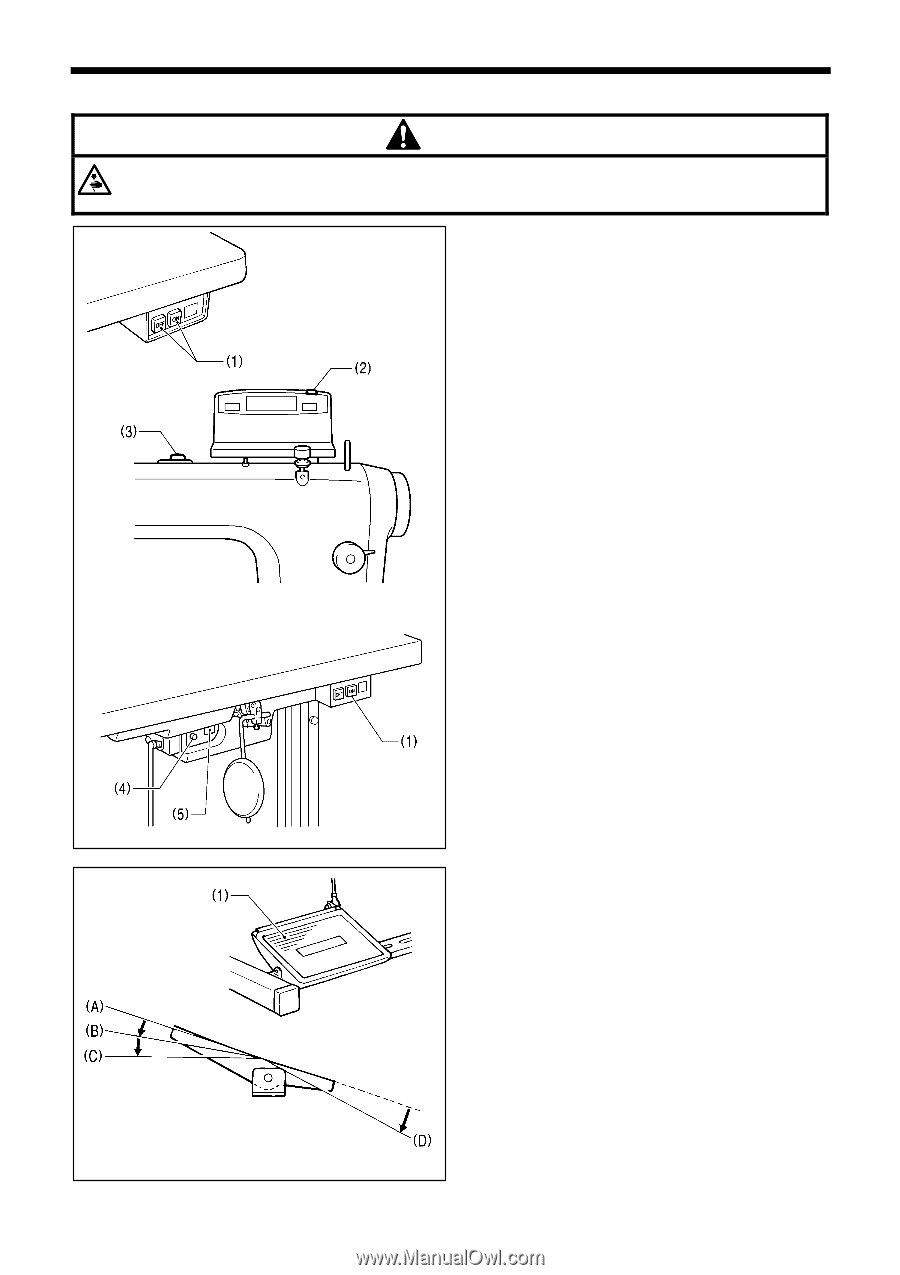
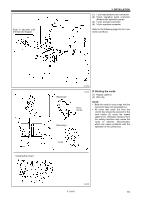
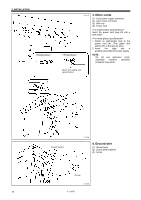
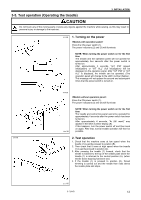
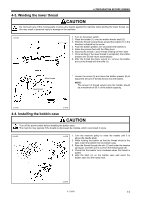
3. INSTALLATION 3-5. Test operation (Operating the treadle) CAUTION Do not touch any of the moving parts or press any objects against the machine while sewing, as this may result in personal injury or damage to the machine. 2114M 1. Turning on the power Press the ON power switch (1). The power indicators (2) and (3) will illuminate. NOTE: When turning the power switch on for the first time The treadle and the operation panel will not operate for approximately four seconds after the power switch is turned on. After approximately 4 seconds, "iniT rPM" (speed initialization) or "iniT ALL" (full initialization) will be displayed on the operation panel. After "iniT rPM" or "iniT ALL" is displayed, the treadle can be operated. (The operation panel will change to the stitch number display.) This message will not appear the second and subsequent times that the power switch is turned on. 3648M 3646M Press the ON power switch (1). The power indicators (3) and (4) will illuminate. 3647M NOTE: When turning the power switch on for the first time The treadle and control box panel cannot be operated for approximately 4 seconds after the power switch has been turned on. After approximately 4 seconds, "Ar (All reset)" may appear in the stitch number display (5). If this happens, turn the power switch off and then back on again. After that, normal treadle operation will then be possible. 2. Test operation 1. Check that the machine sews at low speed when the treadle (1) is gently pressed to position (B). 2. Then check that it sews at high speed when the treadle (1) is gently pressed to position (C). 3. After pressing the treadle (1) forward, check that the needle is lowered to the top of the needle plate when the treadle (1) is returned to the neutral position (A). (when needle down stopping has been set.) 4. If the treadle (1) is pressed to position (D), thread trimming is carried out and the needle then rises above the needle plate and stops. 2117M S-7200B 12
-
 1
1 -
2
-
3
-
4
-
5
-
6
-
7
-
8
-
9
-
10
-
11
-
12
-
13
-
 14
14 -
 15
15 -
 16
16 -
 17
17 -
 18
18 -
 19
19 -
 20
20 -
 21
21 -
 22
22 -
 23
23 -
 24
24 -
25
-
26
-
27
-
28
-
29
-
30
-
31
-
32
-
33
-
34
-
35
-
36
-
37
-
38
-
39
-
40
-
41
-
42
-
43
-
44
-
45
-
46
-
47
-
48
-
49
-
50
-
51
-
52
-
53
-
54
-
55
-
56
-
57
-
58
-
59
-
60
-
61
-
62
-
63
-
64
-
65
-
66
-
67
-
68
-
69
-
70
-
71
-
72
-
73
-
74
 |
 |