Brother International S-7200B Instruction Manual - English - Page 29
Sewing name labels, <Automatic sewing>
 |
View all Brother International S-7200B manuals
Add to My Manuals
Save this manual to your list of manuals |
Page 29 highlights
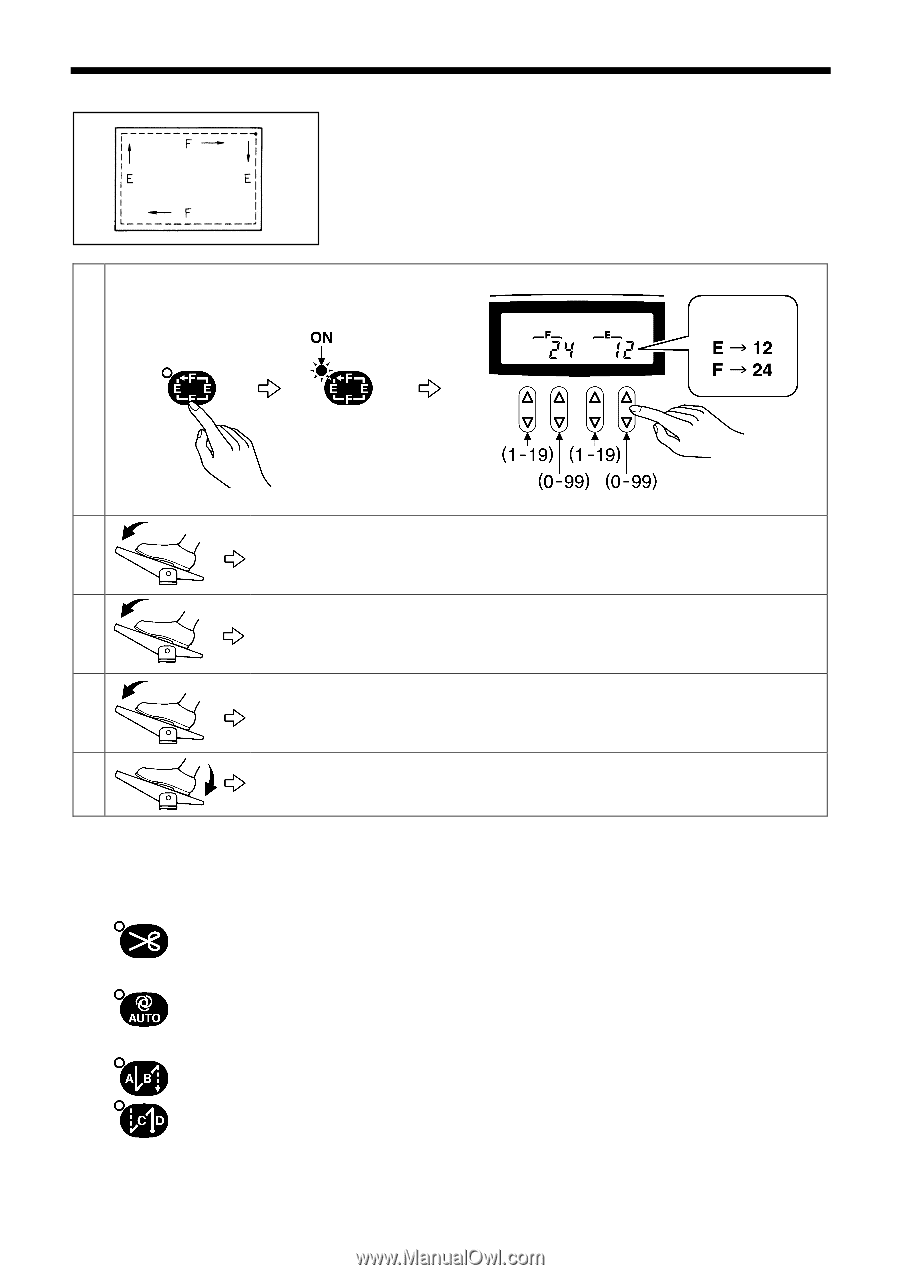
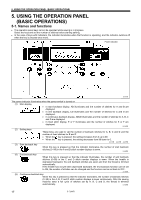
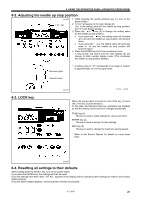
5-5. Sewing name labels 0835M 1 5. USING THE OPERATION PANEL (BASIC OPERATIONS) 2162M Example: From 1 to 1999 stitches can be set for the E and F stitch numbers. 2 After the set number of stitches in E (fixed stitches) have been sewn, the needle bar stops in the position that has been set by the needle up/down key (refer to p.25). 2159M 3 After the set number of stitches in F (fixed stitches) have been sewn, the needle bar stops in the position that has been set by the needle up/down key (refer to p.25). 4 Repeat steps 2 and 3 above. 5 Thread trimming is carried out. After the fixed stitches in E and F are sewn, the presser foot is also lifted automatically. 2160M Press the thread trimming key to turn on the thread trimming function. Thread trimming is carried out automatically after the second set of F stitches has been sewn. When the AUTO key is pressed to turn on the automatic sewing function, the fixed stitches in E and F are sewn respectively simply by depressing the treadle once without needing to depress it continuously. • The start backtack key and end backtack key can be pressed to turn on the backtack sewing function. • If changing the number of start and end backtack stitches in A, B, C and D, press the name label stitch key to turn off the name label function before making the change. (The ABCD display will show the number of stitches and the settings can then be changed.) S-7200B 22
-
 1
1 -
2
-
3
-
4
-
5
-
6
-
7
-
8
-
9
-
10
-
11
-
12
-
13
-
14
-
15
-
16
-
17
-
18
-
19
-
20
-
21
-
22
-
23
-
 24
24 -
 25
25 -
 26
26 -
 27
27 -
 28
28 -
 29
29 -
 30
30 -
 31
31 -
 32
32 -
 33
33 -
 34
34 -
35
-
36
-
37
-
38
-
39
-
40
-
41
-
42
-
43
-
44
-
45
-
46
-
47
-
48
-
49
-
50
-
51
-
52
-
53
-
54
-
55
-
56
-
57
-
58
-
59
-
60
-
61
-
62
-
63
-
64
-
65
-
66
-
67
-
68
-
69
-
70
-
71
-
72
-
73
-
74
 |
 |