Brother International S-7200B Instruction Manual - English - Page 33
Adjusting the needle up stop position, 6-3. LOCK key - service manual
 |
View all Brother International S-7200B manuals
Add to My Manuals
Save this manual to your list of manuals |
Page 33 highlights
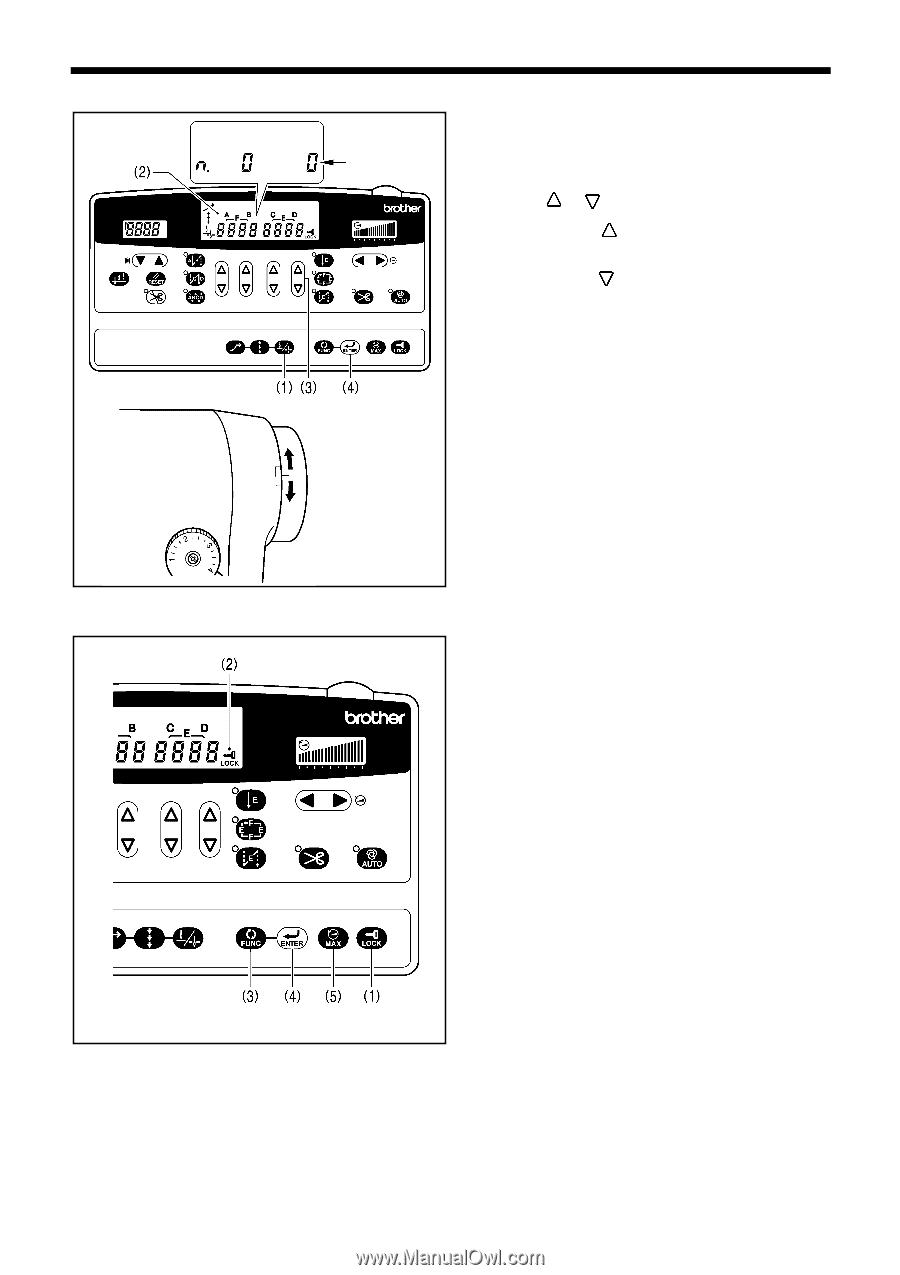
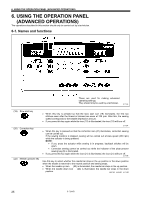
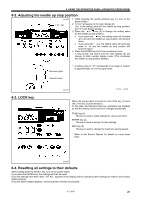
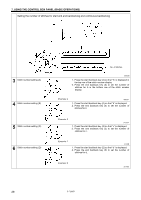
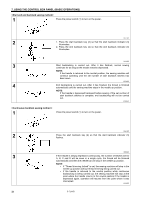
6. USING THE OPERATION PANEL (ADVANCED OPERATIONS) 6-2. Adjusting the needle up stop position 2210M (-10 - 20) 1. While pressing the needle up/down key (1), turn on the power switch. 2. "n.0 xx" will appear in the main display (2). ("xx" is the setting value for the needle up stop position, and "0" is the default setting.) 3. Press the or key (3) to change the setting value for the needle up stop position. • If you press the key, the setting value will increase up to 20 and the needle up stop position will become lower. • If you press the key, the setting value will decrease down to -10 and the needle up stop position will become higher. 4. Press the ENTER key (4) for two seconds or more. A long buzzer will sound and the main display (2) will change to stitch number display mode. (This completes the needle up stop position setting.) Becomes higher * A setting value of "10" corresponds to an angle of rotation of approximately 10° for the upper shaft. Becomes lower 6-3. LOCK key 3657M 2138M 2139M When the power switch is turned on, the LOCK key (1) turns ON. (The icon (2) is illuminated.) In this state, the following three key operations are disabled so that the setting values cannot be changed accidentally. FUNC key (3) This key is used to make settings for various functions. ENTER key (4) This key is used to accept function settings. MAX key (5) This key is used to change the maximum sewing speed. * Refer to the Service Manual for details on using these keys. 2212M 6-4. Resetting all settings to their defaults While holding down the RESET key, turn on the power switch. If you press the ENTER key, the settings will then be reset. Once the settings have been reset, "iniT ALL" appears in the display and the operation panel settings are reset to their factory default settings. Once the above display appears, normal operation will then be possible. S-7200B 26
-
 1
1 -
2
-
3
-
4
-
5
-
6
-
7
-
8
-
9
-
10
-
11
-
12
-
13
-
14
-
15
-
16
-
17
-
18
-
19
-
20
-
21
-
22
-
23
-
24
-
25
-
26
-
27
-
 28
28 -
 29
29 -
 30
30 -
 31
31 -
 32
32 -
 33
33 -
 34
34 -
 35
35 -
 36
36 -
 37
37 -
 38
38 -
39
-
40
-
41
-
42
-
43
-
44
-
45
-
46
-
47
-
48
-
49
-
50
-
51
-
52
-
53
-
54
-
55
-
56
-
57
-
58
-
59
-
60
-
61
-
62
-
63
-
64
-
65
-
66
-
67
-
68
-
69
-
70
-
71
-
72
-
73
-
74
 |
 |