Brother International S-7200B Instruction Manual - English - Page 48
Lubrication, CLEANING, A. Gearbox oil quantity, <Checking the oil quantity>, <Lubrication>
 |
View all Brother International S-7200B manuals
Add to My Manuals
Save this manual to your list of manuals |
Page 48 highlights
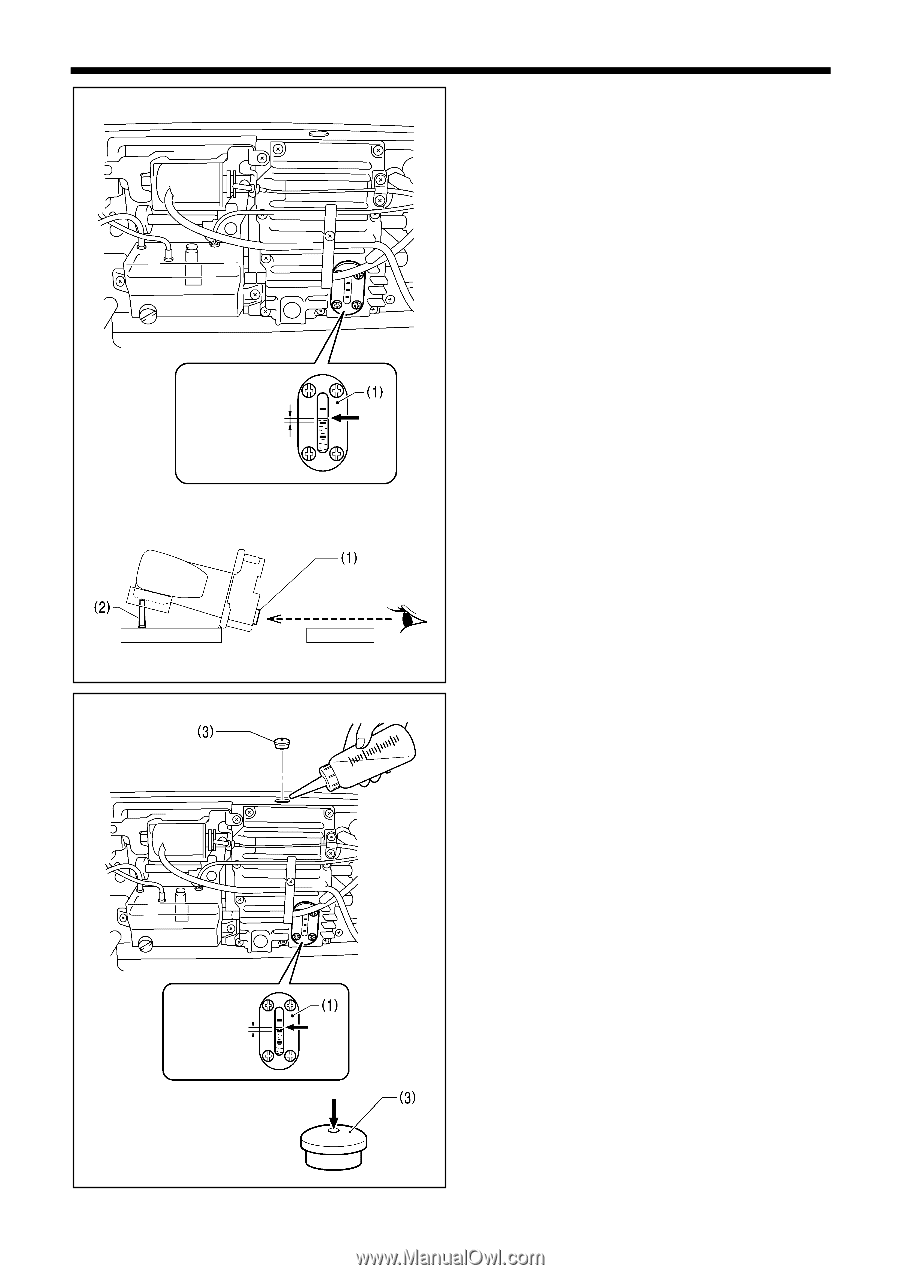
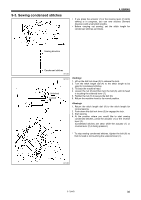
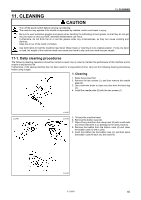
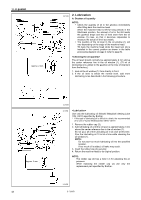
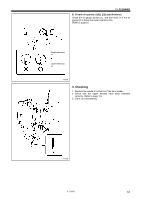
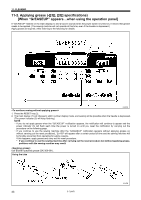
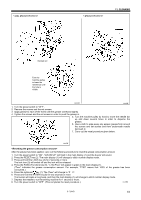
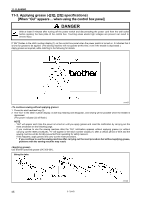
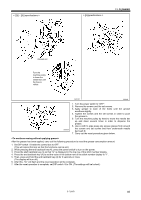
11. CLEANING Approx. 2 mm 3678M 2. Lubrication A. Gearbox oil quantity NOTE: Check the quantity of oil in the gearbox immediately after tilting back the machine head. When the machine head is left for long periods in the tilted-back position, the amount of oil in the felt inside the gearbox drops and the oil level seen from the oil window (1) rises, so that it becomes impossible to measure the actual oil level accurately. The position of the oil level in the oil window (1) will vary depending on the angle of the machine head. Tilt back the machine head while the head rest (2) is installed in the correct position as shown in the table processing diagram on page 4 (refer to page 6). The oil level should normally be approximately 2 mm above the center reference line in the oil window (1). (70 ml of lubricating oil is added to the gearbox at the time of shipment from the factory.) 1. Look at the oil window (1) from directly in front. 2. If the oil level is below the normal level, add more lubricating oil as described in the following procedure. Approx. 2 mm 41 2186M 3679M Use only the lubricating oil (Nisseki Mitsubishi Sewing Lube 10N; VG10) specified by Brother. * If this type of lubricating oil is difficult to obtain, the recommended oil to use is . 1. Remove the rubber cap (3). 2. Add lubricating oil until the oil level is approximately 2 mm above the center reference line in the oil window (1). Do not pour all of the lubricating oil in at once at this time. Pour the lubricating oil 10 ml at a time while checking the oil window (1). NOTE: Do not pour too much lubricating oil into the specified location. If too much oil is added, oil leaks may result. 3. Insert the rubber cap (3) securely. 4. Return the machine head to its original position. NOTE: The rubber cap (3) has a hole in it for adjusting the air pressure. When replacing the rubber cap (3) use only the replacement part specified by Brother. 2188M S-7200B
-
 1
1 -
2
-
3
-
4
-
5
-
6
-
7
-
8
-
9
-
10
-
11
-
12
-
13
-
14
-
15
-
16
-
17
-
18
-
19
-
20
-
21
-
22
-
23
-
24
-
25
-
26
-
27
-
28
-
29
-
30
-
31
-
32
-
33
-
34
-
35
-
36
-
37
-
38
-
39
-
40
-
41
-
42
-
 43
43 -
 44
44 -
 45
45 -
 46
46 -
 47
47 -
 48
48 -
 49
49 -
 50
50 -
 51
51 -
 52
52 -
 53
53 -
54
-
55
-
56
-
57
-
58
-
59
-
60
-
61
-
62
-
63
-
64
-
65
-
66
-
67
-
68
-
69
-
70
-
71
-
72
-
73
-
74
 |
 |