Brother International S-7200B Instruction Manual - English - Page 36
Using The Control Box Panel Basic Operations
 |
View all Brother International S-7200B manuals
Add to My Manuals
Save this manual to your list of manuals |
Page 36 highlights
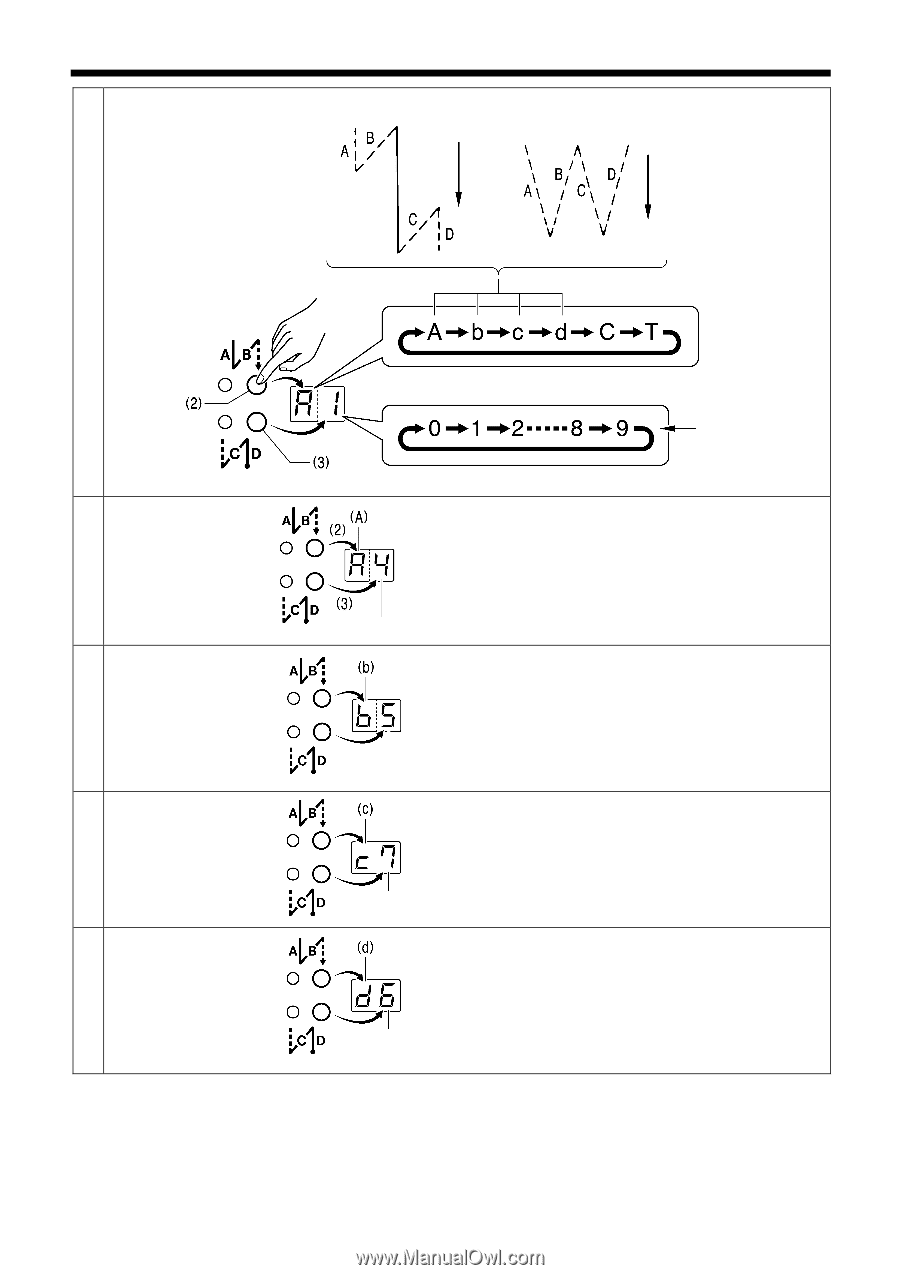
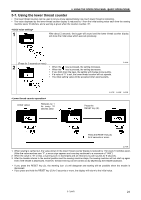
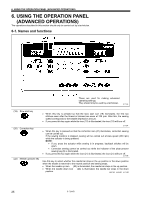
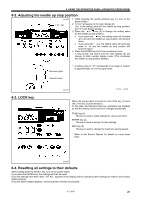
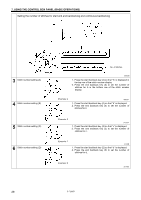
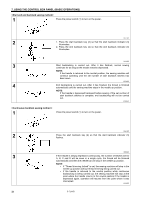
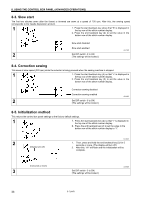
7. USING THE CONTROL BOX PANEL (BASIC OPERATIONS) Setting the number of stitches for start and end backtacking and continuous backtacking 3 Stitch number setting (A) 4 Stitch number setting (B) 5 Stitch number setting (C) 6 Stitch number setting (D) No. of stitches 3662M 1. Press the start backtack key (2) so that "A" is displayed in the top row of the stitch number display. 2. Press the end backtack key (3) to set the number of stitches for A in the bottom row of the stitch number display. (Example: 4) 3663M 1. Press the start backtack key (2) so that "b" is displayed. 2. Press the end backtack key (3) to set the number of stitches for b. (Example: 5) 3137M 1. Press the start backtack key (2) so that "c" is displayed. 2. Press the end backtack key (3) to set the number of stitches for c. (Example: 7) 3138M 1. Press the start backtack key (2) so that "d" is displayed. 2. Press the end backtack key (3) to set the number of stitches for d. (Example: 6) 3139M 29 S-7200B
-
 1
1 -
2
-
3
-
4
-
5
-
6
-
7
-
8
-
9
-
10
-
11
-
12
-
13
-
14
-
15
-
16
-
17
-
18
-
19
-
20
-
21
-
22
-
23
-
24
-
25
-
26
-
27
-
28
-
29
-
30
-
 31
31 -
 32
32 -
 33
33 -
 34
34 -
 35
35 -
 36
36 -
 37
37 -
 38
38 -
 39
39 -
 40
40 -
 41
41 -
42
-
43
-
44
-
45
-
46
-
47
-
48
-
49
-
50
-
51
-
52
-
53
-
54
-
55
-
56
-
57
-
58
-
59
-
60
-
61
-
62
-
63
-
64
-
65
-
66
-
67
-
68
-
69
-
70
-
71
-
72
-
73
-
74
 |
 |