Canon EOS50D EOS 50D Instruction Manual - Page 108
Using Red-eye Reduction
 |
View all Canon EOS50D manuals
Add to My Manuals
Save this manual to your list of manuals |
Page 108 highlights
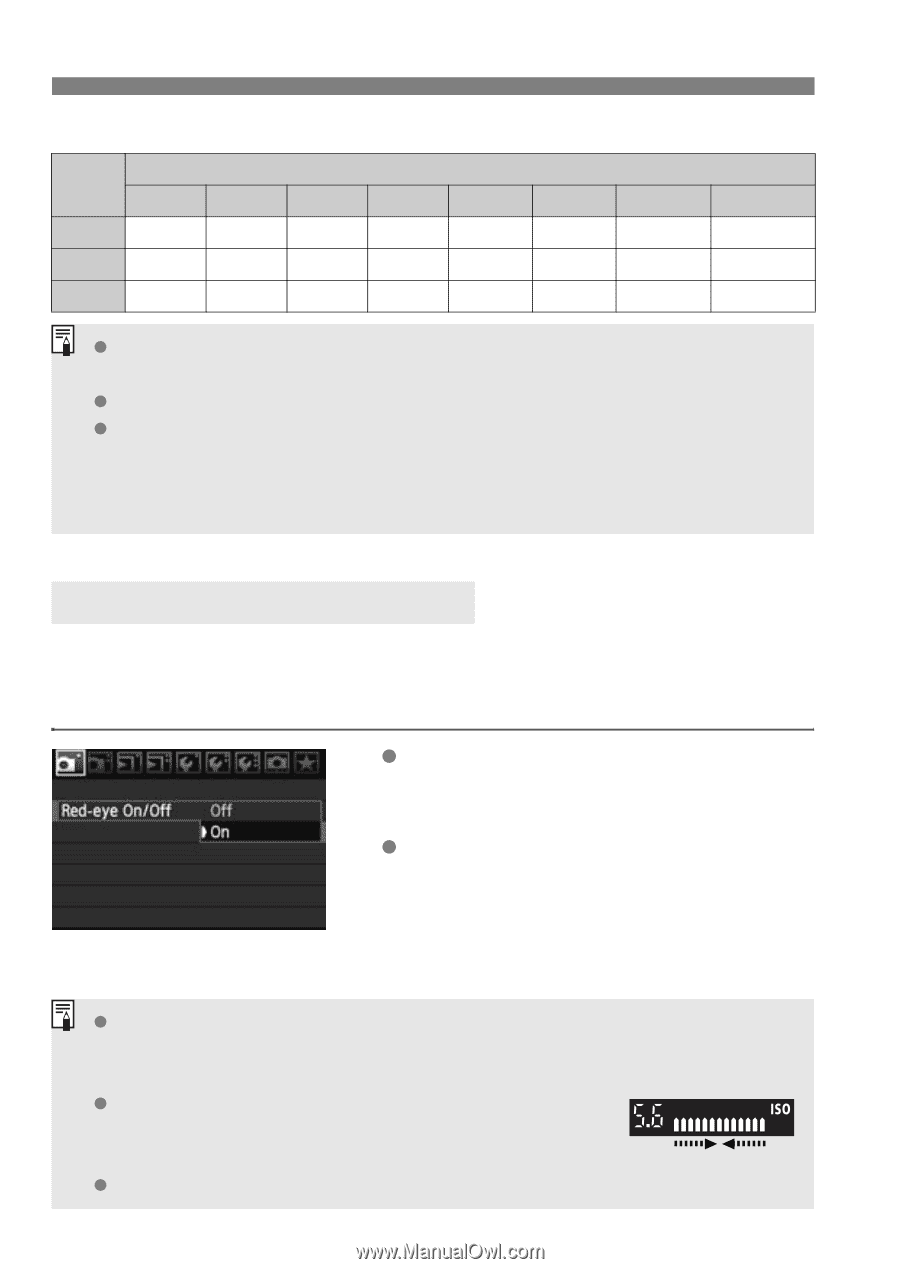
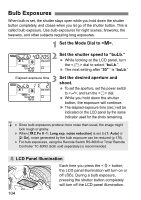
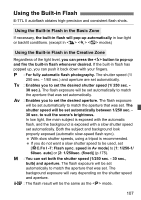
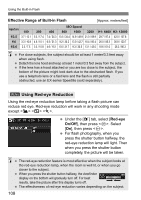
Using the Built-in Flash Effective Range of Built-in Flash [Approx. meters/feet] ISO Speed Aperture 100 200 400 800 1600 3200 H1: 6400 H2: 12800 f/3.5 3.7 / 12.1 5.3 / 17.4 7.4 / 24.3 10.5 / 34.4 14.9 / 48.9 21.0 / 68.9 29.7 / 97.4 42.0 / 137.8 f/4 3.3 / 10.8 4.6 / 15.1 6.5 / 21.3 9.2 / 30.2 13.0 / 42.7 18.4 / 60.4 26.0 / 85.3 36.8 / 120.7 f/5.6 2.3 / 7.5 3.3 / 10.8 4.6 / 15.1 6.6 / 21.7 9.3 / 30.5 13.1 / 43.0 18.6 / 61.0 26.3 / 86.3 For close subjects, the subject should be at least 1 meter/3.3 feet away when using flash. Detach the lens hood and keep at least 1 meter/3.3 feet away from the subject. If the lens has a hood attached or you are too close to the subject, the bottom of the picture might look dark due to the obstructed flash. If you use a telephoto lens or a fast lens and the flash is still partially obstructed, use an EX-series Speedlite (sold separately). 3 Using Red-eye Reduction Using the red-eye reduction lamp before taking a flash picture can reduce red eye. Red-eye reduction will work in any shooting mode except . Under the [1] tab, select [Red-eye On/Off], then press . Select [On], then press . For flash photography, when you press the shutter button halfway, the red-eye reduction lamp will light. Then when you press the shutter button completely, the picture will be taken. The red-eye reduction feature is most effective when the subject looks at the red-eye reduction lamp, when the room is well lit, or when you go closer to the subject. When you press the shutter button halfway, the viewfinder display on the bottom will gradually turn off. For best results, take the picture after this display turns off. The effectiveness of red-eye reduction varies depending on the subject. 108
-
 1
1 -
2
-
3
-
4
-
5
-
6
-
7
-
8
-
9
-
10
-
11
-
12
-
13
-
14
-
15
-
16
-
17
-
18
-
19
-
20
-
21
-
22
-
23
-
24
-
25
-
26
-
27
-
28
-
29
-
30
-
31
-
32
-
33
-
34
-
35
-
36
-
37
-
38
-
39
-
40
-
41
-
42
-
43
-
44
-
45
-
46
-
47
-
48
-
49
-
50
-
51
-
52
-
53
-
54
-
55
-
56
-
57
-
58
-
59
-
60
-
61
-
62
-
63
-
64
-
65
-
66
-
67
-
68
-
69
-
70
-
71
-
72
-
73
-
74
-
75
-
76
-
77
-
78
-
79
-
80
-
81
-
82
-
83
-
84
-
85
-
86
-
87
-
88
-
89
-
90
-
91
-
92
-
93
-
94
-
95
-
96
-
97
-
98
-
99
-
100
-
101
-
102
-
 103
103 -
 104
104 -
 105
105 -
 106
106 -
 107
107 -
 108
108 -
 109
109 -
 110
110 -
 111
111 -
 112
112 -
 113
113 -
114
-
115
-
116
-
117
-
118
-
119
-
120
-
121
-
122
-
123
-
124
-
125
-
126
-
127
-
128
-
129
-
130
-
131
-
132
-
133
-
134
-
135
-
136
-
137
-
138
-
139
-
140
-
141
-
142
-
143
-
144
-
145
-
146
-
147
-
148
-
149
-
150
-
151
-
152
-
153
-
154
-
155
-
156
-
157
-
158
-
159
-
160
-
161
-
162
-
163
-
164
-
165
-
166
-
167
-
168
-
169
-
170
-
171
-
172
-
173
-
174
-
175
-
176
-
177
-
178
-
179
-
180
-
181
-
182
-
183
-
184
-
185
-
186
-
187
-
188
-
189
-
190
-
191
-
192
-
193
-
194
-
195
-
196
-
197
-
198
-
199
-
200
-
201
-
202
-
203
-
204
-
205
-
206
-
207
-
208
-
209
-
210
-
211
-
212
-
213
-
214
-
215
-
216
-
217
-
218
-
219
-
220
-
221
-
222
-
223
-
224
-
225
-
226
-
227
-
228
 |
 |