Canon ES8600 ES8600 8mm Video Camcorder NTSC-E Instruction Manual - Page 33
Setting the date and time, Choosing the display style - parts
 |
UPC - 013803027174
View all Canon ES8600 manuals
Add to My Manuals
Save this manual to your list of manuals |
Page 33 highlights
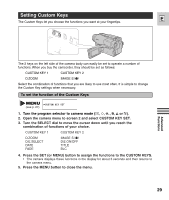
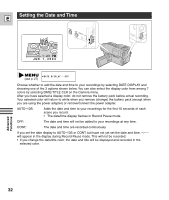
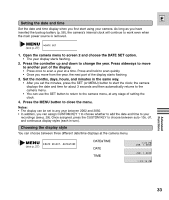
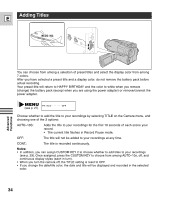
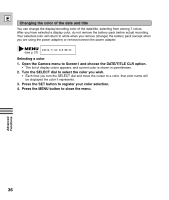
E Setting the date and time Set the date and time display when you first start using your camera. As long as you have inserted the backup battery (p. 58), the camera's internal clock will continue to work even when the main power source is removed. (see p. 27) DATE SET 1. Open the camera menu to screen 2 and choose the DATE SET option. • The year display starts flashing. 2. Press the controller up and down to change the year. Press sideways to move to another part of the display. • Press once to scan a year at a time. Press and hold to scan quickly. • Once you move from the year, the next part of the display starts flashing. 3. Set the months, days, hours, and minutes in the same way. • After you set the minutes, press the SET (or MENU) button to start the clock; the camera displays the date and time for about 3 seconds and then automatically returns to the camera menu. • You can use the SET button to return to the camera menu, at any stage of setting the clock. 4. Press the MENU button to close the menu. Notes: • The display can be set to any year between 2002 and 2050. • In addition, you can assign CUSTOM KEY 1 to choose whether to add the date and time to your recordings (see p. 29). Once assigned, press the CUSTOM KEY to choose between auto-10s, off, and continuous display styles (each in turn). Choosing the display style You can choose between three different date/time displays at the camera menu. (see p. 27) DATE SELECT..DATE&TIME DATE&TIME DATE TIME 1 : 2 3 PM JUN . 1 , 2 0 0 3 JUN . 1 , 2 0 0 3 1 : 2 3 : 1 5 PM Advanced Functions 33
-
 1
1 -
2
-
3
-
4
-
5
-
6
-
7
-
8
-
9
-
10
-
11
-
12
-
13
-
14
-
15
-
16
-
17
-
18
-
19
-
20
-
21
-
22
-
23
-
24
-
25
-
26
-
27
-
 28
28 -
 29
29 -
 30
30 -
 31
31 -
 32
32 -
 33
33 -
 34
34 -
 35
35 -
 36
36 -
 37
37 -
 38
38 -
39
-
40
-
41
-
42
-
43
-
44
-
45
-
46
-
47
-
48
-
49
-
50
-
51
-
52
-
53
-
54
-
55
-
56
-
57
-
58
-
59
-
60
-
61
-
62
-
63
-
64
-
65
-
66
-
67
-
68
-
69
-
70
-
71
-
72
-
73
-
74
-
75
 |
 |