Canon GL1 GL1 Instruction Manual - Page 43
Taking Still Pictures Photo Mode
 |
View all Canon GL1 manuals
Add to My Manuals
Save this manual to your list of manuals |
Page 43 highlights
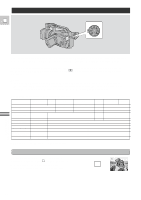
Taking Still Pictures (Photo Mode) E PHOTO PHOTO PHOTO Take still photos to download into your PC for image enhancement and printout. Also, starting your shooting with a still photo makes it easy to find the beginning again later with the Photo Search function (p. 67). You can record still pictures like a photograph. The camera records the picture and sound to tape for approximately 6 seconds. The exposure is automatically adjusted. There are two PHOTO buttons, to let you take still images from both gripping positions, or, you can take still pictures from the wireless controller. You can take a still picture at any time during regular video recording, or you can put the camcorder into record pause mode first, then take a still picture. 1. Set the camera to record or record pause mode. 2. Press the photo button halfway or all the way. • If you are now in regular video recording mode, press the button all the way down, and the still picture will be taken immediately. • If you press the button halfway down: - "PHOTO" flashes at the bottom right of the display. - Exposure is locked the instant the photo button is pressed halfway down. - During autofocus F flashes white in the display as the camcorder adjusts the focus and it is displayed continuously as a green mark when the camera is ready to take the still picture. - To change the still picture before recording: release the button, select a new picture and then press down the PHOTO button lightly once more. - If the subject is unsuitable for autofocus (p. 93), the camera may not be able to focus, and F may continue to flash white in the display. Press the PHOTO button down halfway and adjust the focus manually with the focus ring. - If you are using manual focus (p. 58), the F mark starts as a continuous as a white mark. Focus with the focus ring. 3. Press the PHOTO button fully down to take the still picture. • The camera takes the image almost immediately, and then records the "photo" to the tape for approximately 6 seconds. During this time the camera also records the sound, and the display also shows the still picture. • A counter display is shown, that counts up to 6 secs as the camcorder records the picture. F disappears from the display. Using the Full Range of Features 43
-
 1
1 -
2
-
3
-
4
-
5
-
6
-
7
-
8
-
9
-
10
-
11
-
12
-
13
-
14
-
15
-
16
-
17
-
18
-
19
-
20
-
21
-
22
-
23
-
24
-
25
-
26
-
27
-
28
-
29
-
30
-
31
-
32
-
33
-
34
-
35
-
36
-
37
-
 38
38 -
 39
39 -
 40
40 -
 41
41 -
 42
42 -
 43
43 -
 44
44 -
 45
45 -
 46
46 -
 47
47 -
 48
48 -
49
-
50
-
51
-
52
-
53
-
54
-
55
-
56
-
57
-
58
-
59
-
60
-
61
-
62
-
63
-
64
-
65
-
66
-
67
-
68
-
69
-
70
-
71
-
72
-
73
-
74
-
75
-
76
-
77
-
78
-
79
-
80
-
81
-
82
-
83
-
84
-
85
-
86
-
87
-
88
-
89
-
90
-
91
-
92
-
93
-
94
-
95
-
96
-
97
-
98
-
99
-
100
-
101
-
102
-
103
-
104
 |
 |
