Canon GL1 GL1 Instruction Manual - Page 66
If noise or tape damage prevents the data code from being read.
 |
View all Canon GL1 manuals
Add to My Manuals
Save this manual to your list of manuals |
Page 66 highlights
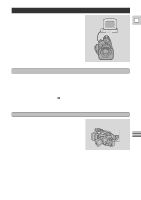
Notes: E • To avoid accidental recording, make sure that you slide the tab on the cassette so that it exposes the hole (the switch position is usually labeled SAVE or ERASE OFF). • The data code will read "- - -" in the following situations: - During playback of a blank section of tape. - If the tape was recorded before entering the date and time in the camera's memory. - If the tape was recorded on a camera without a data code function. - If noise or tape damage prevents the data code from being read. • Data code is sometimes not displayed during high speed playback modes. • If a recording made on GL1 is played back on a different DV camcorder, the data code may not be displayed correctly. • Contents of data code display may change according to D/TIME SEL. (p. 41) or DATA CODE settings made on the menu. Setting the "Data Code" Setting "Select Date/Time" Date/Time Date DEC. 1 , 19 99 Camera data Date/Time & Camera data 0 dB F1. 6 1 /2000 0 dB F1. 6 1 /2000 DEC. 1 , 19 99 Time 1 0 : 00 : 00 AM Date & Time 1 0 : 00 AM DEC. 1 , 19 99 0 dB F1. 6 1 /2000 0 dB F1. 6 1 /2000 0 dB F1. 6 1 /2000 1 0 : 00 : 00 AM 0 dB F1. 6 1 /2000 1 0 : 00 AM DEC. 1 , 19 99 • The data code will appear in the display even if DISPLAYS (p. 95) has been set to OFF through the VCR menu. Using the Full Range of Features 66
-
 1
1 -
2
-
3
-
4
-
5
-
6
-
7
-
8
-
9
-
10
-
11
-
12
-
13
-
14
-
15
-
16
-
17
-
18
-
19
-
20
-
21
-
22
-
23
-
24
-
25
-
26
-
27
-
28
-
29
-
30
-
31
-
32
-
33
-
34
-
35
-
36
-
37
-
38
-
39
-
40
-
41
-
42
-
43
-
44
-
45
-
46
-
47
-
48
-
49
-
50
-
51
-
52
-
53
-
54
-
55
-
56
-
57
-
58
-
59
-
60
-
 61
61 -
 62
62 -
 63
63 -
 64
64 -
 65
65 -
 66
66 -
 67
67 -
 68
68 -
 69
69 -
 70
70 -
 71
71 -
72
-
73
-
74
-
75
-
76
-
77
-
78
-
79
-
80
-
81
-
82
-
83
-
84
-
85
-
86
-
87
-
88
-
89
-
90
-
91
-
92
-
93
-
94
-
95
-
96
-
97
-
98
-
99
-
100
-
101
-
102
-
103
-
104
 |
 |
