Canon GL1 GL1 Instruction Manual - Page 73
Cut-In and Cut-Out Adjustments
 |
View all Canon GL1 manuals
Add to My Manuals
Save this manual to your list of manuals |
Page 73 highlights
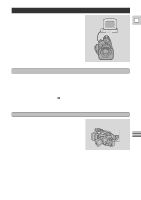
Cut-In and Cut-Out Adjustments Setting the Cut-In and Cut-Out Adjustments E The point where a scene starts is called the "cut-in" point, and the point where it ends is called the "cutout" point. Some VCR models take a second or more to actually start recording after they receive the command signal. If this happens you could lose the beginning of the scene. CUT-IN ADJ. prevents this by sending the command a little early. Similarly, some models take some time to react to the command to stop recording. Some models also rewind slightly after they stop. You could therefore record more than you wanted, or lose the end of the scene. CUT-OUT ADJ. prevents this, by sending the command a little early or late. If you have these problems with your VCR, reset these adjustments. Use the REC.SET UP menu to set the "cut-in" and "cut-out" adjustments. (see p. 70) CUT-IN ADJ.•• 0:00 CUT-OUT ADJ.• 0:00 1. Open the REC.SET UP menu and point the arrow at CUT-IN ADJ. • Point it at "CUT-OUT ADJ." to set the cut out adjustment. 2. Adjust the setting. • CUT-IN ADJ. can be set up to five seconds early. (-5:00 to 0:00) • CUT-OUT ADJ. can be set from one second early to five seconds late. (-1:00 to +5:00) • This can be set to an accuracy of one frame. How to calculate the best adjustment for the "cut-in" and "cut-out" points Use the tape on which you recorded the digital timer in "Setting RECORDER" to calculate the cut-in and cut-out adjustment values. 1. Rewind the tape in the VCR and start playback to play back the recorded digital timer. • Look at the time the CUT-OUT timer stops and CUT-IN timer starts. These times are what the CUTOUT ADJ. and CUT-IN ADJ. settings should be. • For maximum accuracy, take an average of at least three readings. • If your VCR has a frame advance function or a jog dial, you can use it to find the precise starting times more conveniently. 2. Set the CUT-OUT ADJ. and CUT-IN ADJ. settings to the center of the three readings. Note: • The camcorder will remember the cut-in and cut-out adjustment settings until you change them. Editing 73
-
 1
1 -
2
-
3
-
4
-
5
-
6
-
7
-
8
-
9
-
10
-
11
-
12
-
13
-
14
-
15
-
16
-
17
-
18
-
19
-
20
-
21
-
22
-
23
-
24
-
25
-
26
-
27
-
28
-
29
-
30
-
31
-
32
-
33
-
34
-
35
-
36
-
37
-
38
-
39
-
40
-
41
-
42
-
43
-
44
-
45
-
46
-
47
-
48
-
49
-
50
-
51
-
52
-
53
-
54
-
55
-
56
-
57
-
58
-
59
-
60
-
61
-
62
-
63
-
64
-
65
-
66
-
67
-
 68
68 -
 69
69 -
 70
70 -
 71
71 -
 72
72 -
 73
73 -
 74
74 -
 75
75 -
 76
76 -
 77
77 -
 78
78 -
79
-
80
-
81
-
82
-
83
-
84
-
85
-
86
-
87
-
88
-
89
-
90
-
91
-
92
-
93
-
94
-
95
-
96
-
97
-
98
-
99
-
100
-
101
-
102
-
103
-
104
 |
 |
