Canon HR10 User Manual
Canon HR10 - Camcorder - 1080i Manual
 |
UPC - 013803079555
View all Canon HR10 manuals
Add to My Manuals
Save this manual to your list of manuals |
Canon HR10 manual content summary:
- Canon HR10 | User Manual - Page 1
HD Camcorder Instruction Manual Caméscope HD Manuel d'instruction Videocámara HD Manual de Instrucciones Please read also the Digital Video Software instruction manual (on PDF file). Refer to the installation guide for further details. Veuillez lire aussi le manuel d'instruction Digital Video - Canon HR10 | User Manual - Page 2
be contrary to copyright laws. HD Camcorder, HR10 A systems This device complies with manual. If such changes or modifications should be made, you could be required to stop operation of the equipment. Canon U.S.A. Inc. One Canon servicing) instructions in the literature accompanying the product. 2 - Canon HR10 | User Manual - Page 3
Canon HD Camcorder HR10 A and all its accessories. 1 Read Instructions - All the safety and operating instructions should be read before the product is operated. 2 Retain Instructions - The safety and operating instructions to instructions in this manual. 11 mast and supporting structure, grounding - Canon HR10 | User Manual - Page 4
if you follow the operating instructions. Adjust only those controls that are covered by the operation instructions. Improper adjustment of other the power supply is required, please return it to the responsible nearest Canon Service Center and please replace it with the same type number CA-570. The - Canon HR10 | User Manual - Page 5
Enjoying High-Definition Video with your DVD Camcorder Recording HD video with your DVD camcorder may seem a bit complicated at first. Actually, you need to make just two simple choices and you can start recording right away. The first choice - Canon HR10 | User Manual - Page 6
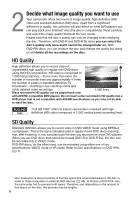
may not be able to eject the disc. "Full HD 1080" refers to Canon camcorders compliant with highdefinition (HD) video composed of 1,080 vertical pixels (scanning lines). SD Quality Standard definition allows you to record video in DVD-VIDEO mode using MPEG-2 compression. This is the same standard - Canon HR10 | User Manual - Page 7
discs; and with dual-layered discs using Canon DVD-R DL54 discs and Verbatim DVD-R DL discs. For further details, contact directly the manufacturer's customer support center. Note that attempting to record or play with this camcorder DVD discs that were recorded, initialized or finalized with other - Canon HR10 | User Manual - Page 8
DVD disc used Disc Type DVD-R, DVD-R DL DVD-RW Disc Quality HD SD HD SD Disc Specifications Editing scenes with this camcorder in order to play it with an external DVD device ( 68)2 Adding recordings to a disc Playback cannot be guaranteed with all external DVD devices. 3 You will need to - Canon HR10 | User Manual - Page 9
9 - Canon HR10 | User Manual - Page 10
Table of contents „Introduction 5 Enjoying High-Definition Video with your DVD Camcorder 14 About this Manual 15 Getting to Know the Camcorder 15 Supplied Accessories 17 Components Guide 20 Screen Displays „Preparations 23 Getting Started 23 Charging the Battery Pack 24 - Canon HR10 | User Manual - Page 11
(16:9 Widescreen or 4:3) 38 Zooming 39 Quick Start Function 40 Reviewing and Deleting the Last Scene Just Recorded 41 Basic Playback 41 Playing 58 Mini Video Light 59 Self Timer 59 Manual Focus Adjustment 60 Manual Exposure Adjustment 61 White Balance 62 Image Effects 63 - Canon HR10 | User Manual - Page 12
„Video (cont 68 Disc Playback on an External Device 68 Changing the Disc Title 68 Finalizing the Disc 70 Disc Playback on External Devices 71 Unfinalizing the Disc - Additional Recordings on a Finalized Disc „Photos 72 Basic Recording 72 Taking Photos 73 Selecting Photo Size and - Canon HR10 | User Manual - Page 13
Photos - Direct Transfer 100 Transfer Orders „Additional Information 101 Trouble? 101 Troubleshooting 106 List of Messages 110 Do's and Don'ts 110 Handling Precautions 113 Maintenance/Others 114 Using the Camcorder Abroad 116 General Information 116 System Diagram 117 Optional Accessories 120 - Canon HR10 | User Manual - Page 14
Thank you for purchasing the Canon HR10. Please read this manual carefully before you use the camcorder and retain it for future reference. Should your camcorder fail to operate correctly, refer to the Troubleshooting table ( 101). Conventions Used in this Manual • IMPORTANT: Precautions related to - Canon HR10 | User Manual - Page 15
Getting to Know the Camcorder Supplied Accessories CA-570 Compact Power Adapter (incl. DVD-R Disc (8 cm Mini DVD) Software CD-ROM* DIGITAL VIDEO Solution Disk Software CD-ROM and User Manual Corel Application Disc * Includes the electronic version of the Digital Video Software instruction manual - Canon HR10 | User Manual - Page 16
on new products and promotions Upon your request, we will send you information on Canon new products and promotions. The serial number of this product can be found at the battery attachment unit of the camcorder. Write down the number and other information here and retain this book as a permanent - Canon HR10 | User Manual - Page 17
Components Guide Left side view Right side view Front view QUICK START button and standby lamp ( 39) FUNC. button ( 27, 45) DISP. button ( 44, 81) (print/share) - Canon HR10 | User Manual - Page 18
Introduction Back view Top view 18 PLAY mode indicator (green) ( 26) Joystick ( 27) CAMERA mode indicator (red) ( 26) LCD screen ( 31) (fast reverse) button ( 41) / Zoom out W (wide-angle) button ( 38) (fast forward) button ( 41) / Zoom in T (telephoto) button ( 38) / (play/pause) button ( 41) / - Canon HR10 | User Manual - Page 19
Wireless Controller WL-D86 START/STOP button ( 35) FUNC. button ( 27) MENU button ( 28) PLAYLIST button ( 65) Navigation buttons ( / / / ) PREV./NEXT buttons: Scene skip ( 42)/ Index screen page up/down ( 41) Reverse SEARCH button ( 42) / Reverse SLOW button ( 42) PLAY button ( 41) PAUSE - Canon HR10 | User Manual - Page 20
size (simultaneous recording) ( 82) Disc quality and specification ( 6) HD mode (High definition) VIDEO mode (Standard definition) VR mode (Standard definition, DVD-RW only) Disc type DVD-R, DVD-RW ( 5) DVD-R DL, Instant AF ( 48), MF Manual focus ( 59) 24F progressive frame rate Disc operation - Canon HR10 | User Manual - Page 21
mode ( 79) Still image quality/size ( 73) Instant AF ( 48), MF Manual focus ( 59) Number of still images available on the memory card Self timer ( stabilizer ( 49) AF frame ( 80) Mini video light ( 58) Camcorder shake warning ( 47) Focus/exposure automatically set and locked ( 72) Flash - Canon HR10 | User Manual - Page 22
has been made, or may decrease by 2 still images at once. Card access display is displayed next to the number of images available while the camcorder is writing on the memory card. Remaining battery charge estimate • When is displayed in red, replace the battery pack with a fully charged one. • When - Canon HR10 | User Manual - Page 23
charging times and recording/playback times with a full battery pack, refer to the tables on page 117. BATT. switch 1 Turn off the camcorder. 2 Attach the battery pack to the camcorder. • Open the LCD panel. • Slide in the connector end of the battery pack in the direction of the arrow and press it - Canon HR10 | User Manual - Page 24
to release the battery pack, and pull out the battery pack holding it from the ridge on its bottom part. IMPORTANT • Turn off the camcorder before connecting or disconnecting the compact power adapter. After you move the switch to , important file allocation data is updated on the disc. Be - Canon HR10 | User Manual - Page 25
. • If the wireless controller does not work, check that [WL.REMOTE] is not set to [ OFF ] ( 52). Otherwise, replace the battery. When you mount the camcorder on a tripod Do not leave the viewfinder exposed to direct sunlight as it may melt (due to concentration of the light by the lens). Do - Canon HR10 | User Manual - Page 26
and release it. This action will toggle the operating mode between recording (CAMERA - red The camcorder's operating mode is determined by the switch and the position of the / switch. In this manual, indicates that a function is available in the operating mode shown and indicates that the - Canon HR10 | User Manual - Page 27
by the icon . The functions assigned to the joystick change according to the operation mode and the camcorder's settings. Press ( ) to display/hide the joystick guide. In the illustrations of this manual, positions other than those relevant to the function explained are marked with a striped pattern - Canon HR10 | User Manual - Page 28
the wireless controller to open directly the setup menus screen. • In mode, push the joystick ( ) to select the icon (only necessary with DVD-RW discs recorded in HD quality, or SD quality (VR mode)). 3 Select ( ) the desired menu from the left side column and press ( ). The title of the - Canon HR10 | User Manual - Page 29
way. 3 Move ( ) the cursor to the [OK] button and press ( ) to start the clock and close the menu. IMPORTANT • When you do not use the camcorder for about 3 months, the built-in rechargeable lithium battery may discharge completely and the date and time setting may be lost. In such case, recharge - Canon HR10 | User Manual - Page 30
to the menu item to change the setting. • The displays and that appear in some menu screens refer to the name of buttons on the camcorder and will not change, regardless of the language selected. Changing the Time Zone DATE/TIME SETUP Default value T.ZONE/DST NEW YORK FUNC. ( 28 - Canon HR10 | User Manual - Page 31
Getting Ready to Start Recording Getting Ready to Start Recording Adjusting the Position and Brightness of the LCD Screen Rotating the LCD Panel Open the LCD panel 90 degrees. • You can rotate the panel 90 degrees downward. • You can rotate the panel 180 degrees toward the lens (allowing the subject - Canon HR10 | User Manual - Page 32
a Disc Use only 8 cm (3 in.) mini DVD discs marked with the DVD-R logo (including DVD-R DL) or the DVD-RW logo. Refer also to Recommended discs ( 7). CHECK ( 26) Pick up lens 1 Move the switch to ON to set the camcorder in mode. 2 Slide OPEN fully in the direction of the arrow and gently open - Canon HR10 | User Manual - Page 33
Power the camcorder using the compact power adapter. Select ( ) the quality to be used for recording the disc. For a comparison between HD and SD quality, refer to Decide what image quality you want to use ( 6). • Only if you inserted a DVD-RW disc and selected - Canon HR10 | User Manual - Page 34
that are not interchangeable. Inserting a memory card facing the wrong direction can cause a malfunction of the camcorder. NOTES Compatibility with all miniSD cards cannot be guaranteed. 1 Turn off the camcorder. 2 Open the LCD panel. 3 Pull out the memory card slot cover. 4 Insert the memory card - Canon HR10 | User Manual - Page 35
Recording Shooting Video Before You Begin Recording Make a test recording first to check if the camcorder operates correctly. Since recordings made on a DVD-R or DVD-R DL disc cannot be deleted, we recommend you use a DVD-RW disc to make the test recordings. ( 26) 1 Move the switch to ON to set - Canon HR10 | User Manual - Page 36
face the subject ( 31). About the Mode Switch and Recording Programs Set the mode switch to AUTO to let the camcorder adjust all the settings for you, allowing you to just point the camcorder and start shooting. Set the mode switch to P to select one of the recording programs. The Special Scene - Canon HR10 | User Manual - Page 37
recording times with a brand new DVD disc (on a single recording side). Recording Mode Disc Type DVD-R, DVD-RW DVD-R DL High Definition 15 min. 20 . We recommend using XP+ or XP mode for important recordings. • The camcorder uses a variable bit rate (VBR) when encoding the video data so the - Canon HR10 | User Manual - Page 38
: TV sets compatible with the Video ID-1 system will automatically switch to wide (16:9) mode. Otherwise, change the aspect ratio of the TV manually. • To play back on a TV with normal aspect ratio (4:3) change the [TV TYPE] setting accordingly ( 53). Zooming POINTS TO CHECK ( 26) : In addition - Canon HR10 | User Manual - Page 39
is ready in record pause mode. NOTES • When you wake up the camcorder from standby mode, the following settings will be changed automatically: - Manual focus returns to automatic focus (AF). - Manual exposure adjustment returns to automatic exposure. - Zoom position returns to full wide - Canon HR10 | User Manual - Page 40
guide, repeatedly push the joystick ( ) toward [NEXT] to display it. • The camcorder plays back the last scene (but without sound) and returns to record pause mode. Deleting a Scene Right After Recording It POINTS TO CHECK ( 26) Disc type: DVD-RW Immediately after recording a scene: 1 Review - Canon HR10 | User Manual - Page 41
external DVD devices ( 68). TO ADJUST THE VOLUME 1 Move the switch to ON, then slide it down toward MODE and release it to set the camcorder in the playback. During the playback of a scene: 1 If the joystick guide does not appear on screen, press ( ) to display it. 2 Push the joystick ( ) - Canon HR10 | User Manual - Page 42
Skip to the beginning of: the next scene the current scene the previous scene Return to normal playback Normal playback Special playback On the camcorder press... On the wireless controller press... or SEARCH or SEARCH Press again to increase the playback speed 5x o 15x the normal speed SLOW - Canon HR10 | User Manual - Page 43
, press PLAYLIST first, and then select the scene. FUNC. ( 27) FUNC. DELETE YES Deleting All Scenes POINTS TO CHECK ( 26) Disc type: DVD-RW Disc quality: HD or SD (VR mode only) To delete all the scenes from the original index screen, perform the following procedure. This will delete also the - Canon HR10 | User Manual - Page 44
switch or the / switch while the scene is being deleted (while the DISC access indicator is on or flashing). On-Screen Displays (Data Code) The camcorder keeps a data code containing the date and time and other camera data (shutter speed, aperture, etc.) registered at the time of recording. You can - Canon HR10 | User Manual - Page 45
Menu Options Lists Menu Options Lists White balance ( 61) Menu items not available appear grayed out in the FUNC. menu or in black in the setup menus. For details about how to select an item, refer to Using the Menus ( 27). FUNC. Menu Recording programs ( 55, 57) Mode switch: P [ PROGRAM AE], - Canon HR10 | User Manual - Page 46
[ONE SCENE], [CANCEL] Add scenes to the playlist. This option is available only from the original index screen. MOVE ( 65) Disc type: Disc quality: HD or SD (VR mode only) Move a scene in the playlist. This option is available only from the playlist index screen. DIVIDE ( 66) Disc type: Disc - Canon HR10 | User Manual - Page 47
DELETE ( 43) Disc type: Disc quality: HD or SD (VR mode only) Delete a scene. SLIDESHOW ( 76) [CANCEL], (only in the [ PROGRAM AE] recording program) [ ON], [ OFF] The camcorder automatically uses slow shutter speeds to obtain brighter recordings in places with insufficient lighting. Operation - Canon HR10 | User Manual - Page 48
fastmoving subjects. • When the optional Wide-converter or Tele-converter is attached to the camcorder, it may partially obstruct the Instant AF sensor. Set the AF mode to [ the screen in order to help you when you are using the manual focus. • Using the focus assist function will not affect the recordings. - Canon HR10 | User Manual - Page 49
: P Disc quality: HD only [ 60i NORMAL], [ 24F PROGR.] Selects the frame rate to be used when recording in HD quality. [ 24F PROGR is different from the 24F mode featured in Canon HDV camcorders. AF AST LAMP ( 78) Mode switch: P [ ON:AiAF], [ [ OFF] ON:CENTER], REVIEW [ OFF], [ 2 sec], [ 4 - Canon HR10 | User Manual - Page 50
Mode switch: P [ AUTO], [ OFF ] The camcorder automatically reduces the background sound of wind when recording outdoors. The disc information includes the disc title, the disc type (DVD-R, DVD-R DL or DVD-RW), the disc quality/ specification (HD, VIDEO or VR mode), and icons that indicate if the - Canon HR10 | User Manual - Page 51
DISC PROTECT ( 66) Disc type: Disc quality: HD or SD (VR mode only) [NO], [YES] DISC TITLE ], [YES] ERASE ALL IMAGES ( 100) ( 77) [ ON], [ OFF] When set to [ ON], the camcorder's on-screen displays will appear also on the screen of a TV or monitor connected using the STV-100 Stereo Video Cable - Canon HR10 | User Manual - Page 52
( ) the volume of the playback. You can also adjust the volume referring to the joystick guide ( 41). BEEP [ HIGH VOLUME], [ LOW VOLUME], [ OFF] A beep will accompany some operations like turning on the camcorder, the self-timer countdown, etc. POWER SAVE [ ON], [ OFF] In order to save power when - Canon HR10 | User Manual - Page 53
OFF ( 39) [ 10 min], [ 20 min], [ 30 min] Select the length of time after which the camcorder will end the standby mode and shut off automatically. IMG QUALITY Disc quality: HD only [ SUPER FINE], [ FINE], [ NORMAL] Select the quality of a still image captured from a scene recorded - Canon HR10 | User Manual - Page 54
the full 1080i high definition specification when possible, or switch automatically to 480i specification when 1080i is not supported by the TV. • This setting will be unavailable while the camcorder is connected to an external device using an HDMI cable. HDMI STATUS T.ZONE/DST ( 30) DATE/TIME - Canon HR10 | User Manual - Page 55
Cinema Mode and Special Scene Recording Programs Cinema Mode With the [ CINE MODE] recording program, the camcorder adjusts various image settings to give a cinematic look to your recordings. When recording in HD quality, the effect will be further enhanced if you set [FRAME RATE] to [ 24F PROGR - Canon HR10 | User Manual - Page 56
Video [ PORTRAIT] The camcorder uses a large aperture, achieving a focus on the subject while blurring other Autofocus may not work as well as in other modes. In such case, adjust the focus manually. • [ SNOW]/[ BEACH] - The subject may become overexposed on cloudy days or in shaded places. Check the - Canon HR10 | User Manual - Page 57
switch: P Options [ PROGRAM AE] ( 26) Default value The camcorder automatically adjusts the aperture and shutter speed to obtain the optimal exposure for value will appear next to the recording program icon. 1 If the joystick guide appears on the screen, press ( ) to hide it. 2 Adjust ( ) - Canon HR10 | User Manual - Page 58
Video Light You can turn on the mini video light (assist lamp) at any time, regardless of the recording program. ( 26) NEXT 1 If the joystick guide does not appear on screen, press ( ) to display it. 2 Push the joystick ( ) toward . 58 - Canon HR10 | User Manual - Page 59
appear on the joystick guide, repeatedly push the joystick press PHOTO fully (when recording still images) or turn off the camcorder to cancel the self timer. POINTS TO CHECK ( 26) FUNC . Manual Focus Adjustment Autofocus may not work well on the following subjects. In such case, focus manually. - Canon HR10 | User Manual - Page 60
zoom before you start the procedure. Mode switch: P FOCUS NEXT 1 If the joystick guide does not appear on screen, press ( ) to display it. 2 Keep the joystick ( ), changes to "MF" and the camcorder returns to manual focusing mode. Manual Exposure Adjustment At times, backlit subjects may appear - Canon HR10 | User Manual - Page 61
joystick ( ) toward [EXP]. • If [EXP] does not appear on the joystick guide, repeatedly push the joystick ( ) toward [NEXT] to display it. • The exposure adjustment EXP] again will cancel the exposure lock and return the camcorder to automatic exposure. White Balance The white balance function helps - Canon HR10 | User Manual - Page 62
option* * When you select [ SET], do not press FUNC. and continue instead with the following procedure. TO SET THE CUSTOM WHITE BALANCE 1 Point the camcorder at a white object, zoom in until it fills the whole screen and press ( ). When the adjustment is completed, stops flashing and stays on. The - Canon HR10 | User Manual - Page 63
, not only the picture but also the sound will fade in or out. When you apply an effect, the sound will be recorded normally. • The camcorder retains the last setting used even if you turn off the digital 63 - Canon HR10 | User Manual - Page 64
does not appear on screen, press ( ) to display it. 2 Push the joystick ( ) toward . • If does not appear on the joystick guide, repeatedly push the joystick ( ) toward [NEXT] to display it. • The icon of the selected effect turns green. • Push the joystick ( ) toward again to deactivate the - Canon HR10 | User Manual - Page 65
refer to Deleting Scenes ( 43). NOTES We recommend powering the camcorder using the compact power adapter while editing the disc (playlist-related once or only the selected scene. POINTS TO CHECK ( 26) Disc type: DVD-RW Disc quality: HD or SD (VR mode only) From the original index screen, select ( , - Canon HR10 | User Manual - Page 66
than 1 second) cannot be divided. POINTS TO CHECK ( 26) Disc type: DVD-RW Disc quality: HD* or SD (VR mode only) * Scenes in the playlist only. From the The frame jump for SD-quality scenes will be shorter than that for HD-quality scenes. Protecting the Disc You can protect the whole disc to - Canon HR10 | User Manual - Page 67
TO CHECK ( 26) Disc type: DVD-RW Disc quality: HD or SD (VR mode only) FUNC. ( 28) FUNC. MENU DISC OPERATIONS DISC PROTECT FUNC. YES Initializing the Disc You need to initialize all new discs when you first insert them to the camcorder ( 32). When you are using a DVD-RW disc, you may need - Canon HR10 | User Manual - Page 68
-RW recorded in HD quality, or in SD quality (VR mode). Finalizing the Disc To play the disc you recorded on a DVD player, a computer's DVD drive or other digital device, you need to finalize it first. You do not need to finalize the disc to play back your recordings with the camcorder connected to - Canon HR10 | User Manual - Page 69
the remaining free space on the disc. POINTS TO CHECK ( 26) Power the camcorder using the compact power adapter. FUNC. ( 28) FUNC. MENU* DISC OPERATIONS FINALIZE FUNC. ** YES * Only when using a DVD-RW recorded in HD quality, or in SD quality (VR mode). Otherwise, pressing FUNC. will open the - Canon HR10 | User Manual - Page 70
want to play from the index screen. ON A cOMPUTER'S DVD DRIVE 1 Insert a finalized disc in the DVD drive. 2 Run the DVD playback software. Refer also to the instruction manual and help modules of your DVD playback software. IMPORTANT Discs recorded in HD quality can be played back only with AVCHD - Canon HR10 | User Manual - Page 71
may result in permanent data loss. • Only discs that were finalized using this camcorder can be unfinalized with it. Discs that Can be Unfinalized DVD-R/DVD-R DL - DVD-RW HD quality DVD-RW SD quality (VIDEO mode) DVD-RW SD quality (VR mode) - You can record additional scenes even without - Canon HR10 | User Manual - Page 72
with this camcorder ( 84). ( 26) 1 Move the switch to ON to set the camcorder in CAMERA mode permanent data loss. - Do not subject the camcorder to vibrations or strong impacts. - Do not Do not disconnect the power source or turn off the camcorder. - Do not change the position of the / - Canon HR10 | User Manual - Page 73
Selecting Photo Size and Quality Still images are recorded on the memory card using JPEG compression. As a general rule select a larger image size for higher quality. Select the [LW 1920x1080] size for photos with an aspect ratio of 16:9. ( 26) Options Image size options and the approximate number - Canon HR10 | User Manual - Page 74
Just Recorded You can erase the still image recorded last while reviewing it within the time set for the [REVIEW] option (or immediately after recording it, if [REVIEW] is set to [ OFF]). POINTS TO CHECK ( 26) While reviewing the image immediately after recording: 1 Push the joystick ( ) toward - Canon HR10 | User Manual - Page 75
ON, then slide it down toward MODE and release it to set the camcorder in PLAY mode. The green PLAY indicator will turn on. 2 Move specific image without having to browse all of them one by one. 1 If the joystick guide does not appear on screen, press ( ) to display it. 2 Push the joystick - Canon HR10 | User Manual - Page 76
screen, and when the CARD access indicator is on or flashing. Failing to do so may result in permanent data loss. - Do not subject the camcorder to vibrations or strong impacts. - Do not open the memory card slot cover and do not remove the memory card. - Do not disconnect the power - Canon HR10 | User Manual - Page 77
. YES IMPORTANT Be careful when erasing images. Erased images cannot be recovered. NOTES Protected images on the memory card cannot be erased. 1 If the joystick guide does not appear on screen, press ( ) to display it. 2 Push the joystick ( ) toward . 3 Select ( ( ). ) [ERASE] and press 77 - Canon HR10 | User Manual - Page 78
2 Push the joystick ( ) toward . • If does not appear on the joystick guide, repeatedly push the joystick ( ) toward [NEXT] to display it. • Repeatedly push . • The flash will not fire in the following cases: - When you manually adjust the exposure in (auto) or (red-eye reduction) mode. - During - Canon HR10 | User Manual - Page 79
to [ OFF] so the assist lamp does not light up ( 49). - The camcorder may not be able to focus even if the AF-assist lamp is on. - , refer to the sidebar on page 79. [ AEB] (Auto Exposure Bracketing) The camcorder records a still image in three different exposures (dark, normal, light in 1/2 EV - Canon HR10 | User Manual - Page 80
Three still images in different exposures will be recorded on the memory card. Automatic Focus Priority When the focus priority is activated, the camcorder records a still image only after the focus has been adjusted automatically. POINTS TO CHECK ( 26) Mode switch at AUTO: The focus priority cannot - Canon HR10 | User Manual - Page 81
value Appropriate for standard shooting conditions, including backlit scenes. The camcorder divides the picture into several areas and the light is measured a still image, while reviewing it within the time set for the [REVIEW] option (or immediately after recording it, if [REVIEW] is set to [ - Canon HR10 | User Manual - Page 82
will still appear on the screen. Capturing a Still Image while Recording Movies You can record still images on the memory card even while the camcorder is set to mode. You can also capture simultaneously, as a still image on the memory card, the same picture you are recording as a scene - Canon HR10 | User Manual - Page 83
Capturing a Still Image from the Playback Scene You can capture frames from a scene recorded in HD quality as still images on the memory card. The size of the captured still image will be [LW 1920x1080] and it cannot be changed, but - Canon HR10 | User Manual - Page 84
images, even the protected ones. Initializing the Memory Card Initialize memory cards when you use them with this camcorder for the first time, or to erase all the still images on them. Options [INITIALIZE] Clears the files will be erased and the memory card can be used without any problem. 84 - Canon HR10 | User Manual - Page 85
• Self timer ( 59) • Manual focus ( 59) • Manual exposure adjustment ( 60) • White balance ( 61) • Image effects ( 62) • Digital effects ( 63) Canon printers: SELPHY printers of the CP, DS and ES series and PIXMA printers marked with the PictBridge logo. Connecting the Camcorder to the Printer ( 26 - Canon HR10 | User Manual - Page 86
all print orders NOTES • will appear for images that cannot be printed. • We recommend powering the camcorder using the compact power adapter. • Refer also to the printer's instruction manual. Printing with the Button (Print/Share) You can print a still image without changing the settings simply - Canon HR10 | User Manual - Page 87
options and [DEFAULT] settings vary depending on the printer model. For details, refer to the printer's instruction manual. Printing Multiple Images on the Same Sheet [2-UP], [4-UP], etc. When using Canon printers you can print the same still image multiple times on the same sheet of paper. Use the - Canon HR10 | User Manual - Page 88
Printing after Changing the Print Settings 1 If the joystick guide does not appear on screen, press ( ) to display to the printer's instruction manual for details. - If the error still persists and printing does not restart, disconnect the USB cable and turn off the camcorder and the printer. - Canon HR10 | User Manual - Page 89
to green. • The trimming settings apply only to one image. • The trimming settings are canceled in the following cases: - When you turn off the camcorder. - When you disconnect the USB cable. - When you expand the trimming frame beyond its maximum size. - When you change the [PAPER SIZE] setting - Canon HR10 | User Manual - Page 90
want to print and set the desired number of copies as a print order. Later, you can easily print out the print orders by connecting the camcorder to a PictBridge-compatible printer ( 85). You can set print orders for up to 998 still images. Selecting Still Images for Printing (Print Order) POINTS TO - Canon HR10 | User Manual - Page 91
NOTES • Depending on the connected printer, you can change some print settings before step 4 ( 86). • Cancel Printing/Printing Errors ( 88). • Restarting Printing: Open the print settings menu as explained in steps 2-3 above. In the print settings menu, select [RESUME]* and press ( ). The remaining - Canon HR10 | User Manual - Page 92
Connections This chapter explains step-by-step how to connect your camcorder to an external device such as a TV, VCR, or computer 100 Stereo Video Cable is connected to the camcorder. When connecting a cable to the camcorder, make sure to align the triangle marks on the cable's connector and on - Canon HR10 | User Manual - Page 93
Connection Diagrams High Definition TV Sets (HDTV) Terminal on the Camcorder Connecting Cable Terminal on the Connected Device 1 Output connection (signal flow ) to an HDTV with component video input terminals. Pr/Cr Red Blue Pb/Cb - Canon HR10 | User Manual - Page 94
White Red VIDEO AUDIO L R Playback on a TV Screen This section explains how to play back the disc with this camcorder by connecting it to a TV. To play back the disc with another DVD device refer to Disc Playback on an External Device ( 68). The quality of the playback picture will vary depending - Canon HR10 | User Manual - Page 95
instruction manual of the connected TV. • You can play back discs recorded in HD quality not only on HDTVs but also on standard TVs. When you connect the camcorder this may damage the camcorder. - The HDMI connection will recognize automatically the highest resolution supported by the connected HDTV - Canon HR10 | User Manual - Page 96
device: Begin recording when the scene you wish to copy appears. Stop recording when copying is complete. 5 This camcorder: Stop playback. NOTES • We recommend powering the camcorder using the compact power adapter. • By default, the on-screen displays will be embedded in the output video signal - Canon HR10 | User Manual - Page 97
panel to access. Terminal on the Camcorder Connecting Cable Terminal on the Connected Device allow you to play back movies (SD or HD quality), transfer movies to a computer and easily to the Corel Application Disc Installation Guide and User Manual. Transferring Photos - Direct Transfer With - Canon HR10 | User Manual - Page 98
Refer to the installation guide (separate leaflet included with the CD-ROM). 2 Set the camcorder to mode. 3 Connect the camcorder to the computer using the Digital Video Software instruction manual (electronic version on PDF file). • The direct transfer menu appears on the camcorder screen and the - Canon HR10 | User Manual - Page 99
The button will flash while the images are being transferred. • The camcorder returns to the transfer menu once the transfer is complete. • To cancel , select ( ) [CANCEL] and press ( ) or press FUNC. . MANUAL TRANSFER OPTIONS When you select [ SELECT & TRANSFER] or [ WALLPAPER]: 1 Select - Canon HR10 | User Manual - Page 100
transfer orders for up to 998 still images. Selecting Still Images to Transfer (Transfer Order) Do not connect the USB cable to the camcorder while setting the transfer orders. ( 26) FUNC. ( 27) FUNC. TRANSFER ORDER Press ( ) : The image selection screen appears. FROM THE IMAGE SELECTION SCREEN - Canon HR10 | User Manual - Page 101
handling and maintenance tips, and other information. Trouble? Troubleshooting If you have a problem with your camcorder, refer to this checklist. Consult your dealer or a Canon Service Center if the problem persists. Power Source Problem Solution • Camcorder will not turn on. Battery pack is - Canon HR10 | User Manual - Page 102
up in red. This is not a malfunction. Turn the camcorder off and let it cool for a while - before resuming operation. Recording Problem Solution flashes red on the screen. The camcorder has malfunctioned. Consult a Canon Service Center. - Horizontal bands appear on the screen. This is - Canon HR10 | User Manual - Page 103
Problem Solution Pressing START/STOP will not start Set the camcorder to mode. 35 recording. Load a recommended disc. 7 The disc is full (" END" appears on the screen). Delete some recordings 43 (DVD-RW in HD quality, or SD quality (VR mode)) to free some space or replace the disc. The - Canon HR10 | User Manual - Page 104
off. Adjust the volume with the joystick guide in 41 mode. Playback on a Connected TV or Disc Playback on External DVD Devices External DVD devices refers to DVD players, DVD recorders, computer DVD drives, game consoles and other digital devices. Problem Solution There is a brief stop between - Canon HR10 | User Manual - Page 105
can only be played back - with VR mode-compatible DVD players. Refer to the instruction manual of your DVD device. Discs recorded in HD quality can only be played back with AVCHD- - compatible DVD players. Refer to the instruction manual of your DVD device. Cannot edit my recordings or add It - Canon HR10 | User Manual - Page 106
has been reached. Delete some recordings 43 (DVD-RW in HD quality, or SD quality (VR mode)) to free some space or replace the disc. CANNOT PLAY DISC The disc is dirty or you attempted to play back a type of disc not supported by 5 this camcorder. This message can also appear if condensation has - Canon HR10 | User Manual - Page 107
layered disc you inserted cannot be used with this camcorder. 7 DISC IS FINALIZED CANNOT RECORD You cannot record additional scenes on a finalized DVD-R/DVD-R DL disc. - You cannot record additional scenes or unfinalize a DVD-RW disc (HD quality, - or SD quality (VIDEO mode)) that was finalized - Canon HR10 | User Manual - Page 108
Print Related Messages About Canon PIXMA/SELPHY DS Printers: If the printer's error indicator flashes or an error message appears on the printer's operation panel, refer to the printer's instruction manual. Message PAPER ERROR NO PAPER PAPER JAM Explanation There is a problem with the paper. The - Canon HR10 | User Manual - Page 109
PRINTHEAD Explanation There is a problem with the ink. Replace ] to resume printing. Consult a Canon Service Center (refer to the list included instruction manual and contact the appropriate customer support center or service center The paper settings of the camcorder conflict with the printer's - Canon HR10 | User Manual - Page 110
and Don'ts Handling Precautions Camcorder properly, consult qualified service personnel. • Handle the camcorder with care. Do not subject the camcorder to shocks or vibration as this may cause damage. • Do not touch the pick up lens. • Do not subject the camcorder to vibrations or strong impacts - Canon HR10 | User Manual - Page 111
. Mini DVD Disc The recording surface of DVD discs is extremely delicate. If handled or stored in an incorrect manner, the camcorder may stop lead to problems when recording or playing back the disc. Carefully inspect the recording surface of the disc before inserting it in the camcorder. If the - Canon HR10 | User Manual - Page 112
. Image data may be corrupted or lost due to memory card defects or exposure to static electricity. Canon Inc. makes no warranties for corrupted or lost data. • Do not turn off the camcorder, disconnect the power source or remove the memory card while the CARD access indicator is flashing. • Do - Canon HR10 | User Manual - Page 113
time, store it in a place free of dust, in low humidity, and at temperatures not higher than 30 °C (86 °F). Cleaning Camcorder Body • Use a soft, dry cloth to clean the camcorder body. Never use chemically treated cloths or volatile solvents such as paint thinner. Pick Up Lens • Remove any dust or - Canon HR10 | User Manual - Page 114
Abroad Power Sources You can use the compact power adapter to operate the camcorder and to charge battery packs in any country with power supply between 100 and 240 V AC, 50/60 Hz. Consult a Canon Service Center for information on plug adapters for overseas use. Playback on a TV Screen You can - Canon HR10 | User Manual - Page 115
other countries. • Macintosh and Mac OS are trademarks of Apple Inc., registered in the U.S. and other countries. • is a trademark of DVD Format/Logo Licensing Corporation. • Manufactured under license from Dolby Laboratories. "Dolby" and the double-D symbol are trademarks of Dolby Laboratories - Canon HR10 | User Manual - Page 116
, BP-218 Battery Pack CA-570 Compact Power Adapter STV-100 Stereo Video Cable DTC-100 D Terminal Cable CTC-100 Component Cable HDMI Cable VCR/DVD recorder TV/HDTV IFC-300PCU USB Cable PictBridgecompatible printers miniSD card miniSD card adapter Card reader/writer Computer Mini - Canon HR10 | User Manual - Page 117
Call or visit your local retailer/dealer for genuine Canon video accessories. You can also obtain genuine accessories for your Canon camcorder by calling: 1-800-828-4040, Canon U.S.A. Information Center. Use of genuine Canon accessories is recommended. This product is designed to achieve - Canon HR10 | User Manual - Page 118
Additional Information Recording and Playback Times The recording and playback times given in the following tables are approximate and vary according to recording mode and charging, recording or playback conditions. The effective usage time of the battery pack may decrease when recording in cold - Canon HR10 | User Manual - Page 119
TL-H37 Tele-converter This Tele-converter lens increases the focal length of the camcorder lens by a factor of 1.5. • The image stabilizer is not as effective when the Tele-converter is attached. • The minimum focusing distance with the TL-H37 - Canon HR10 | User Manual - Page 120
protection for active shooting. SC-2000 Soft Carrying Case A handy camcorder bag with padded compartments and plenty of space for accessories. This mark identifies genuine Canon video accessories. When you use Canon video equipment, we recommend Canonbrand accessories or products bearing the same - Canon HR10 | User Manual - Page 121
Specifications HR10 System Disc Recording System Television System Compatible Media Maximum Recording Time Image Sensor LCD Screen Viewfinder Microphone Lens Lens Configuration Filter Diameter HD AVCHD (all disc types) Video compression: MPEG-4 AVC/H.264 Audio compression: Dolby Digital 2ch SD DVD - Canon HR10 | User Manual - Page 122
(TTL + external distance sensor when set to [INSTANT AF]); Manual focus available Minimum Focusing Distance 1 m (3.3 ft.); 1 cm cards. 3 This camcorder supports Exif 2.2 (also called "Exif Print"). Exif Print is a standard for enhancing the communication between camcorders and printers. By - Canon HR10 | User Manual - Page 123
Power/Others Power supply (rated) Power consumption (SP mode, AF on) Operating temperature Dimensions (W x H x D) Weight (camcorder body only) 7.4 V DC (battery pack), 8.4 V DC (compact power adapter) 5.6 W (viewfinder, normal brightness), 5.7 W (LCD screen, normal brightness) 0 - 40 °C (32 - 104 - Canon HR10 | User Manual - Page 124
rate 49 A Abroad, using the camcorder 114 AEB - Auto exposure bracketing DVD-R DL, DVD-RW 5 Drive mode 79 E Error messages 106 Exposure 60 F File numbers 53 Finalizing the disc 68 Fireworks (recording program 56 Flash 78 Focus Assist functions 48, 59 Automatic 48 Focus priority 80 Manual - Canon HR10 | User Manual - Page 125
Joystick guide 27 L Language 29 LCD screen 31 Light metering mode 81 LP mode 37 M Magnifying a still image 76 Maintenance 113 Manual exposure Recording reminder 22 Remote sensor 25 RESET 101 Reviewing Movies (Record review 40 Still images (Review 49 S Scene editing 65 Screen icons 20 - Canon HR10 | User Manual - Page 126
Additional Information T Telephoto 38 Transfer order 100 Transferring to a computer Movies 97 Still images 97 Tripod 25 Troubleshooting 101 Tv (recording program 57 U USB terminal 97 V VIDEO mode (disc specification 7 Viewfinder 36 Volume 41 VR mode (disc specification 7 W White - Canon HR10 | User Manual - Page 127
service, contact the authorized Canon retail dealer from whom you purchased the camcorder or call the CANON instructions; B) If the equipment is defective as a result of leaking batteries, sand, dirt or water damage; C) If defects or damages are caused by the use of unauthorized parts or by service - Canon HR10 | User Manual - Page 128
in the instruction manual; ii) the use of accessories, attachments, products, supplies, parts or devices with this Canon product that do not conform to Canon specifications or that cause abnormally frequent service problems; iii) repairs or services performed by any party other than a Canon Service - Canon HR10 | User Manual - Page 129
INC. SURAMÉRICA 703 Waterford Way, Suite 400, Miami, FL 33126 USA ASIA CANON HONGKONG COMPANY LTD. 19/F, The Metropolis Tower, 10 Metropolis Drive, Hunghom, Kowloon, Hong Kong The information in this manual is verified as of 1 April 2007. Les informations contenues dans ce manuel ont été vérifi
-
 1
1 -
 2
2 -
 3
3 -
 4
4 -
 5
5 -
 6
6 -
 7
7 -
8
-
9
-
10
-
11
-
12
-
13
-
14
-
15
-
16
-
17
-
18
-
19
-
20
-
21
-
22
-
23
-
24
-
25
-
26
-
27
-
28
-
29
-
30
-
31
-
32
-
33
-
34
-
35
-
36
-
37
-
38
-
39
-
40
-
41
-
42
-
43
-
44
-
45
-
46
-
47
-
48
-
49
-
50
-
51
-
52
-
53
-
54
-
55
-
56
-
57
-
58
-
59
-
60
-
61
-
62
-
63
-
64
-
65
-
66
-
67
-
68
-
69
-
70
-
71
-
72
-
73
-
74
-
75
-
76
-
77
-
78
-
79
-
80
-
81
-
82
-
83
-
84
-
85
-
86
-
87
-
88
-
89
-
90
-
91
-
92
-
93
-
94
-
95
-
96
-
97
-
98
-
99
-
100
-
101
-
102
-
103
-
104
-
105
-
106
-
107
-
108
-
109
-
110
-
111
-
112
-
113
-
114
-
115
-
116
-
117
-
118
-
119
-
120
-
121
-
122
-
123
-
124
-
125
-
126
-
127
-
128
-
129
 |
 |
PUB.DIM-810
English
HD Camcorder
Instruction Manual
Français
Caméscope HD
Manuel d'instruction
Español
Videocámara HD
Manual de Instrucciones
Please read also the
Digital
Video
Software
instruction
manual (on PDF file). Refer to
the installation guide for further
details.
Veuillez lire aussi le manuel
d'instruction
Digital
Video
Software
(sur fichier PDF). Pour
d'autres détails, référez-vous au
guide d'installation.
Lea también el manual de
instrucciones
Digital
Video
Software
(en archivo PDF).
Para mayores detalles, refiérase
a la guía de instalación.