Canon PowerShot A200 PowerShot A200/A100 Camera User Guide
Canon PowerShot A200 Manual
 |
View all Canon PowerShot A200 manuals
Add to My Manuals
Save this manual to your list of manuals |
Canon PowerShot A200 manual content summary:
- Canon PowerShot A200 | PowerShot A200/A100 Camera User Guide - Page 1
©2002 CANON INC. PRINTED IN MALAYSIA Camera User Guide This guide covers both the PowerShot A200 and PowerShot A100 digital cameras. • Please read the "Read this First" section (p.11). • Please refer to the "Software Starter Guide" for information on installing the software and downloading images - Canon PowerShot A200 | PowerShot A200/A100 Camera User Guide - Page 2
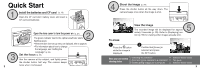
Press the button while the image is displayed. Confirm that [Erase] is selected and press the SET button. When you have finished shooting photos Installing the software Connecting the camera to a computer Downloading images to a computer Software Starter Guide This guide Software Starter Guide 3 - Canon PowerShot A200 | PowerShot A200/A100 Camera User Guide - Page 3
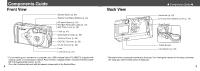
34) Optical Viewfinder Window (p. 33) AF-assist Beam (p. 34) Red-Eye Reduction Lamp (p. 43) Self-Timer Lamp (p. 46) Flash (p. 43) Date Battery Holder (p. 95) Terminal Cover (p. 85) DIGITAL Terminal* (p. 85) DC IN Terminal (p. 99) Lens Lens Cover (p. 27) * For connecting your camera to a computer - Canon PowerShot A200 | PowerShot A200/A100 Camera User Guide - Page 4
Orange: Ready to shoot, (camera shake warning) / charging the flash (at LCD ON). Lower Indicator Yellow: Macro / Infinity modes Flashing Yellow: Focusing difficulty (Although you can press the shutter button, it is recommended to use the focus lock to shoot (p. 50)). 6 About this Camera User Guide - Canon PowerShot A200 | PowerShot A200/A100 Camera User Guide - Page 5
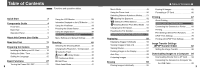
Guide 4 Front View 4 Back View 5 Operation Panel 6 About this Camera User Guide 7 Read this First 11 Preparing the Camera 19 Installing the Battery and CF Card 19 Setting the Date 52 Setting the White Balance 53 Switching Between Photo Effect Modes .. 54 Changing the ISO Speed - Canon PowerShot A200 | PowerShot A200/A100 Camera User Guide - Page 6
Date Battery 95 Using the Optional Battery Kits 96 Camera Care and Maintenance 100 Troubleshooting 101 Specifications 106 Index 113 10 Read this First Accessories This digital camera is designed to perform optimally when used with genuine Canon brand digital camera accessories ("Canon - Canon PowerShot A200 | PowerShot A200/A100 Camera User Guide - Page 7
in the country of sale. If a problem arises while the camera is in use abroad, please convey it back to the country of sale before proceeding with a warranty claim to a Canon Customer Support Help Desk. For Canon Customer Support contacts, please see the Canon Limited Warranty supplied with - Canon PowerShot A200 | PowerShot A200/A100 Camera User Guide - Page 8
to keep the date battery used in the camera away from guide. Disassembly or alteration may result in high-voltage electrical shock. Internal inspections, alterations and repairs should be conducted by qualified service personnel authorized by your camera distributor or a Canon Customer Support - Canon PowerShot A200 | PowerShot A200/A100 Camera User Guide - Page 9
batteries, use only Canon AA-size NiMH batteries and the charger recommended for use with these batteries. Use of another charger may cause batteries when using the compact power adapter to charge the battery pack or power the camera. • Do not store the equipment in humid or dusty areas. Storage in - Canon PowerShot A200 | PowerShot A200/A100 Camera User Guide - Page 10
of time, remove the batteries from the camera or battery charger and store the equipment in a safe place. Storing the camera for extended periods with batteries installed will run down the battery and may damage the camera. Preparing the Camera Installing the Battery and CF Card Insert two - Canon PowerShot A200 | PowerShot A200/A100 Camera User Guide - Page 11
have been edited on another camera or with another company's software may cause the 20 camera to operate incorrectly. We recommend that you use the optional AC Adapter Kit ACK800 to power the camera during long usage sessions (p. 99). The optional battery charger kit lets you use rechargeable - Canon PowerShot A200 | PowerShot A200/A100 Camera User Guide - Page 12
and store them in a safe place. Batteries may leak and damage the camera if left installed during prolonged periods of non-use. WARNING Never use damaged batteries or batteries whose outer seal is completely or partially missing or peeled off, as - Canon PowerShot A200 | PowerShot A200/A100 Camera User Guide - Page 13
time. Press or button to select the item to be set. Press or button to set the date and time. ● Preparing the Camera ● Setting the Language Sets the display language for LCD monitor menus and messages. 1 Press the MENU button. The Rec. or Replay menu will display. 6 Press - Canon PowerShot A200 | PowerShot A200/A100 Camera User Guide - Page 14
and CF card. • Soft case appearance may differ in some regions. Basic Functions Turning the Power ON / OFF Shooting Mode 1 Open the lens cover. The camera powers up in Shooting mode (still). Close the lens cover. The power goes off. Replay Mode 1 Press the button until the image is displayed on - Canon PowerShot A200 | PowerShot A200/A100 Camera User Guide - Page 15
the LCD monitor is turned on and the "Change the Batteries" message appears, the LCD monitor may not automatically turn on the next time the camera is started. • When the LCD monitor is set to On (no information display) or Off, shooting information appears for approximately 6 seconds when you take - Canon PowerShot A200 | PowerShot A200/A100 Camera User Guide - Page 16
to On or affix the camera to a tripod when the upper indicator flashes orange and the camera shake warning icon ( ) Macro / Infinity Movie Recording Mode (red) Digital Zoom A200 x1.3 x1.6 x2.0 x2.5 x3.2 x4.0 Setting* A100 x1.3 x1.6 x2.0 x2.5 x3.2 Camera Shake Warning Low Battery p. 46 p. - Canon PowerShot A200 | PowerShot A200/A100 Camera User Guide - Page 17
no. (Replay image no. / total) • Shooting date / time • Compression ( ) • Resolution ( Display. Shooting Mode Exposure Compensation White Balance Photo Effect Flash Macro / Infinity Resolution (Movies) attached. A JPEG file not supported by "Design rule for Camera File system" standards. RAW - Canon PowerShot A200 | PowerShot A200/A100 Camera User Guide - Page 18
(this may however, make it more difficult for the camera to focus). 34 Reviewing an Image Right After Shooting The images that have been Digital Zoom When the LCD monitor is on, you can digitally zoom in on a subject. Images can be zoomed up to 4 times (PowerShot A200), or 3.2 times (PowerShot A100 - Canon PowerShot A200 | PowerShot A200/A100 Camera User Guide - Page 19
Set the details after pressing the SET button. , , , or modes mode 2 Press or button to select Rec. / Play or the Set up menu. 36 e.g. PowerShot A100 5 Press the MENU button. Menu Display Change the Menu ● Basic Functions ● Set and Confirm End Open the lens cover. Rec. Menu ON Press the - Canon PowerShot A200 | PowerShot A200/A100 Camera User Guide - Page 20
Red) Resolution (Movies) 320 × 240* / 160 × 120 Compression Superfine / Fine* / Normal ISO Speed PowerShot A200 50* / 100 / 200 / 400 / AUTO PowerShot A100 64* / 100 / 200 / 400 / AUTO AiAF On* / Off Digital Zoom On* / Off Review Blue Menu (Yellow) Date / Time Sets the date / time p. - Canon PowerShot A200 | PowerShot A200/A100 Camera User Guide - Page 21
this camera. Auto The camera automatically makes most of the settings for you. Manual You can manually adjust a CF card. The (Fine) settings provide adequate quality for standard shots. Resolution PowerShot A200 PowerShot A100 (Large) 1600 × 1200 pixels 1280 × 960 pixels (Medium) 1024 × 768 - Canon PowerShot A200 | PowerShot A200/A100 Camera User Guide - Page 22
3 Press the MENU button. e.g. PowerShot A100 Compression See "Functions Available in Each Shooting Red-Eye The flash may fire automatically Reduction, as required by the light level. Auto The red at night or in rooms with artificial lighting. The red-eye reduction lamp fires with each shot. Use - Canon PowerShot A200 | PowerShot A200/A100 Camera User Guide - Page 23
in macro mode. Subjects framed in the viewfinder when in macro mode may not appear in the final image as intended due to the parallax problem. The recordable area at the closest focal distance PowerShot A200: approx. 46 x 34mm (1.81 x 1.34 in.) PowerShot A100: approx. 47 x 35mm (1.85 x 1.38 in.) 45 - Canon PowerShot A200 | PowerShot A200/A100 Camera User Guide - Page 24
camera will shoot continuously when the shutter button is pressed. The shooting speed is as follows.* PowerShot A200: approx. 2 images per second PowerShot A100: approx. 3 images per second * Large / Fine, LCD monitor off mode. (These figures reflect standard Canon software that came with your camera - Canon PowerShot A200 | PowerShot A200/A100 Camera User Guide - Page 25
individual movie clips (A200: approx. 20 frames / second, A100: approx. 15 frames / second) PowerShot A200: approx. 9 seconds PowerShot A100: approx. 14 seconds PowerShot A200: approx. 26 seconds PowerShot A100: approx. 30 seconds (based on standard conditions established by Canon) These items may - Canon PowerShot A200 | PowerShot A200/A100 Camera User Guide - Page 26
50 ● Shooting ● Switching Between Autofocus Modes While the auto focus function is set to AiAF, you can change to the auto focus center point. The camera automatically selects the On AF frame to focus on according to the shooting conditions. Focus is selected for the center of the AF frame. This - Canon PowerShot A200 | PowerShot A200/A100 Camera User Guide - Page 27
set to match the light source, the camera can reproduce colors more accurately. Auto Daylight Cloudy Tungsten Fluorescent Fluorescent H The camera sets the white balance automatically according to SET button. • The white balance cannot be set when (sepia) or (B / W) photo effect is selected. 53 - Canon PowerShot A200 | PowerShot A200/A100 Camera User Guide - Page 28
the photo effect setting screen appears. 2 Press or button to select the photo effect. • If the LCD monitor is on, you can check the photo effect selected, the camera automatically adjusts ISO as shown below. PowerShot A200: ISO 50 - 150 PowerShot A100: ISO 64 - 150 e.g. PowerShot A100 2 Press - Canon PowerShot A200 | PowerShot A200/A100 Camera User Guide - Page 29
CF cards. This is useful if you are planning to download images from the cards to your computer, since it helps assigned numerical file names over the range 0001 to 9900. The camera stores these files into folders, which are assigned folder numbers Flash Red-eye reduction, Auto p. 43 On Continues on - Canon PowerShot A200 | PowerShot A200/A100 Camera User Guide - Page 30
Photo Effect p. 54 ISO Speed p. 55 Auto Focus Frame p. 51 Digital Zoom p. 35 AF-assist Beam p. 34 : Default settings : Available : Available only for the first image : The ISO speed is automatically set between the equivalent of 50 and 150 (PowerShot A200) or 64 and 150 (PowerShot A100 - Canon PowerShot A200 | PowerShot A200/A100 Camera User Guide - Page 31
to go to index replay. Viewing Movies ● Replaying ● Replay movies you shot. 1 Press or button to select the movie. A movie displays with the instructions on it. Pausing and Resuming Play • Press the SET button to pause the movie. Press it again to resume play. Fast Forwarding / Rewinding • Press - Canon PowerShot A200 | PowerShot A200/A100 Camera User Guide - Page 32
orientation. 3 Press the MENU button. Movie images cannot be rotated. If an image has been rotated in the camera before being loaded onto a computer, the particular software in use will determine whether or not the rotation settings are retained. 62 Auto Play ● Replaying ● Use this feature - Canon PowerShot A200 | PowerShot A200/A100 Camera User Guide - Page 33
● Replaying ● Protecting Images Use the protect feature to protect important images from accidental erasure. 1 In the [Play] Menu, select (Protect) and press the SET button. See "Selecting Menus and Settings" (p. 36). 2 Press or button to select the image you want to protect and press the SET - Canon PowerShot A200 | PowerShot A200/A100 Camera User Guide - Page 34
participating photo lab to have them printed out later. Refer to the System Map included with this camera kit for printer information. * Digital Print compliant software is needed for actually transferring the images. Optional Canon direct print function compliant printer Printed images Photo lab - Canon PowerShot A200 | PowerShot A200/A100 Camera User Guide - Page 35
the type of printer you have, it may or may not use rechargeable batteries. Refer to your printer's user guide. Refer to the System Map included with this camera kit for printer information. Please see your printer's user guide for instructions on loading paper and installing an ink cassette. 69 - Canon PowerShot A200 | PowerShot A200/A100 Camera User Guide - Page 36
on. If the printer is correctly connected, the icon will appear on the LCD monitor. to Printer DIGITAL Terminal Direct Interface Cable DIF-100 70 When disconnecting the cable from the camera's Digital terminal, be sure to hold the connector at its sides and pull it straight out. Movies cannot - Canon PowerShot A200 | PowerShot A200/A100 Camera User Guide - Page 37
eight copies of the same image on one page. Borders Prints right to the edge of the Borderless page. Bordered Prints with a border. Date Prints the image's creation date. *This setting is only available for Card-Size paper. 2 Set the number of copies with or button. You can set from 1 to 99 - Canon PowerShot A200 | PowerShot A200/A100 Camera User Guide - Page 38
specifying the printing area Please set the Print Style (Image, Borders and Date) first (p. 72). Printing area can only be specified with the image. • When you close the Print mode, i.e. - turn the camera off - change the camera mode - after setting the printing area, you select [Cancel] and - Canon PowerShot A200 | PowerShot A200/A100 Camera User Guide - Page 39
printing images all at once, on optional Canon direct print function compliant printers or at participating photo labs. Selecting Images for Printing 1 Display camera. These settings will be overwritten by any print marks set by your camera. The output of some digital printers or photo lab services - Canon PowerShot A200 | PowerShot A200/A100 Camera User Guide - Page 40
by the shooting date. A maximum of 998 images can be set per CF card. The number of copies cannot be set when the [Print Type] is set to [Index]. Only one copy can be set at [Index]. Print settings can also be assigned to images with the bundled software programs on a computer - Canon PowerShot A200 | PowerShot A200/A100 Camera User Guide - Page 41
print type is set to [Index], the date will not print even if the [Date] setting is set to [On] in settings were set has been deleted before restarting. - If there was very little free space on the CF cancelled because the camera batteries became discharged, please power the camera with a household - Canon PowerShot A200 | PowerShot A200/A100 Camera User Guide - Page 42
DPOF Transfer Order) Setting the Image Transfer Using the camera, you can specify images you wish to transfer and attach to e-mails. (Please use the supplied software for actually transferring images.) These settings are compatible with the Digital Print Order Format (DPOF) standards. The mark will - Canon PowerShot A200 | PowerShot A200/A100 Camera User Guide - Page 43
between models, please consult the manual for your equipment. ● Downloading Images to a Computer ● Connecting the Camera to a Computer Via the USB Cable Installing the included software in advance allows you to download images automatically simply by connecting the camera to the computer with the - Canon PowerShot A200 | PowerShot A200/A100 Camera User Guide - Page 44
For more information about what to do after connecting your camera, please refer the Software Starter Guide. 86 List of Menu Options and Messages Rec. Menu (1/2) Item / Menu Screen Resolution (Still images) e.g. PowerShot A100 Resolution (Movies) Setting Content Sets the number of pixels used - Canon PowerShot A200 | PowerShot A200/A100 Camera User Guide - Page 45
a CF card (excluding protected images) (p. 65). Transfer Order Sets which images and how many copies will be printed on a direct print function compliant printer or a photo lab service (p. 76). Sets the images that will be transferred with your e-mail software (p. 82). 89 - Canon PowerShot A200 | PowerShot A200/A100 Camera User Guide - Page 46
Messages ● Resetting the Settings to Default You can reset all of the menu and button operation settings to default except for [Date / Time] and [Language]. 1 Turn on the camera. Can be performed from shooting, replay or any other mode. 2 Press the MENU button for longer than 5 seconds. The message - Canon PowerShot A200 | PowerShot A200/A100 Camera User Guide - Page 47
attempted to shoot or replay with no CF card installed. : You attempted to shoot with no CF card installed. : There is something wrong with the CF card message recurs frequently, the camera may be damaged. Note down the error number [xx] and take the camera to a Customer Support Help Desk. If this - Canon PowerShot A200 | PowerShot A200/A100 Camera User Guide - Page 48
not installed correctly camera. Ink Cassette Error : There is a problem camera, or in an incompatible format, or downloaded to and edited on a computer. Appendices Replacing the Date Battery If the LCD monitor displays the Set Date / Time menu when you turn on the camera, this means that the Date - Canon PowerShot A200 | PowerShot A200/A100 Camera User Guide - Page 49
Four batteries are supplied with the Battery and Charger Kit CBK100, however, only two batteries are used for this camera. The indicator flashes while charging, then comes on solid when charging is finished. This charger can be used only to charge Canon AA-size NiMH batteries. Please do not attempt - Canon PowerShot A200 | PowerShot A200/A100 Camera User Guide - Page 50
battery leakage. Remove batteries from the camera or charger and store in a dry cool location when not in use. It takes approximately 110 minutes (for two) and 220 minutes (for four) for the charger to fully recharge the batteries (as determined by testing at Canon facilities). Please do not charge - Canon PowerShot A200 | PowerShot A200/A100 Camera User Guide - Page 51
camera or lens with cleaners that contain organic solvents. If you are unable to remove the dirt from the lens, contact the Canon Customer Support the camera, as these may cause damage or deformation. 100 Troubleshooting ● Appendices ● Problem Cause The camera doesn't The camera is turned - Canon PowerShot A200 | PowerShot A200/A100 Camera User Guide - Page 52
a steady orange. The CF card is full. • Insert a new CF card. • Download images to your computer, then erase them from the card to free up more space Canon AA-size NiMH batteries. (For the information about alkaline batteries, see "Proper Battery Handling" (p. 21).) 102 ● Appendices ● Problem - Canon PowerShot A200 | PowerShot A200/A100 Camera User Guide - Page 53
● Appendices ● Problem Shots are blurry or unfocused. The subject comes out underexposed (too dark). Cause Solution The camera was moving when you took • Hold the camera steady when shooting. the shot. Autofocus function hampered by obstruction to AF-assist beam. • Be careful not to block the - Canon PowerShot A200 | PowerShot A200/A100 Camera User Guide - Page 54
to change without notice. PowerShot A200 PowerShot A100 Camera Effective Pixels Approx. 2 million Approx. 1.2 million Image Sensor 1 / 3.2 in. CCD (Total number of pixels: approx. 2.1 million) 1 / 3.2 in. CCD (Total number of pixels: approx. 1.3 million) Lens Digital Zoom Optical Viewfinder - Canon PowerShot A200 | PowerShot A200/A100 Camera User Guide - Page 55
PowerShot A200 PowerShot A100 maximum of approx. 10) / auto play / printing with Card Photo Printer CP-100 or CP-10 (Direct Print function) English / digital camera supports Exif 2.2 (also called "Exif Print"). Exif Print is a standard for enhancing the communication between digital cameras - Canon PowerShot A200 | PowerShot A200/A100 Camera User Guide - Page 56
. 63 sec. 49 sec. 126 sec. 100 sec. 263 sec. * The shooting time for 1 movie PowerShot A200: approx. 9 seconds, PowerShot A100: approx. 14 seconds PowerShot A200: approx. 26 seconds, PowerShot A100: approx. 30 seconds The figures in the table reflect recording times for repeated shooting. 110 - Canon PowerShot A200 | PowerShot A200/A100 Camera User Guide - Page 57
°C (32 - 95 °F) Dimensions Diameter: 14.5 mm (0.6 in.) Length: 50 mm (2 in.) Weight Approx. 27 g (0.95 oz.) Battery Charger CB-3AH Supplied with the optional Battery and Charger Kit CBK100. Rated Input 100 - 240 V AC (50 / 60 Hz), 8W Rated Output 1.6 V DC / 2 A Charging Time Approx. 110 - Canon PowerShot A200 | PowerShot A200/A100 Camera User Guide - Page 58
and Estimated Capacities .... 110 Formatting 66 Installing 19 Compression 41 ● Index ● Continuous Mode 46 D Date 24 Default Settings 38, 91 Digital Zoom 35 Downloading Images to a Computer Connecting the Camera to a Computer Via the USB Cable 85 Downloading Directly from a CF Card ... 84 - Canon PowerShot A200 | PowerShot A200/A100 Camera User Guide - Page 59
49 Replay 61 114 P Photo Effect 54 Play Menu 89 Power Printing About Printing 67 Connecting the Camera to a Printer .... 69 DPOF Red-Eye Reduction 43, 44 Replacing the Date Battery Date/Time 90 Digital Zoom 88 File No. Reset 88 Format 90 Resetting the Settings to Default ........ 91 Review - Canon PowerShot A200 | PowerShot A200/A100 Camera User Guide - Page 60
camera, the software, the CompactFlashTM cards (CF cards), personal computers, peripheral devices, or use of non-Canon CF cards. Trademark Acknowledgments • Canon and PowerShot are trademarks of Canon and other countries. • Microsoft, Windows, and Windows NT are either registered trademarks or - Canon PowerShot A200 | PowerShot A200/A100 Camera User Guide - Page 61
installation. This equipment generates, uses and can radiate radio frequency energy and, if not installed and used in accordance with the instructions technician for help. The cables with the ferrite core provided with the digital camera must be used with this equipment in order to comply with Class
-
 1
1 -
 2
2 -
 3
3 -
 4
4 -
 5
5 -
 6
6 -
 7
7 -
8
-
9
-
10
-
11
-
12
-
13
-
14
-
15
-
16
-
17
-
18
-
19
-
20
-
21
-
22
-
23
-
24
-
25
-
26
-
27
-
28
-
29
-
30
-
31
-
32
-
33
-
34
-
35
-
36
-
37
-
38
-
39
-
40
-
41
-
42
-
43
-
44
-
45
-
46
-
47
-
48
-
49
-
50
-
51
-
52
-
53
-
54
-
55
-
56
-
57
-
58
-
59
-
60
-
61
 |
 |
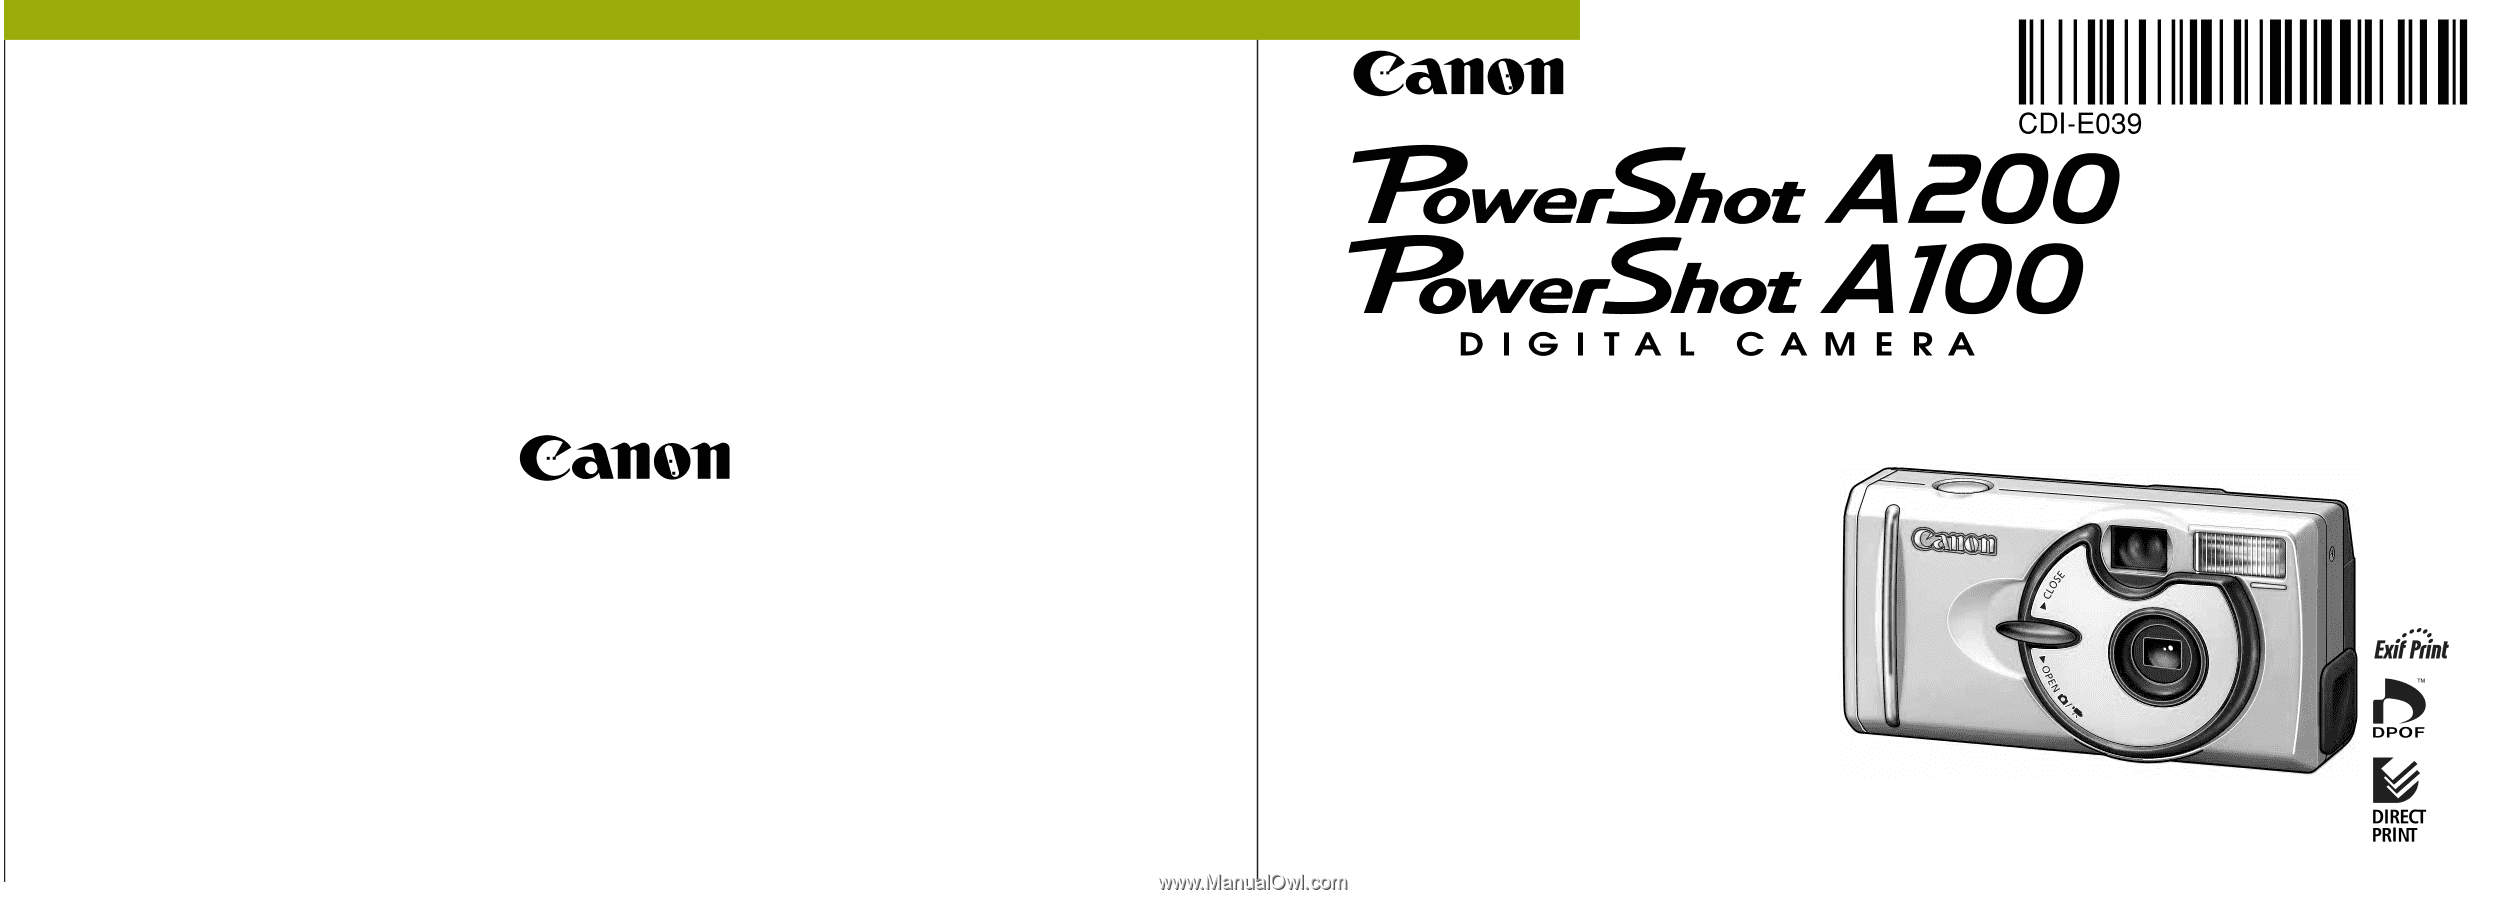
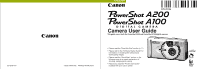
Camera User Guide
This guide covers both the PowerShot A200 and PowerShot A100 digital cameras.
• Please read the "Read this First" section (p.11).
• Please refer to the "Software Starter Guide" for
information on installing the software and
downloading images.
• Please read the "Quick Start" section on the
following page for a simple explanation of
shooting, replaying and erasing.
• Please also read the "Printer User Guide"
included with your Canon printer.
ENGLISH
CDI-E039-010
©
2002 CANON INC.
PRINTED IN MALAYSIA