Canon XC10 User Manual
Canon XC10 Manual
 |
View all Canon XC10 manuals
Add to My Manuals
Save this manual to your list of manuals |
Canon XC10 manual content summary:
- Canon XC10 | User Manual - Page 1
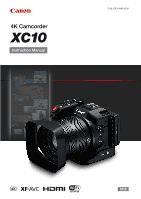
4K Camcorder Instruction Manual PUB. DIE-0469-000A - Canon XC10 | User Manual - Page 2
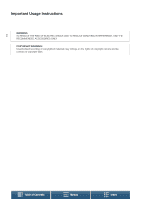
Important Usage Instructions WARNING 2 TO REDUCE THE RISK OF ELECTRIC SHOCK AND TO REDUCE ANNOYING INTERFERENCE, USE THE RECOMMENDED ACCESSORIES ONLY. COPYRIGHT WARNING: Unauthorized recording of copyrighted materials may infringe on the rights of copyright owners and be contrary to copyright - Canon XC10 | User Manual - Page 3
and SDXC Logos are trademarks of SD-3C, LLC. • Canon is an authorized licensee of the CFast 2.0™ trademark, which logo are trademarks of the Wi-Fi Alliance. • WPS as used on the camcorder's settings, onscreen displays and in this manual signifies Wi-Fi Protected Setup. • The Wi-Fi Protected Setup - Canon XC10 | User Manual - Page 4
results when recording video at either 4K or HD quality, or taking photos of up to approx. 12 megapixels. The XC10 continues Canon's lineage of high-performance camcorders with robust features designed to help articulate the discerning professional's creative expression. 4 Exceptional Video and - Canon XC10 | User Manual - Page 5
the amount of light by 3 stops, allowing you to better capture your subject in the desired depth of field (A 134). • Push AF While the camcorder is in manual focus mode, you can use Push AF to switch the camcorder 5 temporarily to autofocus mode (A 71). • HD playback from 4K video When you - Canon XC10 | User Manual - Page 6
9 About this Manual 9 Conventions Used in this Manual 9 Supplied Accessories 11 Names of Parts 12 Viewfinder unit 17 RC-6 Remote Controller 17 2. Preparations 18 Charging the Battery Pack 18 Preparing the Camcorder 21 Attaching the Lens Hood 21 Using the Viewfinder Unit 21 Using the LCD Panel - Canon XC10 | User Manual - Page 7
Microphone) 82 Low Cut Filter ( HD-sized Clip from a 4K Clip 106 Capturing Photos from 4K Clips (4K Frame Grab) and HD Using Wi-Fi 119 Wi-Fi Protected Setup (WPS) 119 Searching for Access Points 120 Manual Setup 122 Viewing and Changing Wi-Fi Settings 123 Browser Remote: Controlling the Camcorder - Canon XC10 | User Manual - Page 8
8. Additional Information 131 Menu Options 131 FUNC. Menu 131 Setup Menus 133 Troubleshooting 140 List of Messages 146 8 Handling Precautions 150 Maintenance/Others 153 Optional Accessories 154 Specifications 156 Reference Tables 159 Index 161 Table of Contents Menus Index - Canon XC10 | User Manual - Page 9
9 About this Manual Thank you for purchasing the Canon XC10. Please read this manual carefully before you use the camcorder and retain it for future reference. Should the camcorder fail to operate correctly, refer to Troubleshooting (A 140). Conventions Used in this Manual • IMPORTANT: Precautions - Canon XC10 | User Manual - Page 10
About this Manual The arrow > is used to abbreviate menu selections. For a detailed explanation on how to use the menus, refer to Using the MENU function cannot be used. For details refer to Basic Operation of the Camcorder (A 25) and Selecting the Resolution (Recording in 4K or HD) (A 48). - Canon XC10 | User Manual - Page 11
The following accessories are supplied with the camcorder. CA-570 Compact Power Adapter (incl. power cord) LP-E6N Battery Pack (incl. protective cover) Supplied Accessories 11 Lens Hood Viewfinder Unit (incl. viewfinder unit cover) Lens Cap RC-6 Remote Controller (incl. CR2032 lithium - Canon XC10 | User Manual - Page 12
Names of Parts Names of Parts 12 1 23 4 5 6 7 8 9 10 11 1 Focus ring (A 66) 2 Zoom ring (A 65) 3 FOCUS (focus mode) switch (A 66) 4 Shoulder strap mount (A 24) 5 MIC (microphone) terminal (A 78) 6 HDMI OUT terminal (A 112) 7 USB terminal (A 86, 116) 8 DC IN terminal (A 18) 9 DISP. (display) - Canon XC10 | User Manual - Page 13
1 2 3 Names of Parts 13 1 Air intake vent (A 47) 2 Shoulder strap mount (A 24) 3 × (headphone) terminal (A 84) 4 5 4 Tally lamp (A 38) 5 Remote sensor (A 35) Table of Contents 6 6 Lens hood (A 21) Menus Index - Canon XC10 | User Manual - Page 14
Names of Parts 2 14 1 3 4 5 6 1 LCD touch screen (A 23) 2 MAGN. (magnification) button (A 69)/ Assignable button 3 (A 97) 3 MENU button (A 28) 4 Joystick (A 28) 5 ACCESS indicator (A 31) 7 8 9 10 6 CARD OPEN (open recording media slot cover) lever (A 31) 7 Recording media slot cover 8 CFast - Canon XC10 | User Manual - Page 15
E2 GPS Receiver or optional EXseries Speedlite for EOS cameras. 3 ON/OFF button (A 27) 4 video clips, this button is referred to in this manual as the START/ STOP button; when you are shooting (playback) button (A 100) 8 POWER/CHG (power/battery charging) indicator (A 18) 9 Shooting mode dial (A - Canon XC10 | User Manual - Page 16
Names of Parts 16 1 3 5 6 2 4 1 Battery compartment 2 Battery release latch (A 18) 3 BATT. OPEN (open battery compartment) switch (A 18) 4 Battery compartment cover (A 18) 5 Lens hood mount index (A 21) 6 Tripod socket (A 24) Table of Contents Menus Index - Canon XC10 | User Manual - Page 17
Names of Parts Viewfinder unit 1 2 3 17 1 Viewfinder unit latch (A 21) 2 Eye cup RC-6 Remote Controller 4 5 4 Delay switch (A 35) 5 Battery compartment cover 3 Dioptric adjustment lever (A 22) 6 6 Transmit button Table of Contents Menus Index - Canon XC10 | User Manual - Page 18
18 Charging the Battery Pack The camcorder can be powered with a battery pack or directly using the compact power adapter. The first time you use the camcorder, charge the battery pack. For approximate charging times and recording/playback times with a fully charged battery pack, refer to - Canon XC10 | User Manual - Page 19
off the camcorder. After a moment, the POWER/CHG (battery pack charging) indicator POWER/CHG indicator will turn on in red (battery pack charging). The red POWER/CHG indicator will go out when the 19 battery pack is fully charged. • If the indicator flashes, refer to Troubleshooting (A 140 - Canon XC10 | User Manual - Page 20
CHG indicator has gone out before restoring the power supply. • If remaining battery time is an issue, you can power the camcorder using the compact power adapter so the battery pack will not be consumed. • Charged battery packs continue to discharge naturally. Therefore, charge them on the day of - Canon XC10 | User Manual - Page 21
basic preparations of the camcorder, such as attaching the viewfinder unit and adjusting the screen and grip. 21 Attaching the Lens Hood Attach the lens hood to protect the lens and reduce the amount of stray light that may hit the lens. Place the lens hood on the front of the lens so that the hood - Canon XC10 | User Manual - Page 22
ቢ ቤ Removing the Viewfinder Unit 1 Turn the LCD panel 90 degrees upward. 2 Open the viewfinder unit latch and remove the viewfinder unit from the camcorder. • Make sure to open the latch all the way before removing the unit. 3 Attach the viewfinder unit cover, hook the viewfinder unit latch to the - Canon XC10 | User Manual - Page 23
Camcorder 4 Attach the viewfinder unit cover. 23 ቢ ባ ቤ NOTES • When you are not using the viewfinder unit, make sure to attach the viewfinder unit cap to the unit. Using for high- and low-angle shooting. NOTES • About the LCD screen: The screen is produced using extremely high-precision - Canon XC10 | User Manual - Page 24
toward or away from the lens to give you a convenient grip angle. 24 While firmly holding the camcorder, rotate the grip to camcorder when attaching or adjusting the shoulder strap. Using a Tripod You can mount the camcorder on a tripod with a mounting screw of 6.5 mm (0.26 in.) or smaller. Using - Canon XC10 | User Manual - Page 25
of a button, the camcorder can easily switch between recording mode and playback mode. For details on playing back your recordings, refer to Playback (A 100). Operating modes: Hold the ^ button pressed down. Operating Mode Icons Used in This Manual This instruction manual uses icons to indicate - Canon XC10 | User Manual - Page 26
Place two fingers on the screen and move them apart. Used on an index screen during playback. Pinch your fingers out to start playing back the clip. Also used during photo playback to zoom in on the photo. IMPORTANT • The camcorder features a capacitive touch screen. In the following cases, you may - Canon XC10 | User Manual - Page 27
• You can adjust the date and time later on with the [ System Setup] > [1] > [Date/Time] setting. • When you do not use the camcorder for about 3 months, the built-in rechargeable lithium battery may discharge completely and the date and time setting may be lost. In such case, recharge the built-in - Canon XC10 | User Manual - Page 28
, touch [$] to adjust for daylight saving time. 5 Touch [X] to close the menu. Using the MENU Button and Joystick You can navigate some of the camcorder's menus and screens using the MENU button and joystick instead of using the touch panel. This is convenient, for example, when the viewfinder unit - Canon XC10 | User Manual - Page 29
and Setup Menus The camcorder's functions and settings can be adjusted using the FUNC. menu and setup menus. For details about the available menu options and settings, refer to the appendix Menu Options (A 131). In this manual, navigating the menus is explained using mainly the touch panel controls - Canon XC10 | User Manual - Page 30
[X] to close the menu at any time. • You can touch [K] to return to the previous screen. If you changed a setting, it will be applied. To use the joystick 1 and modes only: Push the joystick (Ý/Þ) to select [FUNC.] and then press the joystick. 2 Push the joystick (Ý/Þ) to select [MENU] and then - Canon XC10 | User Manual - Page 31
Preparing Recording Media Preparing Recording Media The camcorder records 4K clips to CFast cards, and HD clips and photos to . SD, / SDHC and 0 SDXC memory cards. Initialize recording media (A 33) when you use them with this camcorder for the first time. 31 Compatible Recording Media For the - Canon XC10 | User Manual - Page 32
• CFast cards have front and back sides that are not interchangeable. Inserting a CFast card facing the wrong direction can cause a malfunction of the camcorder. Be sure to insert the CFast card as described in the procedure above. Removing a CFast card 1 Wait until the ACCESS indicator is off - Canon XC10 | User Manual - Page 33
To write-protect the SD card, set the switch to the LOCK position. Initializing the Recording Media The first time you use any recording media with this camcorder, initialize it first. You can also initialize a recording media to permanently delete all the data it contains. When initializing an SD - Canon XC10 | User Manual - Page 34
to cancel the operation while it is 34 in progress. You can use the SD card but all data will be erased. 6 When the confirmation Data on a Recording Media Some actions, such as suddenly turning off the camcorder or removing the recording media while data is being recorded, can cause data - Canon XC10 | User Manual - Page 35
. For details about wirelessly controlling the camcorder, refer to Browser Remote: 35 Controlling the Camcorder from a Network Device (A 125). Operating modes: Inserting the Battery Insert the supplied lithium button battery into the remote controller before use. 1 Press the tab in the direction - Canon XC10 | User Manual - Page 36
, or when it can only be operated at very close range, replace the battery. • The supplied remote controller may not operate correctly when the remote sensor is located under strong light sources or direct sunlight. • The camcorder may not operate correctly when a flash fires. If a flash is being - Canon XC10 | User Manual - Page 37
cap. 2 Attach the lens hood (A 21) and, if necessary, attach the viewfinder unit (A 21). 3 Attach a charged battery pack to the camcorder (A 18). 4 Insert recording media as necessary (A 31, 33). • Insert a CFast card to record 4K clips; insert an SD card to record HD clips and photos. 5 Adjust the - Canon XC10 | User Manual - Page 38
Photos Basic Recording This camcorder uses the same button to record video clips and take photos. In this manual, when you are recording to stop the recording. • The clip is recorded on the recording media and the camcorder enters record standby mode. The tally lamp will also go out. 6 Press and hold - Canon XC10 | User Manual - Page 39
Canon shall not be liable for any loss or corruption of data. NOTES • The built-in microphone may pick up operation noise from the camcorder while recording. Using resolution is set to 4K or HD. When the resolution is set to 4K, the photo size will be 3840x2160; when set to HD, 1920x1080. NOTES • - Canon XC10 | User Manual - Page 40
[ 4:3 4000x3000] Shooting Continuous Photos (Drive Mode) Using drive mode, you can take a burst of photos also be applied to the entire series. The camcorder will shoot at a rate of approx. 3.8 shots the zoom position and other camera settings, the interval between shots may not be - Canon XC10 | User Manual - Page 41
of the START/STOP button lights up in red. • The time code displayed on the Browser Remote screen is the same as on the camcorder. • Press [START/STOP] the application's screens (you will still be able to use the controls on the camcorder). Press [D] to lock the application's controls; press [C] - Canon XC10 | User Manual - Page 42
the shooting mode and settings in the FUNC. menu and setup menus. 42 Some icons that appear in mode also appear in mode. If the camcorder is in mode and you do not find an icon in these tables for mode, refer to Icons that appear during mode (A 45). Operating modes - Canon XC10 | User Manual - Page 43
56 @, D 0.0ft Focus mode 66 • While focusing in manual focus mode, the estimated distance to the subject will be displayed 69 ND ND filter 134 ¬, , Light metering mode 60 z, { Zebra patterns E2 GPS Receiver is connected to the camcorder. Browser Remote: in white - preparations - Canon XC10 | User Manual - Page 44
is displayed, replace the battery pack with a fully charged one. • Depending on the conditions of use, the actual battery charge may not be Description A 4K, HD Button to open the [4K/HD] submenu and currently selected recording resolution (4K/HD). 48 When the camcorder's internal temperature - Canon XC10 | User Manual - Page 45
White balance 61 , , , , , , , Looks 63 , ª, ¬, « Light metering mode 60 , p, Drive mode 40 Orientation detection 92 Icons on the right side will also be displayed. Camcorder shake warning - • If this icon appears, we recommend stabilizing the camcorder, for example, by mounting - Canon XC10 | User Manual - Page 46
- focus and exposure are locked (during auto focus mode); exposure is locked (manual focus mode). • In yellow (flashing) - focus is not locked. If the mode, it will start flashing in yellow. • In white (flashing) - the camcorder is attempting to focus on the subject. , j, , G, , , Button to - Canon XC10 | User Manual - Page 47
be activated automatically (in that case, ` will appear next to the b icon). When the camcorder's temperature has decreased sufficiently, the fan will be turned off. Use this setting when you do not want the camcorder to pick up the operating sound of the cooling fan. [i On]: The fan runs at - Canon XC10 | User Manual - Page 48
.97P / 305 Mbps [3 Recording Setup] [1] [HD Recording] 59.94P / 50 Mbps NOTES • For details on the signal output from the HDMI OUT terminal, refer to Video Output Configuration (A 110). • When the resolution is set to 4K, you can use the [v Camera Setup] > [2] > [Rolling Shutter Reduction] setting - Canon XC10 | User Manual - Page 49
speed, ISO speed or gain. 2 Turn the control dial to adjust the setting, if available. Manual Exposure (n) With this mode, you have full access to menus, settings and other functions. When shooting, you can use the control dial to adjust the aperture, shutter speed or ISO speed/gain*. This mode - Canon XC10 | User Manual - Page 50
Shooting Modes To select the ISO speed or gain 1 Touch [K]. 2 Open the [ISO/Gain] submenu. 50 [v Camera Setup] > [2] > [ISO/Gain] 3 Select the function to adjust. [v Camera Setup] [2] [ISO/Gain] [ISO] Available aperture settings Aperture Clips (1/4-stop increments) F2.8, F3.2, F3.4, F3.7, F4 - Canon XC10 | User Manual - Page 51
88), or the look is set to [ Wide DR] or [ Canon Log] (A 63), the lowest available ISO speed is 500 and the lowest using the FUNC. menu or Browser Remote application (A 54). • For available settings, refer to Manual Exposure (n) (A 50). NOTES • Depending on the brightness of the subject, the camcorder - Canon XC10 | User Manual - Page 52
the shutter speed. • You can also adjust the shutter speed using the FUNC. menu or Browser Remote application (A 54). • For available settings, refer to Manual Exposure (n) (A 50). NOTES • Depending on the brightness of the subject, the camcorder will not be able to control the exposure and the - Canon XC10 | User Manual - Page 53
other modes. - White points may appear on the screen. - Autofocus may not work as well as in other modes. In such case, adjust the focus manually. • [ Fireworks]/[ Low Light]: To avoid camcorder blur (blur due to the camcorder moving) we recommend using a tripod. Table of Contents Menus Index - Canon XC10 | User Manual - Page 54
during mode, you cannot adjust the gain. • The ISO speed or gain adjustment dial will appear at the bottom of the screen. • You can use the [v Camera Setup] > [2] > [ISO/Gain] setting to switch between ISO speed and gain. 2 Drag your finger left/right along the dial to select the desired value - Canon XC10 | User Manual - Page 55
screen. ባ ቢ 2 Select the desired shutter speed value from the list. • The selected value will be displayed on the Browser Remote screen and applied on the camcorder. To change the ISO speed or gain when the shooting mode is n 1 Press the current ISO speed or gain value on the Browser Remote screen - Canon XC10 | User Manual - Page 56
limit. Shooting with a smaller limit is useful as it results in a darker picture to set the AGC limit or auto ISO limit. [v Camera Setup] [v Camera Setup] > [1] > [AGC Limit] or [Auto ISO this value is selected in ISO2000. mode and the camcorder is switched to mode, the auto ISO limit will - Canon XC10 | User Manual - Page 57
Limits NOTES • When the rate for slow & fast motion recording mode is set to [x1/4] (A 88), or the look is set to [ Wide DR] or [ Canon Log] (A 63), the lowest available ISO speed is 500 and the lowest available gain setting is 9.0 dB. 57 • While the rate for slow & fast motion - Canon XC10 | User Manual - Page 58
on the Browser Remote screen and applied on the camcorder. Touch Exposure You can have the camcorder adjust the exposure simply by touching the screen. The camcorder will meter the light at the point you touch and lock the exposure. Using the highlights setting, you can make sure that clouds - Canon XC10 | User Manual - Page 59
screen. If the exposure value was locked and adjusted, in addition, y and the selected exposure value will appear to the left of . AE Shift When using AE shift, you can select from 17 AE shift levels for clips and 13 for photos. 1 Touch [FUNC.] and then touch y [AE Shift]. • An adjustment - Canon XC10 | User Manual - Page 60
[¬ Standard]: Averages the light metered from the entire screen, giving more weight to the subject in the center. [ Spotlight]: Use this option when recording a standard shooting conditions. The camcorder suitably exposes a subject at the center of the scene. The camcorder suitable exposes a subject - Canon XC10 | User Manual - Page 61
Touch [K]. To set a custom white balance ([ Set 1] or [ Set 2]) 1 Point the camcorder at a gray card or white object so it fills the whole screen. 2 Touch [ ] white under colored lighting. * Indicates a preset white balance option. NOTES • When recording a clip, you can use the [v Camera Setup] > - Canon XC10 | User Manual - Page 62
• Using a custom white balance may provide better results in the following cases: - Changing lighting conditions - Close-ups - Subjects in a single color (sky, sea or forest) 62 - Under mercury lamps, certain types of fluorescent lights and LED lights • Depending on the type of fluorescent light - Canon XC10 | User Manual - Page 63
using the standard picture style. [ Wide DR]: Applies a gamma curve with a wide latitude and colors appropriate for the gamma curve. [ Cinema EOS Std.]: Reproduces the picture found on Cinema EOS cameras. [ Canon Log]: Creates a picture with wide dynamic range that is suitable for processing - Canon XC10 | User Manual - Page 64
Using Looks Adjusting the Settings of a Pre-installed Look 1 Touch [ ]. 2 Adjust the desired setting by touching [-] or [+]. 64 • [Sharpness]: 0 (low sharpness) to 7 (high sharpness) [Contrast]1: -4 (low looks. The camcorder can store two • The settings for [ Canon Log] cannot be adjusted. - Canon XC10 | User Manual - Page 65
the zoom (10x optical zoom) using the zoom ring on the lens. Operating modes: Turn the zoom ring to zoom in and out. Zooming 65 NOTES • If you turn the zoom ring too quickly, the camcorder may not be able to focus immediately. In such case, the camcorder will focus after you finish turning - Canon XC10 | User Manual - Page 66
in.; at full wide-angle, measured from the front of the lens barrel) to ∞. Even during autofocus mode, you can turn the focus ring to focus manually. When you stop turning the ring, the camcorder returns to autofocus mode. This is useful in situations such as when focusing on a subject on the other - Canon XC10 | User Manual - Page 67
using the Browser Remote application. You can use the application to change the focus mode regardless of the position of the camcorder's FOCUS switch. 67 If the camcorder is set to manual . In such case, focus manually. - Reflective surfaces - Subjects with low contrast or without vertical lines - Canon XC10 | User Manual - Page 68
Adjusting the Focus Manual Focus (MF) You can adjust the focus using the focus ring on the lens or through the FUNC. menu. 68 Operating modes: Using the Focus Ring 1 Set the FOCUS switch to M. • MF appears on the left side of the screen. 2 Turn the focus ring on the lens to adjust the focus. • The - Canon XC10 | User Manual - Page 69
• If you focus manually and then leave the camcorder with the power turned on, the focus on the subject may be lost after a while. This possible slight shift in focus is a result of the internal temperature rising in the camcorder and lens. Check the focus before resuming shooting. Using the Focus - Canon XC10 | User Manual - Page 70
on the video configuration. NOTES • Peaking/Magnification appears only on the camcorder screen. It will not appear on an external monitor connected to the camcorder and will not affect your recordings. • You cannot use magnification while color bars are displayed on the screen. Table of Contents - Canon XC10 | User Manual - Page 71
the Focus Push AF Operating modes: While using manual focus (A 68), press the PUSH AF button camcorder will focus on that person's face. You can also change the person selected as main subject. You must use the touch screen to select the subject. [v Camera Setup] (in mode) or [{ Camera - Canon XC10 | User Manual - Page 72
in the following cases: - When the shutter speed used is slower than 1/30 (1/24 if the frame rate set in [3 Recording Setup] > [1] > [4K Recording] or [HD Recording] is 23.98P). - When the shooting mode is set to ƒ and [ Night Scene], [ Low Light] or [ Fireworks] is selected. - When [Slow & Fast - Canon XC10 | User Manual - Page 73
the zoom approaches full wide angle. * Not available when recording 4K clips, using slow & fast motion recording mode or taking photos. Powered IS off. • If the degree of camcorder shake is too high, the image stabilizer may not be able to compensate fully. • When using Dynamic IS, the edges of the - Canon XC10 | User Manual - Page 74
at the center of the screen. Use the markers, which can be displayed in Camera Setup] (in mode) [2] (in mode) or [1] (in mode) [Onscreen Markers] [j Off] NOTES • You can turn off most other onscreen displays, leaving only the onscreen markers (A 46). Displaying Zebra Patterns The camcorder - Canon XC10 | User Manual - Page 75
frame rate set in [3 Recording Setup] > [1] > [4K Recording] or [HD Recording] is not 23.98P, you can also select between a 75 drop frame and non-drop frame time code. Operating modes: Selecting the Time Code Mode You can select the camcorder's time code mode. [3 Recording Setup] 1 Press the - Canon XC10 | User Manual - Page 76
select between a drop frame (DF) or non-drop frame (NDF) time code, depending on how you plan to use your recordings. When the frame rate set in [3 Recording Setup] > [1] > [4K Recording] or [HD Recording] is 23.98P, the time code is set to non-drop frame (NDF) and cannot be changed. [3 Recording - Canon XC10 | User Manual - Page 77
[ Setting] to set your own identification code, [ Time] to use the time as user bit, or [ Date] to use the date as the user bit. [ Setting] • If you selected . When the frame rate set in [3 Recording Setup] > [1] > [4K Recording] or [HD Recording] is 23.98P and [3 Recording Setup] > [1] > [User - Canon XC10 | User Manual - Page 78
. NOTES • An external microphone may pick up noise while Wi-Fi functions are in use. Keep a distance between the camcorder and microphone. MIC terminal Audio Scenes (Built-in Microphone) You can have the camcorder optimize the audio settings of the built-in microphone by selecting the audio scene - Canon XC10 | User Manual - Page 79
On] [i On] Selected by user (A 83) [Audio Compressor] [L Low] [L Low] [L Low] [j Off] [H High] [L Low] [j Off] Selected by user (A 84) NOTES • [„ Custom Setting set the audio recording level to manual. • Touch [ ] instead to return the camcorder to automatic audio recording level. Audio - Canon XC10 | User Manual - Page 80
dB), the sound may be distorted. 80 • We recommend using headphones to check the sound level while adjusting the audio recording [L Auto (Low) [j Off à]: The camcorder will reduce a large amount of noise from the wind. Low-frequency sounds will also be reduced. ]: The camcorder will reduce a - Canon XC10 | User Manual - Page 81
Automatic]: [i On]: [j Off]: The camcorder will automatically activate the built-in microphone attenuator . Audio Equalizer (Built-in Microphone) You can use the audio equalizer to adjust sound levels by specifically low-frequency range for more powerful sound. [è Low Cut Filter]: Filters the low - Canon XC10 | User Manual - Page 82
in Mic Directionality] [h Normal] Options [í Monaural]: [h Normal]: [î Wide]: Mono recording that emphasizes sound coming from the front of the camcorder/microphone. Standard stereo recording; a middle point between the [î Wide] and [í Monaural] settings in reach. Stereo recording of ambient sound - Canon XC10 | User Manual - Page 83
Low Cut] 4 Select the desired option and then touch [X]. Switching the Input You can select the input signal used by the MIC terminal depending on whether you are using distortions when sudden, loud sounds are picked up by the camcorder. Start the procedure from step 1 for the built-in microphone - Canon XC10 | User Manual - Page 84
Compressor] submenu. [¡ Audio Setup] > [2] > [Audio Compressor] 4 Select the desired option and then touch [X]. [¡ Audio Setup] [2] [Audio Compressor] [L Low] Options [H High]: [L Low]: [j Off]: Flattens out audio levels more and is best when recording multiple people talking at varying levels - Canon XC10 | User Manual - Page 85
color bars. For 4K clips, the color bars will be recorded in 4K (3840x2160) but will be output from the HDMI OUT terminal in HD (1920x1080). [3 mode will deactivate the color bars. Recording an Audio Reference Signal The camcorder can output a 1 kHz audio reference signal. [3 Recording Setup] 1 - Canon XC10 | User Manual - Page 86
for photos only. Connecting the GPS Receiver Turn off the camcorder and the receiver. Connect the receiver to the camcorder's USB terminal using the USB cable*. For details about connecting and using the receiver, refer to the GP-E2 Instruction Manual. * Supplied with the optional GP-E2 GPS Receiver - Canon XC10 | User Manual - Page 87
magnets and motors. NOTES • GPS signal reception may take some time after replacing the battery pack or when first turning on the camcorder after a long period without use. • The camcorder is not compatible with the GPS receiver's digital compass and positioning interval functions. Also, the - Canon XC10 | User Manual - Page 88
x1/21 x2 x4 x10 x20 x60 x120 x1200 1 Not available when recording 4K clips. 2 Clips recorded with this option will have a resolution of 1280x720 will not be available. NOTES • Slow & fast motion recording cannot be used together with pre-recording mode. • The slow/fast motion rate cannot be - Canon XC10 | User Manual - Page 89
pressed the button. Pre-recording is available only for HD 89 clips. Operating modes: 1 Touch [FUNC.] STOP button again to stop recording. • The camcorder records the clip, including approximately 5 seconds of setting. • Pre-recording cannot be used together with slow & fast motion recording - Canon XC10 | User Manual - Page 90
Interval Recording Mode Interval Recording Mode The camcorder will automatically record photos at a selected . 4 Press the PHOTO button again to stop recording. NOTES • Interval recording cannot be used together with face detection & tracking, touch focus, exposure lock, touch exposure or AE shift - Canon XC10 | User Manual - Page 91
can press the START/STOP button again to cancel the countdown. NOTES • When using the supplied remote controller, the countdown duration will be determined by the [Self Timer self timer. - Turning off the camcorder. - Pressing the ^ button or changing the shooting mode. Table of Contents Menus - Canon XC10 | User Manual - Page 92
. [3 Recording Setup] [1] [Detect Orientation] [i On] Examples of image rotation when [Detect Orientation] is set to [i On] Recording Camcorder's orientation* Onscreen icon Playback * As seen from the back of the camcorder, with the lens pointing forward. Table of Contents Menus Index - Canon XC10 | User Manual - Page 93
Orientation Detection Correcting Orientation during Playback You can have the camcorder display in the correct orientation photos that were recorded using orientation detection. Operating modes: 93 1 Press the MENU button. 2 Open the [Auto Rotate] submenu. [^ Playback Setup] > [1] > [Auto - Canon XC10 | User Manual - Page 94
EOS cameras (270EX II, 320EX, 430EX II, 580EX II, 600EX-RT), you can enjoy flash photography with this camcorder. If you use the optional 320EX Speedlite, you can use its LED 94 light (video light) when recording clips. For details about using a Speedlite, refer to its instruction manual. Attaching - Canon XC10 | User Manual - Page 95
To set the flash output level 3 Make sure [Flash Mode] is set to [n Manual]. 4 Touch [Flash Output]. • An adjustment dial will appear. 5 Drag your finger • Using a non-Canon flash (especially high-voltage models) or flash accessories can cause a malfunction of the camcorder or cause the camcorder to - Canon XC10 | User Manual - Page 96
4 Customization 96 Customizing the FUNC. Menu You can change what functions appear on the right side of the FUNC. menu appear, making frequently used functions easier to access. By default, the following functions appear on the right side of the FUNC. menu. To replace an icon, follow the procedure - Canon XC10 | User Manual - Page 97
Assignable Buttons Assignable Buttons The camcorder conveniently features assignable buttons to which you can assign various functions. By assigning often-used functions, you can quickly access them with a single press of a button. 97 Operating modes: 1 Open the submenu of the desired assignable - Canon XC10 | User Manual - Page 98
Assignable Buttons Using an Assignable Button After you assign a function to one of the assignable buttons, press the button to activate the function. 98 Assignable Functions Functions can - Canon XC10 | User Manual - Page 99
settings from other XC10 camcorders can be used with this camcorder. • The following settings in the FUNC. menu and setup menus will not be saved. - FUNC menu: [Pre REC], [Self Timer], the automatic/manual setting for ^ [Magnification], [Powered IS] - Setup menus: [{ Camera Setup] > [2] > [Flash - Canon XC10 | User Manual - Page 100
5 Playback 100 Playback This section explains how to play back recordings with the camcorder. For details on playing back recordings using an external monitor, refer to Connecting to an External Monitor (A 112). Operating modes: Playing Back Recordings In playback mode, the thumbnails of clips - Canon XC10 | User Manual - Page 101
of recording and recording media [y4K] [ ] 4K clips recorded on the CFast card. [yHD] [}] [8 ] [8] HD clips recorded on the SD card. Photos recorded data loss. - Do not disconnect the power source or turn off the camcorder. - Do not open the recording media slot cover. NOTES • You may - Canon XC10 | User Manual - Page 102
Playback Onscreen Icons and Displays during Playback 102 Operating modes: Icons that appear during mode Icons on the top of the screen Icon/Display Description A M Button to open the setup menus. 133 ¸ Delete recording. 108 Playback operation 104 Ô/Ó Ð: playback, Ý: playback - Canon XC10 | User Manual - Page 103
from a 4K clip (4K frame grab) or HD clip. Button to open the volume controls. Button to play back an HD-sized clip from a 4K clip. Data value y +0/0 Exposure adjustment value ISO00000 ISO speed ª, ¬, « Light metering mode ±0 Flash exposure compensation ,,,,, , , Looks L, S, 0000x0000 - Canon XC10 | User Manual - Page 104
indicated on the screen is approximate. • During frame reverse, the interval between frames depends on the video configuration used: 1 frame (for 4K clips), approx. 0.2 seconds (for HD clips with a frame rate of 59.94P) or approx. 0.5 seconds (for other video configurations). • During reverse slow - Canon XC10 | User Manual - Page 105
Playback Playback Controls during Photo Playback When you play back a photo, touch the screen to display the playback controls to access playback functions. Operating modes: Button [Ð]/[Ý] [f] [h] [ ]/[ ] Function Start/stop slideshow playback. Return to the index screen. Photo jump. Touch [Ï] or - Canon XC10 | User Manual - Page 106
The ACCESS indicator will flash as the photo is being recorded. 4 Touch [Ñ] to stop playback. Photo size by clip type Clip 4K clip (4K Frame Grab) HD clip HD clip recorded in slow motion at x1/4 Photo size 3840x2160 1920x1080 1280x720 IMPORTANT • Observe the following precautions while the ACCESS - Canon XC10 | User Manual - Page 107
Playback NOTES • If the LOCK switch on the SD card is set to prevent writing, you will not be able to record a photo. Change the position of the LOCK switch in advance. 107 Magnifying Photos during Playback You can magnify photos when you play them back. Operating modes: 1 Play back the photo - Canon XC10 | User Manual - Page 108
Deleting Recordings Deleting Recordings 108 You can delete those clips and photos that you are not interested in keeping. Deleting recordings allows you also to free up space on the recording media. Operating modes: Deleting Clips and Photos from the Index Screen 1 Open the index screen with the - Canon XC10 | User Manual - Page 109
copies of important recordings before deleting them (A 113, 116). NOTES • Photos that were protected with other devices cannot be deleted with this camcorder. • To delete all recordings and make all recordable space available again you may prefer to initialize the recording media (A 33). Table of - Canon XC10 | User Manual - Page 110
on the recording video configuration used. Operating modes: Recording video configuration Resolution Frame rate / Bit rate 4K (3840x2160) 29.97P / 305 Mbps 29.97P / 205 Mbps 23.98P / 305 Mbps 23.98P / 205 Mbps HD (1920x1080) 59.94P / - Canon XC10 | User Manual - Page 111
of the clip being played back. For playback of an HD-sized clip from a 4K clip, refer to the entry for HD. Operating modes: 111 Playback video configuration Resolution Frame rate 4K (3840x2160) 29.97P 23.98P HD (1920x1080) All available frame rates Photos - HDMI OUT terminal output - Canon XC10 | User Manual - Page 112
the HDMI OUT terminal while Wi-Fi functions are in use. • Correct operation cannot be guaranteed when connecting the camcorder to DVI monitors. • Video may not be output correctly depending on the monitor. • When [v Camera Setup] > [2] > [Rolling Shutter Reduction] is set to [i On ] and recording - Canon XC10 | User Manual - Page 113
) to the NLE software. The following plugins are available. - Canon XF Plugin 64 for Avid Media Access (Windows or Mac OS) - Canon XF Plugin for Final Cut Pro X (Mac OS) For details about using the software, refer to the instruction manual (PDF file) that is installed with the software. Refer to - Canon XC10 | User Manual - Page 114
Application Support/ProApps/Avid/AVX2_Plug-ins/AMA/MVP_CanonXF64.avx /Library/Application Suport/Canon/XFUtility2/mc_bc_dec_avc.framework Applications/Canon Utilities/Desired plugin name Viewing the Software Instruction Manuals For details on using the software, refer to the instruction manual (PDF - Canon XC10 | User Manual - Page 115
language and double-click the PDF file. Viewing the Plugin Instructions Windows: 1 From the Start menu, select All Programs > Canon Utilities > Canon XF Plugin 64 for Avid Media Access > Canon XF Plugin 64 for Avid Media Access Instruction Manual. 2 Select the desired language. 115 Mac OS: 1 From - Canon XC10 | User Manual - Page 116
[}] index screen (A 100). 3 Camcorder: Connect the camcorder to the computer using the supplied USB cable. 4 Computer: CameraWindow will start automatically and the main screen will appear. • Windows: If the AutoPlay dialog box appears instead, click Downloads Images From Canon Camera to start the - Canon XC10 | User Manual - Page 117
/Change and follow the instructions. - Mac OS: Drag and drop the following folder to the Trash. /Applications/Canon Utilities/CameraWindow • Depending on the computer, the software may not work correctly. • When the camcorder is powered only using the battery pack, the battery's charge on the - Canon XC10 | User Manual - Page 118
camcorder serves as the Wi-Fi access point. Before using the Wi-Fi functions • The instructions use. • Configuring the network settings requires adequate knowledge about configuring and using wireless (Wi-Fi) networks. Canon cannot provide support regarding network configurations. IMPORTANT • Canon - Canon XC10 | User Manual - Page 119
refer to the instruction manual of your wireless router. Searching for Access Points: If your access point does not support the WPS function or you cannot activate it, you can have the camcorder search for access points in the area. Manual Setup: If the access point you want to use has stealth mode - Canon XC10 | User Manual - Page 120
your wireless router's settings and activate the Wi-Fi Protected Setup (WPS) using a PIN code, refer to the instruction manual of your wireless router. 5 Within 2 minutes, touch [OK] on the camcorder's screen. • While the camcorder is attempting to connect to the access point, you can touch [Stop - Canon XC10 | User Manual - Page 121
camcorder search for access points again. Encrypted access point • When the network name (SSID) of the desired access point appears, touch [OK]. • If the access point is encrypted (C), enter the encryption key (password) with the following procedure. Otherwise, go to step 7 of Manual network using - Canon XC10 | User Manual - Page 122
If you prefer, you can enter manually the details of the Wi-Fi network you want to connect to. Follow the instructions on the screen to complete the procedure. To enter text for the various settings, use the virtual keyboard (A 121). 1 Press the MENU button. 2 Open the [Access Point Connection - Canon XC10 | User Manual - Page 123
and Changing Wi-Fi Settings You can view and change Wi-Fi connection settings saved in the camcorder. Because the settings must be changed manually, adequate knowledge about configuring and using Wi-Fi networks is required. If Browser Remote has been activated, deactivate it before performing the - Canon XC10 | User Manual - Page 124
Viewing and Changing Wi-Fi Settings 124 To view the camcorder's MAC address 1 Press the MENU button. 2 Open the [Display MAC Address] screen. [- Wi-Fi Setup] > [1] > [Display MAC Address] • The camcorder's MAC address will appear. 3 Touch [K] and then touch [X]. [- Wi-Fi Setup] [1] [Display MAC - Canon XC10 | User Manual - Page 125
which camcorder the application is controlling in case of a multi-camera shooting setup. To enter information for various settings, use the A Web browser that supports JavaScript and is enabled to accept cookies is required. [- Wi-Fi Setup] [1] Preparations on the Camcorder 1 Press the MENU - Canon XC10 | User Manual - Page 126
of the controls are given in the following pages. Detailed operation is given in each function's reference page. 8 When you have finished using Browser Remote, on the camcorder set [- Wi-Fi Setup] > [1] > [Browser Remote] to [Off] and then touch [X]. • will turn yellow and then disappear from the - Canon XC10 | User Manual - Page 127
are displayed on the camcorder, the live view image will not be displayed. 127 The [Advanced Control] Screen When using a computer, tablet and Key lock button (Browser Remote controls only) 11 Approximate remaining battery charge* 12 CFast card status and approximate remaining recording time 13 - Canon XC10 | User Manual - Page 128
Browser Remote: Controlling the Camcorder from a Network Device 128 The [Basic Control] Screen When using a smartphone or other device with a smaller screen, you can use the [Basic Control] screen that offers only the most important shooting controls (START/STOP, PHOTO, live view and focus) but - Canon XC10 | User Manual - Page 129
*. You can then play back your photos using the Web browser and even save local copies of them on the device. * For details about compatible devices, operating systems, Web browsers, etc., please visit your local Canon Web site. Operating modes: 129 1 Camcorder: Open the [}] index screen (A 100 - Canon XC10 | User Manual - Page 130
Using Wi-Fi (A 119). • Touch [View Information] to see the access point's SSID (network name), connection protocol, camcorder's IP address and camcorder select [Canon XC10] from the list of servers. 5 Computer: Select the desired photo to play back from the displayed folder. 6 Camcorder: To end - Canon XC10 | User Manual - Page 131
Using the FUNC. Menu and Setup Menus (A 29). For details about each function, see the reference page. Menu items without a reference page are explained after the tables. Setting options in boldface indicate default values. Depending on the camcorder [v/{ Camera Setup 3 Available for HD clips only. - Canon XC10 | User Manual - Page 132
], [ÿ Sunset], [ Low Light], [ Spotlight], [ Fireworks] 52 [Looks] For clips: [ Standard], [ EOS Std.], [ Wide DR], [ Cinema EOS Std.], [ Canon Log], [ vUser Setting ] 89 1 Available for clips only. 2 Available for photos only. 3 Available for HD clips only. Table of Contents Menus Index - Canon XC10 | User Manual - Page 133
1], [ Set 2] [ ] (automatic), [ ] (manual) When set to [ ]: 0 to 100 [l] (manual) on or off When set to [l]: [-3] to [3] 133 49 49 61 79 58 59 74 69 73 65 66 69 Setup Menus [v Camera Setup] menu ( mode)/ [{ Camera Setup] menu ( mode) Menu item Setting options v{A [Face Detection & Tracking] - Canon XC10 | User Manual - Page 134
camcorder automatically uses slow shutter speeds to obtain brighter recordings in places with insufficient lighting. • Fastest shutter speed used when the resolution is set to 4K. • When this function is set ], [% Date], [& Time], [' Date and Time], [( Camera Data] [i On], [j Off] y}A ÜÜ - - Ü - Canon XC10 | User Manual - Page 135
Menu Options [3 Recording Setup] menu Menu item [4K / HD] Setting options [4K 4K Clips], [HD HD Clips] v{y}A Ü - - - 48 [4K Recording] [ 29.97P / 305 Mbps], [ 29.97P / 205 Mbps], [ 23.98P / 305 Mbps], [ 23.98P / 205 Mbps] Ü - - - 48 [HD Recording] [ 59.94P / 50 Mbps], [ 59.94i / 35 - Canon XC10 | User Manual - Page 136
[L Low], [j Off] v{y}A Ü - Ü Ü 105 - - Ü Ü 105 ÜÜÜÜ - Ü - - - 80 Ü - - - 81 Ü - - - 81 Ü - - - 82 Ü - - - 82 Ü - - - 83 Ü - - - 83 Ü - - - 83 Ü - - - 84 [Notification Sounds]: A beep will accompany some operations like turning on the camcorder - Canon XC10 | User Manual - Page 137
[ Aperture], [ Shutter Speed], [ ISO], [ White Balance], [ Exposure Lock], [y AE Shift], [z Zebra], [O Peaking], [< Focus], [^ Magnification] - Ü - - 96 [Battery Info] - ÜÜÜÜ - [HDMI Time Code] [i On], [j Off] Ü - - - - [HDMI Rec Command] [i On], [j Off] Ü - - - - [HDMI Status - Canon XC10 | User Manual - Page 138
] [GPS Information Display] [Certification Logo Display] [Firmware] [Reset All] Setting options [. meters], [/ Using the [H Bright] setting will shorten the effective usage time of the battery pack. [Tally Lamp]: When this function is set to [i On], the tally lamp illuminates when the camcorder - Canon XC10 | User Manual - Page 139
manually. This setting also affects units for GPS information when using the optional GP-E2 GPS Receiver. [Certification Logo Display]: This displays select certification logos that apply to this camcorder. • This setting may not be available depending on the country/region of purchase. [Firmware - Canon XC10 | User Manual - Page 140
communicate with the battery pack attached. Non-genuine Canon battery packs cannot be charged using this camcorder. - If you are using a genuine Canon battery pack, there may be a problem with the camcorder or battery pack. Consult a Canon Service Center. - Canon's LP-E6 Battery Pack cannot be - Canon XC10 | User Manual - Page 141
Troubleshooting camcorder becomes unusually hot or it becomes hot after using it only for a short while, it may indicate a problem with the camcorder. Consult a Canon Service quickly (4 flashes per second). - The battery pack is exhausted. Replace or charge the battery pack. - There is not enough - Canon XC10 | User Manual - Page 142
battery pack is faulty. Consult a Canon Service Center. 7 keeps flashing on the screen. - You connected the optional GP-E2 GPS Receiver to the camcorder camcorder's internal temperature has risen even higher. The camcorder can continue to be used setting [Camera Setup] level manually (A 79 - Canon XC10 | User Manual - Page 143
will not fire when the [Camera Setup] > [2] > [Flash] > [Flash Mode] setting is set to [Automatic]. Change the setting to [Manual]. - The optional Speedlite will not fire in interval recording mode. - When you are using the 320EX Speedlite, the Speedlite will not fire if the LED light is on. Set the - Canon XC10 | User Manual - Page 144
the camcorder. Start Browser Remote before shooting. The Browser Remote or Playback via Browser screen is not displayed correctly on the Web browser. - The device, operating system or Web browser used may not be supported. For the latest information about supported systems, visit your local Canon - Canon XC10 | User Manual - Page 145
if the transmission rate drops, the connection is lost, or other problems occur. Location of the access point (wireless router) - When using a Wi-Fi network indoors, place the access point in the same room where you are using the camcorder. - Place the access point in an open, unobstructed location - Canon XC10 | User Manual - Page 146
Troubleshooting List of Messages Battery communication error. Does this battery display the Canon logo? - This may be due to using a non-genuine Canon battery pack. - If you are using a genuine Canon battery pack, there may be a problem with the battery pack or camcorder. Consult a Canon Service - Canon XC10 | User Manual - Page 147
camcorder and back on again. Then, remove the recording media being used and reinsert it. Alternatively, replace the recording media. If this does not solve the problem, consult a Canon Service Refer also to the instruction manual of your access point and other devices you will use. A User is already - Canon XC10 | User Manual - Page 148
, turn it on again. If the problem persists contact a Canon Service Center. Unable to complete WPS. - Turn off the camcorder and access point (wireless router). After a short while, turn them on again and try again. If the problem persists, perform setup using the [Search for Access Points] option - Canon XC10 | User Manual - Page 149
wireless signal. Try using the camcorder in a location farther away from such appliances. - Turn off the camcorder and access point (wireless router). After a short while, turn them on again and perform the WiFi network setup again. If the problem persists contact a Canon Service Center. 149 Table - Canon XC10 | User Manual - Page 150
get into the camcorder it may damage the camcorder and/or the lens. Consult a Canon Service Center as soon as possible. • Be careful to avoid dust and dirt particles accumulating on the lens or entering the camcorder. When you finish using the camcorder, make sure to remove the lens hood and attach - Canon XC10 | User Manual - Page 151
the battery pack and the camcorder. Wipe the terminals with a soft cloth. Long-term storage • Store battery packs displayed, depending on the battery life. Use the time shown on Canon shall not be liable for lost or corrupted data. • Do not touch or expose the terminals to dust or dirt. • Do not use - Canon XC10 | User Manual - Page 152
about 3 months. To recharge the built-in lithium battery: Connect the compact power adapter to the camcorder and use a household power outlet to power the camcorder for 24 hours while it is turned off. Lithium Button Battery WARNING! • The battery used in this device may present a fire or chemical - Canon XC10 | User Manual - Page 153
2 hours before resuming use of the camcorder. Using the Camcorder Abroad Power Sources You can use the compact power adapter to operate the camcorder and to charge battery packs in any country with power supply between 100 and 240 V AC, 50/60 Hz. Consult a Canon Service Center for information on - Canon XC10 | User Manual - Page 154
can also obtain genuine accessories for your Canon camcorder by calling: 1-800-828-4040, Canon U.S.A. Information Center. Use of genuine Canon accessories is recommended. The message [Battery communication error] is displayed if you use a non-genuine Canon battery pack, and user response is required - Canon XC10 | User Manual - Page 155
LP-E6N Optional Accessories Battery Packs When you need extra battery packs, make sure to select the LP-E6N. 155 This mark identifies genuine Canon video accessories. When you use Canon video equipment, we recommend Canon-brand accessories or products bearing the same mark. Table of Contents - Canon XC10 | User Manual - Page 156
156 XC10 System • Recording System Movies: Video compression: MPEG-4 AVC/H.264 Audio compression: Linear PCM, 16 bits, 48 kHz, 2 channels File format: MXF Photos: DCF (Design rule for Camera File system), compatible with Exif* Ver. 2.3, JPEG compression * This camcorder supports Exif - Canon XC10 | User Manual - Page 157
/4K Frame Grab), 1920x1080 (HD clips), 1280x720 (HD clips recorded in slow motion at x1/4) 157 Wi-Fi • Wireless Standard: IEEE802.11b/g/n (2.4 GHz band), IEEE802.11a/n (5 GHz band) • Connection Methods: Wi-Fi Protected Setup (WPS), search for access points, manual, camera access point • Supported - Canon XC10 | User Manual - Page 158
battery pack), 8.4 V DC (DC IN) • Power Consumption (screen at normal brightness) When shooting 4K clips (305 Mbps, 29.97P): 6.2 W When shooting HD clips (50 Mbps, 59.94P): 5.4 W • Operating Temperature: 0 - 40 °C (32 - 104 °F) • Dimensions (W x H x D)* Camcorder in this manual is verified - Canon XC10 | User Manual - Page 159
CA-570 Compact Power Adapter to charge battery packs. The charging times given in the following table are approximate and vary according to charging conditions and initial charge of the battery pack. Charging conditions Using the camcorder Using the LC-E6 Battery Charger 240 min. 150 min. Table - Canon XC10 | User Manual - Page 160
operating mode, bit rate, and charging, recording or playback conditions. The effective usage time of the battery pack may decrease when recording in cold surroundings, when using the brighter screen settings, etc. Typical recording times measure recording with repeated operations such as start/stop - Canon XC10 | User Manual - Page 161
9 4K frame grab 106 A Abroad, using the camcorder 153 Bit rate 48 Browser Remote 125 Built-in backup battery 152 C Canon XF Utility for XF-AVC (download 113 CFast card limit 56 L Language 28 Lens hood 21 Looks 63 Low cut filter 83 Low light (Special Scene mode 53 161 Table - Canon XC10 | User Manual - Page 162
mode 53 Sunset (Special Scene mode 53 T Tally lamp 38 Time code 75 Time zone/DST 28 Touch screen operations 26 Tripod 24 Troubleshooting 140 Tv (shooting mode 52 U User bit 77 V Video configuration 48 Video output configuration 110 Viewfinder unit 21 Volume 105 W White balance 61 - Canon XC10 | User Manual - Page 163
to abuse, mishandling, accident, improper maintenance, use of non-Canon accessories or failure to follow operating, maintenance or environmental instructions prescribed in Canon USA's user's manual; B. If the Equipment is defective as a result of leaking batteries, sand, dirt or water damage; C. If - Canon XC10 | User Manual - Page 164
abuse, mishandling, accident, improper maintenance, use of non-Canon accessories or failure to follow operating, maintenance or environmental instructions prescribed in Canon Canada's user's manual; B. If the Equipment is defective as a result of leaking batteries, sand, dirt or water damage; C. If - Canon XC10 | User Manual - Page 165
(855-246-3367) ❖ Professional Product Support / (USA only) Soutien des produits professionnels (800) 667-2666 CENTRO Y SURAMÉRICA http://www.cla.canon.com CANON LATIN AMERICA, INC. Visit your local Canon Web site to download the latest version of this Instruction Manual. Consultez votre site
-
 1
1 -
 2
2 -
 3
3 -
 4
4 -
 5
5 -
 6
6 -
 7
7 -
8
-
9
-
10
-
11
-
12
-
13
-
14
-
15
-
16
-
17
-
18
-
19
-
20
-
21
-
22
-
23
-
24
-
25
-
26
-
27
-
28
-
29
-
30
-
31
-
32
-
33
-
34
-
35
-
36
-
37
-
38
-
39
-
40
-
41
-
42
-
43
-
44
-
45
-
46
-
47
-
48
-
49
-
50
-
51
-
52
-
53
-
54
-
55
-
56
-
57
-
58
-
59
-
60
-
61
-
62
-
63
-
64
-
65
-
66
-
67
-
68
-
69
-
70
-
71
-
72
-
73
-
74
-
75
-
76
-
77
-
78
-
79
-
80
-
81
-
82
-
83
-
84
-
85
-
86
-
87
-
88
-
89
-
90
-
91
-
92
-
93
-
94
-
95
-
96
-
97
-
98
-
99
-
100
-
101
-
102
-
103
-
104
-
105
-
106
-
107
-
108
-
109
-
110
-
111
-
112
-
113
-
114
-
115
-
116
-
117
-
118
-
119
-
120
-
121
-
122
-
123
-
124
-
125
-
126
-
127
-
128
-
129
-
130
-
131
-
132
-
133
-
134
-
135
-
136
-
137
-
138
-
139
-
140
-
141
-
142
-
143
-
144
-
145
-
146
-
147
-
148
-
149
-
150
-
151
-
152
-
153
-
154
-
155
-
156
-
157
-
158
-
159
-
160
-
161
-
162
-
163
-
164
-
165
 |
 |
Instruction Manual
PUB. DIE-0469-000A
4K Camcorder