Canon XC10 User Manual - Page 6
Table of Contents, Introduction 9, Preparations 18, Recording 37 - hd camcorder
 |
View all Canon XC10 manuals
Add to My Manuals
Save this manual to your list of manuals |
Page 6 highlights
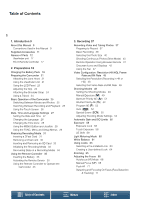
Table of Contents 6 1. Introduction 9 About this Manual 9 Conventions Used in this Manual 9 Supplied Accessories 11 Names of Parts 12 Viewfinder unit 17 RC-6 Remote Controller 17 2. Preparations 18 Charging the Battery Pack 18 Preparing the Camcorder 21 Attaching the Lens Hood 21 Using the Viewfinder Unit 21 Using the LCD Panel 23 Adjusting the Grip 24 Attaching the Shoulder Strap 24 Using a Tripod 24 Basic Operation of the Camcorder 25 Switching Between Movies and Photos 25 Switching Between Recording and Playback 25 Using the Touch Screen 26 Date, Time and Language Settings 27 Setting the Date and Time 27 Changing the Language 28 Changing the Time Zone 28 Using the MENU Button and Joystick 28 Using the FUNC. Menu and Setup Menus 29 Preparing Recording Media 31 Inserting a CFast Card 31 Removing a CFast card 32 Inserting and Removing an SD Card 33 Initializing the Recording Media 33 Recovering Data on a Recording Media 34 Using the Remote Controller 35 Inserting the Battery 35 Activating the Remote Sensor 35 Using the Remote Controller to Operate the Camcorder 35 3. Recording 37 Recording Video and Taking Photos 37 Preparing to Record 37 Basic Recording 38 Selecting the Photo Size 40 Shooting Continuous Photos (Drive Mode) 40 Remote Operation Using Browser Remote 41 Onscreen Icons and Displays 42 Using the Fan 47 Video Configuration: Resolution (4K/HD), Frame Rate and Bit Rate 48 Selecting the Resolution (Recording in 4K or HD) 48 Selecting the Frame Rate and Bit Rate 48 Shooting Modes 49 Setting the Shooting Modes 49 Manual Exposure (n) 49 Aperture Priority AE (") 51 Shutter Priority AE (,) 52 Program AE (') 52 Auto (N) 52 Special Scene (ƒ) 52 Adjusting Shooting Mode Settings 54 Automatic Gain and ISO Limits 56 Exposure 58 Exposure Lock 58 Touch Exposure 58 AE Shift 59 Light Metering Mode 60 White Balance 61 Using Looks 63 Selecting a Pre-installed Look 63 Creating a User-defined Look 64 Zooming 65 Adjusting the Focus 66 Autofocus (AF) Mode 66 Manual Focus (MF) 68 Push AF 71 Detecting and Focusing On Faces (Face Detection & Tracking) 71 Table of Contents Menus Index
-
 1
1 -
 2
2 -
 3
3 -
 4
4 -
 5
5 -
 6
6 -
 7
7 -
 8
8 -
 9
9 -
 10
10 -
 11
11 -
 12
12 -
13
-
14
-
15
-
16
-
17
-
18
-
19
-
20
-
21
-
22
-
23
-
24
-
25
-
26
-
27
-
28
-
29
-
30
-
31
-
32
-
33
-
34
-
35
-
36
-
37
-
38
-
39
-
40
-
41
-
42
-
43
-
44
-
45
-
46
-
47
-
48
-
49
-
50
-
51
-
52
-
53
-
54
-
55
-
56
-
57
-
58
-
59
-
60
-
61
-
62
-
63
-
64
-
65
-
66
-
67
-
68
-
69
-
70
-
71
-
72
-
73
-
74
-
75
-
76
-
77
-
78
-
79
-
80
-
81
-
82
-
83
-
84
-
85
-
86
-
87
-
88
-
89
-
90
-
91
-
92
-
93
-
94
-
95
-
96
-
97
-
98
-
99
-
100
-
101
-
102
-
103
-
104
-
105
-
106
-
107
-
108
-
109
-
110
-
111
-
112
-
113
-
114
-
115
-
116
-
117
-
118
-
119
-
120
-
121
-
122
-
123
-
124
-
125
-
126
-
127
-
128
-
129
-
130
-
131
-
132
-
133
-
134
-
135
-
136
-
137
-
138
-
139
-
140
-
141
-
142
-
143
-
144
-
145
-
146
-
147
-
148
-
149
-
150
-
151
-
152
-
153
-
154
-
155
-
156
-
157
-
158
-
159
-
160
-
161
-
162
-
163
-
164
-
165
 |
 |
