Canon XC10 User Manual - Page 22
Adjusting the Viewfinder Unit, Hook the viewfinder unit latch under the left side of
 |
View all Canon XC10 manuals
Add to My Manuals
Save this manual to your list of manuals |
Page 22 highlights
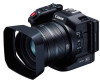
Preparing the Camcorder 4 Hook the viewfinder unit latch under the left side of the LCD panel and then fasten the latch. Then, return the LCD panel to its original position. 22 Adjusting the Viewfinder Unit 1 Press the ON/OFF button to turn on the camcorder. • The POWER/CHG indicator will illuminate. • If necessary, perform the initial setup (A 27). 2 Adjust the dioptric adjustment lever until the viewfinder unit's image is sharp. ባ ቢ ቤ Removing the Viewfinder Unit 1 Turn the LCD panel 90 degrees upward. 2 Open the viewfinder unit latch and remove the viewfinder unit from the camcorder. • Make sure to open the latch all the way before removing the unit. 3 Attach the viewfinder unit cover, hook the viewfinder unit latch to the left side of the cover and then fasten the latch. Dioptric adjustment lever ባ ቤ ብ ቦ ቢ Table of Contents Menus Index
-
 1
1 -
2
-
3
-
4
-
5
-
6
-
7
-
8
-
9
-
10
-
11
-
12
-
13
-
14
-
15
-
16
-
 17
17 -
 18
18 -
 19
19 -
 20
20 -
 21
21 -
 22
22 -
 23
23 -
 24
24 -
 25
25 -
 26
26 -
 27
27 -
28
-
29
-
30
-
31
-
32
-
33
-
34
-
35
-
36
-
37
-
38
-
39
-
40
-
41
-
42
-
43
-
44
-
45
-
46
-
47
-
48
-
49
-
50
-
51
-
52
-
53
-
54
-
55
-
56
-
57
-
58
-
59
-
60
-
61
-
62
-
63
-
64
-
65
-
66
-
67
-
68
-
69
-
70
-
71
-
72
-
73
-
74
-
75
-
76
-
77
-
78
-
79
-
80
-
81
-
82
-
83
-
84
-
85
-
86
-
87
-
88
-
89
-
90
-
91
-
92
-
93
-
94
-
95
-
96
-
97
-
98
-
99
-
100
-
101
-
102
-
103
-
104
-
105
-
106
-
107
-
108
-
109
-
110
-
111
-
112
-
113
-
114
-
115
-
116
-
117
-
118
-
119
-
120
-
121
-
122
-
123
-
124
-
125
-
126
-
127
-
128
-
129
-
130
-
131
-
132
-
133
-
134
-
135
-
136
-
137
-
138
-
139
-
140
-
141
-
142
-
143
-
144
-
145
-
146
-
147
-
148
-
149
-
150
-
151
-
152
-
153
-
154
-
155
-
156
-
157
-
158
-
159
-
160
-
161
-
162
-
163
-
164
-
165
 |
 |
