Dell 944 All In One Inkjet Printer Owner's Manual - Page 59
Faxing a Paper Document Using the Operator Panel, Store a copy in a folder, Configuration Summary
 |
View all Dell 944 All In One Inkjet Printer manuals
Add to My Manuals
Save this manual to your list of manuals |
Page 59 highlights
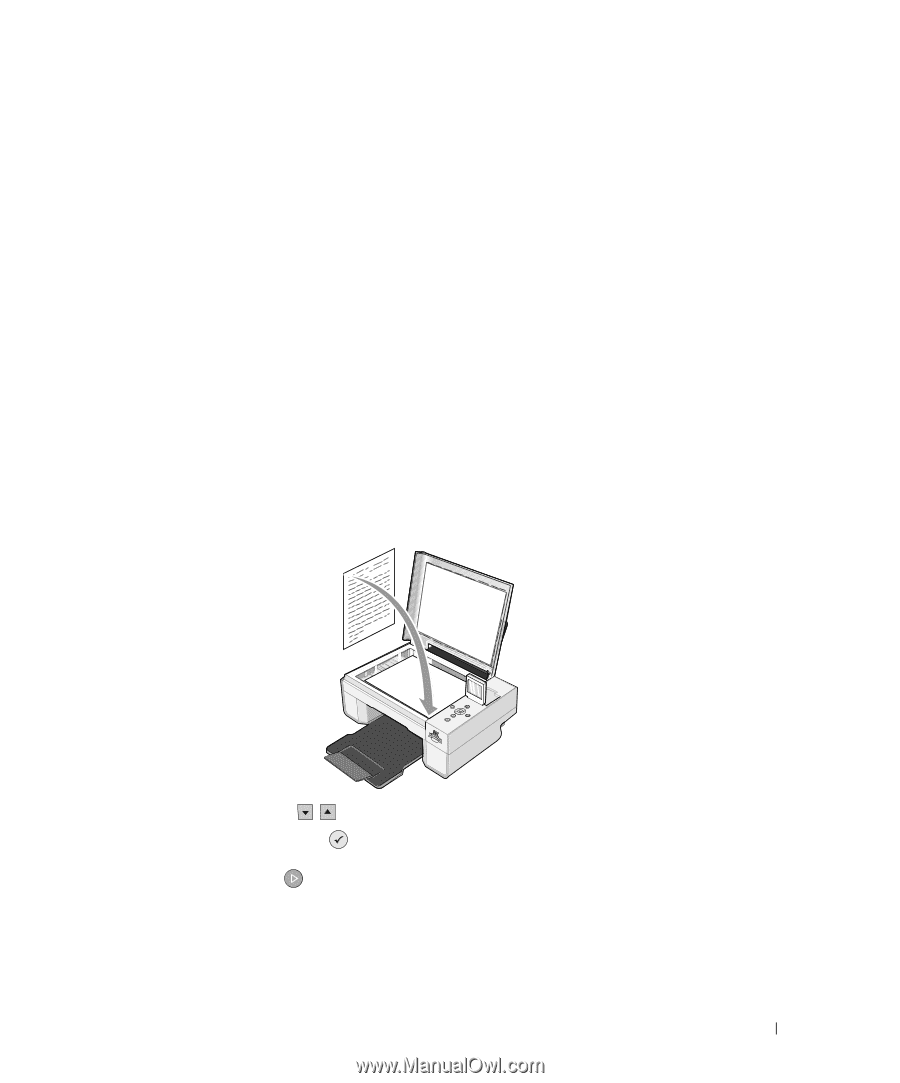
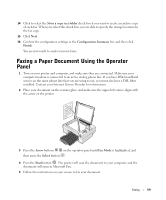
14 Click to select the Store a copy in a folder check box if you want to create an archive copy of each fax. When you select this check box, you are able to specify the storage location for the fax copy. 15 Click Next. 16 Confirm the configuration settings in the Configuration Summary list, and then click Finish. You are now ready to send or receive faxes. Faxing a Paper Document Using the Operator Panel 1 Turn on your printer and computer, and make sure they are connected. Make sure your computer modem is connected to an active analog phone line. If you have DSL broadband service on the same phone line that you are using to fax, you must also have a DSL filter installed. Contact your Internet Service Provider for information. 2 Place your document on the scanner glass, and make sure the upper left corner aligns with the arrow on the printer. 3 Press the Arrow buttons on the operator panel until Fax Mode is highlighted, and then press the Select button . 4 Press the Start button . The printer will scan the document to your computer, and the document will open in Microsoft Fax. 5 Follow the instructions on your screen to fax your document. Faxing 59
-
 1
1 -
2
-
3
-
4
-
5
-
6
-
7
-
8
-
9
-
10
-
11
-
12
-
13
-
14
-
15
-
16
-
17
-
18
-
19
-
20
-
21
-
22
-
23
-
24
-
25
-
26
-
27
-
28
-
29
-
30
-
31
-
32
-
33
-
34
-
35
-
36
-
37
-
38
-
39
-
40
-
41
-
42
-
43
-
44
-
45
-
46
-
47
-
48
-
49
-
50
-
51
-
52
-
53
-
 54
54 -
 55
55 -
 56
56 -
 57
57 -
 58
58 -
 59
59 -
 60
60 -
 61
61 -
 62
62 -
 63
63 -
 64
64 -
65
-
66
-
67
-
68
-
69
-
70
-
71
-
72
-
73
-
74
-
75
-
76
-
77
-
78
-
79
-
80
-
81
-
82
-
83
-
84
-
85
-
86
-
87
-
88
-
89
-
90
-
91
-
92
-
93
-
94
-
95
-
96
-
97
-
98
-
99
-
100
-
101
-
102
-
103
-
104
-
105
-
106
-
107
-
108
-
109
-
110
-
111
-
112
-
113
-
114
-
115
-
116
-
117
-
118
 |
 |