Denon DVD-5910 Owners Manual - English - Page 22
Part Names And Functions
 |
View all Denon DVD-5910 manuals
Add to My Manuals
Save this manual to your list of manuals |
Page 22 highlights
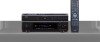
ENGLISH ENGLISH 5 PART NAMES AND FUNCTIONS (1) Front Panel See page 3. q Power ON/STANDBY button • Press once to set to the standby mode. The indicator lights up in red. • Press again to turn the power on. The indicator lights up in green. w Power indicator • This indicator lights when the power is on and when the power is in the standby mode. Light green : Power is on Light red : Power is in the standby mode e Power switch • Press once to turn the power on. • Press again to set to the "OFF" position and turn the power off. r Display • Information on the disc that is currently playing is shown on the display. (See page 23.) t Remote control sensor y SELECT of HDMI/DVI button • Press this to set the video signal output via the HDMI/DVI connector. (See page 56.) HDMI Y Cb Cr HDMI RGB HDMI/DVI OFF u FORMAT of HDMI/DVI button • Press this to set the video signal format via the HDMI connector or the DVI connector. (See page 56.) 480P/576P 720P 1080i AUTO i VIDEO MODE button • Use this to instantly change the adjustment mode of the stored video signals. (See page 56.) The setting values of PICTURE MODE and SQUEEZE MODE will not be stored. (The unit will return to the stored setting values when the power is switched off.) • PICTURE MODE STD M1 M2 M3 M4 M5 • TV SYSTEM PROGRESSIVE INTERLACED OTHERS • SQUEEZE MODE No effective for interlaced image. OFF ON AUTO HDMI/DVI • AUDIO ADJUST TIME: -30msec TIME: 0msec TIME: +200msec o Select the playback area/layer of SUPER AUDIO CD (SUPER AUDIO CD SETUP) • Switch the area /layer of the Super audio CDs played with priory. • MULTI.......When playing Super audio CDs, the Multi 22 channel area is played with priory • STEREO....When playing Super audio CDs, the stereo channel area is played with priority. • CD When playing Super audio CDs, the CDs layer is played with priority. MULTI STEREO CD !0 PURE DIRECT SELECT button • Press to switch the modes with the specific video signals, digital audio signals and indicate in display on and off. (See pages 50, 51.) NORMAL MODE 1 MODE 2 ALL OFF !1 DVD AUDIO/VIDEO indicator • This indicator lights when playing the DVD audio or DVD video. !2 Super Audio CD indicator • This indicator lights when playing the Super Audio CD. !3 Disc tray • Load discs here. (See page 26.) • Press the OPEN/CLOSE button !6 to open and close the disc tray. • The disc tray is also closed when the PLAY button !8 is pressed. !4 DENON LINK indicator • This indicator lights when the audio signals are transferred by DENON LINK connections. !5 Advanced AL24 Processing indicator • This indicator lights when the audio signals of a DVD, etc., are being processed digitally with the Advanced AL24 processing. !6 OPEN/CLOSE button (5) • Press this to open and close the disc tray. (See pages 26, 60.) !7 STILL/PAUSE button (3) • Press this to pause images or music or to play images frame by frame. (See page 62.) !8 PLAY button (1) • Press this to play the disc. (See page 61.) !9 STOP button (2) • Press this to stop the disc. (See page 62.) @0 Skip button (8) • Press this to move back to the beginning of the current track (or chapter). (See page 63.) • Press again to move back to the beginning to the previous track (or chapter). @1 Skip button (9) • Press this to move ahead to the beginning of the next track (or chapter). (See page 63.) @2 Slow/Search buttons (6 7) • Press this to set the slow or search play mode. (See pages 62, 63.) 6: search in the reverse direction. 7: search in the forward direction.
-
 1
1 -
2
-
3
-
4
-
5
-
6
-
7
-
8
-
9
-
10
-
11
-
12
-
13
-
14
-
15
-
16
-
 17
17 -
 18
18 -
 19
19 -
 20
20 -
 21
21 -
 22
22 -
 23
23 -
 24
24 -
 25
25 -
 26
26 -
 27
27 -
28
-
29
-
30
-
31
-
32
-
33
-
34
-
35
-
36
-
37
-
38
-
39
-
40
-
41
-
42
-
43
-
44
-
45
-
46
-
47
-
48
-
49
-
50
-
51
-
52
-
53
-
54
-
55
-
56
-
57
-
58
-
59
-
60
-
61
-
62
-
63
-
64
-
65
-
66
-
67
-
68
-
69
-
70
-
71
-
72
-
73
-
74
-
75
-
76
-
77
-
78
-
79
-
80
-
81
-
82
-
83
-
84
-
85
-
86
 |
 |
