Edimax AR-7211A V2 Manual
Edimax AR-7211A V2 Manual
 |
View all Edimax AR-7211A V2 manuals
Add to My Manuals
Save this manual to your list of manuals |
Edimax AR-7211A V2 manual content summary:
- Edimax AR-7211A V2 | Manual - Page 1
AR-7211A V2 / AR-7211B V2 User Manual 10-2012 / v1.0 1 - Edimax AR-7211A V2 | Manual - Page 2
electronic, mechanical, magnetic, optical, chemical, manual or otherwise, without the prior written permission from Edimax Technology Co., Ltd. Edimax of all necessary servicing, repair, and any incidental or consequential damages resulting from any defect in the software. Edimax Technology Co., Ltd - Edimax AR-7211A V2 | Manual - Page 3
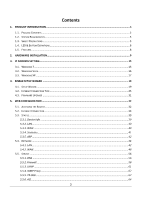
STATUS ...39 5.3.1. Device Info ...39 5.3.2. LAN...40 5.3.3. WAN ...40 5.3.4. Statistics...41 5.3.5. ARP...42 5.4. NETWORK ...42 5.4.1. LAN...42 5.4.2. WAN ...48 5.5. SERVICE ...56 5.5.1. DNS ...56 5.5.2. Firewall...58 5.5.3. UPNP ...61 5.5.4. IGMP Proxy ...62 5.5.5. TR-069 ...62 5.5.6. ACL ...64 3 - Edimax AR-7211A V2 | Manual - Page 4
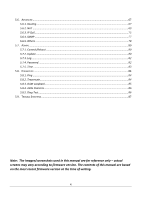
...84 5.8.1. Ping ...84 5.8.2. Traceroute...84 5.8.3. OAM Loopback...85 5.8.4. ADSL Statistics...86 5.8.5. Diag-Test ...86 5.9. TROUBLE SHOOTING...87 Note: The images/screenshots used in this manual are for reference only - actual screens may vary according to firmware version. The contents of this - Edimax AR-7211A V2 | Manual - Page 5
AR-7211A V2 or AR-7211B V2) Power adapter 1 meter RJ-45 Ethernet cable 1.8M RJ-11 telephone line x 2 Quick installation guide CD containing setup wizard, user manual 1.5 or higher 1.3. Safety Precautions Follow the following instructions to prevent the device from risks and damage caused by - Edimax AR-7211A V2 | Manual - Page 6
is damp or wet. Do not spill any fluid on this device. Do not connect this device to any PCs or electronic products, other than those which you are instructed or recommended to do so in the product's documentation, by our customer engineers or by your broadband provider - connecting to incorrect - Edimax AR-7211A V2 | Manual - Page 7
for more information about how to connect the router correctly. If all connections are correct, please contact your ISP to check if there is a problem with your Internet service. 2) If the Internet LED is red, please check your ADSL LED first. If your ADSL LED is off, refer to Note 1. If the - Edimax AR-7211A V2 | Manual - Page 8
1.5. Features The device supports the following features: Various line modes External PPPoE dial-up access CLI System status display PPP session PAP/CHAP IP filter IP quality of service (QoS) Remote access control Line connection status test Remote managing through Telnet or HTTP - Edimax AR-7211A V2 | Manual - Page 9
2. Hardware Installation Step 1. Connect the ADSL line Connect the Line interface of the device to the Modem interface of a splitter using a telephone cable. Connect a telephone to the Phone interface of the splitter using a telephone cable. Connect the Line interface of the splitter to your - Edimax AR-7211A V2 | Manual - Page 10
Figure 1 - No telephone before the splitter Configuration 2 0 shows the correct connection when a telephone set is installed before the splitter. Figure 2 - Telephone set connected before the splitter Note: When Configuration 2 is used, the filter must be installed close to the telephone cable. Do - Edimax AR-7211A V2 | Manual - Page 11
the light is on, you can continue setup. However if the light is flashing, there is no broadband line detected. Please call your Internet Service Provider (ISP) and inform them about the flashing ADSL light to resolve the issue. Step 5. Firewall settings Please turn off all personal firewalls before - Edimax AR-7211A V2 | Manual - Page 12
2. Click "Switch to Classic View" in the top left to show additional setting icons. 3. Locate the "Network Connections" icon and double-click to open network connection settings. 12 - Edimax AR-7211A V2 | Manual - Page 13
4. Select the "Local Area Connection" icon and right-click it to open the submenu, then select "Properties". 5. Select "Internet Protocol (TCP/IP)" and then click "Properties" 13 - Edimax AR-7211A V2 | Manual - Page 14
6. Ensure that "Obtain an IP address automatically" and "Obtain DNS server address automatically" are selected and then press "OK". 14 - Edimax AR-7211A V2 | Manual - Page 15
IP address automatically for either Windows 95/98/Me, 2000 or NT operating systems. For other operating systems (Macintosh, Sun, etc.), please follow the manual of the operating system. The following is a step-by-step illustration of how to configure your PC to obtain an IP address automatically for - Edimax AR-7211A V2 | Manual - Page 16
4. In the Internet Protocol Version 4 (TCP/IPv4) Properties window, select Obtain an IP address automatically and Obtain DNS server address automatically as shown on the following screen. 5. Click OK to confirm the setting. Your PC will now obtain an IP address automatically from your router's DHCP - Edimax AR-7211A V2 | Manual - Page 17
3. Check your list of Network Components. You should see Internet Protocol Version 4 (TCP/IPv4) on your list. Select it and click the Properties button. 4. In the Internet Protocol Version 4 (TCP/IPv4) Properties window, select Obtain an IP address automatically and Obtain DNS server address - Edimax AR-7211A V2 | Manual - Page 18
3. Check your list of Network Components. You should see Internet Protocol [TCP/IP] on your list. Select it and click the Properties button. 4. In the Internet Protocol (TCP/IP) Properties window, select Obtain an IP address automatically and Obtain DNS server address automatically as shown on the - Edimax AR-7211A V2 | Manual - Page 19
prefer a web based setup, you can login to the ADSL router using Internet Explorer, and configure the router from there using the web-based interface. Instructions for how to do so can be found in 5. Web Configuration 4.1. Setup Wizard 1. When you start the setup wizard, you will see the following - Edimax AR-7211A V2 | Manual - Page 20
2. Please select your product. 20 - Edimax AR-7211A V2 | Manual - Page 21
3. Please ensure all hardware is correctly installed. Check the box and click "Next" 21 - Edimax AR-7211A V2 | Manual - Page 22
4. Select your country and ISP. If your ISP is not listed, select "Other" from the list and refer to 4.2. Internet Connection Type. 22 - Edimax AR-7211A V2 | Manual - Page 23
5. Enter your ISP's username and password and click "Apply". On the next screen, click "Apply" again. 23 - Edimax AR-7211A V2 | Manual - Page 24
6. Please wait while the router connects to the Internet. When the router is connected successfully, you will see the screen below. 24 - Edimax AR-7211A V2 | Manual - Page 25
"Other" from the list. Then select your Internet connection type and click "Next". If you are not sure, please contact your Internet Service Provider (ISP). Depending on your selection, please refer to the appropriate chapter 4.1.1.1. PPPoE/PPPoA, 4.1.1.2. Bridge Mode, 4.1.1.3. Dynamic IP Address or - Edimax AR-7211A V2 | Manual - Page 26
used for xDSL. Bridge Mode Bridge Mode is a common connection method used for xDSL modems. Dynamic IP Address Obtain an IP address automatically from your service provider. Static IP Address Uses a static IP address. Your service provider gives a static IP address to access Internet - Edimax AR-7211A V2 | Manual - Page 27
Parameter User Name Password VPI VCI Connection type Description Enter the username exactly as your ISP assigned. Enter the password that your ISP has assigned to you. Virtual path identifier (VPI) is the virtual path between two points in an ATM network. Its valid value is in the range of 0 to 255 - Edimax AR-7211A V2 | Manual - Page 28
4.2.1.2. Bridge Mode Parameter VPI VCI Connection Type Description Virtual path identifier (VPI) is the virtual path between two points in an ATM network. Its valid value is in the range of 0 to 255. Enter the correct VPI provided by your ISP. By default, VPI is set to 8. Virtual channel - Edimax AR-7211A V2 | Manual - Page 29
4.1.1.3. Dynamic IP Address Parameter VPI VCI Connection Type Description Virtual path identifier (VPI) is the virtual path between two points in an ATM network. Its valid value is in the range of 0 to 255. Enter the correct VPI provided by your ISP. By default, VPI is set to 8. Virtual channel - Edimax AR-7211A V2 | Manual - Page 30
4.2.1.3. Static IP Parameter VPI VCI Static IP Address IP Subnet Mask Gateway Connection Type Description Virtual path identifier (VPI) is the virtual path between two points in an ATM network. Its valid value is in the range of 0 to 255. Enter the correct VPI provided by your ISP. By default, VPI - Edimax AR-7211A V2 | Manual - Page 31
select "ADSLTYPE_ROUTER_LLC" or "ADSLTYPE_ROUTER_VCMUX". 4.3.Firmware Upgrade The wizard includes a tool to upgrade the router's firmware. Firmware can be downloaded from the Edimax website, if you wish to upload new firmware, select "Firmware Upgrade" from the menu across the top of the screen. 31 - Edimax AR-7211A V2 | Manual - Page 32
5. Web Configuration The router can also be configured using the web-based configuration interface. Follow the instructions below. 5.1. Accessing the Router To access the web-based configuration interface: 1. Open the Internet Explorer (IE) browser and enter http://192.168.2.1. 2. In the Login - Edimax AR-7211A V2 | Manual - Page 33
If you log in as a common user, you can check the status of the router, but not configure most of the settings. 5.2.Internet Connection The Wizard page of the web-based interface allows easy configuration of the Internet connection and other parameters. The following sections describe the various - Edimax AR-7211A V2 | Manual - Page 34
the properties of your Internet connection is provided by your Internet service provider (ISP). For example, your ISP should inform you whether Routed or 1483 Bridged and refer to the appropriate section of the manual accordingly: 5.2.1. PPPoE/PPPoA Note: The settings for PPPoA and PPPoE connection - Edimax AR-7211A V2 | Manual - Page 35
by your ISP. Enter the password for PPPoE dial-up, which is provided by your ISP. You can select Continuous (recommended), Connect on Demand, or Manual. Continuous: After dial-up is successful, PPPoE connection is always on-line, whether the data is being transmitted or not. Connect on Demand - Edimax AR-7211A V2 | Manual - Page 36
Field Description connection. Manual: Dial up and disconnect the connection mannually. 5.2.2. 1483 MER/1483 Routed Note: The settings for 1483 Routed and 1483 MER connection types are the same. - Edimax AR-7211A V2 | Manual - Page 37
addresses When selected, DHCP automatically assigns DNS automatically server address. Use the following DNS server addresses When selected, you need to manually enter the primary DNS server address and secondary DNS server address. Check this box to enable network address translation (NAT). If - Edimax AR-7211A V2 | Manual - Page 38
Field LAN Interface Setup LAN IP LAN Netmask Enable Secondary IP DHCP Server Enable DHCP Server Start IP End IP Max Lease Time Description Enter the IP address of the LAN interface. Its valid value is in the range of 192.168.2.1 to 192.168.255.254. The default IP address is 192.168.2.1. Enter the - Edimax AR-7211A V2 | Manual - Page 39
Click BACK to modify the settings. Click FINISH to save the settings. Click RESET to cancel the settings. Note: After saving the settings in the Wizard page, the PVC in the Wizard page replaces that in the Channel Configuration page. The preset PVCs in the Channel Configuration page do not take - Edimax AR-7211A V2 | Manual - Page 40
5.3.2. LAN Choose Status > LAN. The page that is displayed shows some basic LAN settings of the router. In the LAN Status page, you can view the LAN IP address, DHCP server status, MAC address and DHCP client table. To configure the LAN network, refer to chapter 5.4.1LAN. 5.3.3. WAN Choose Status > - Edimax AR-7211A V2 | Manual - Page 41
5.3.4. Statistics Choose Status > Statistics. The Statistics page that is displayed contains Statistics and ADSL Statistics. 5.3.4.1. Statistics In this page, you can view the statistics of each network interface. 5.3.4.2. ADSL Statistic Select ADSL Statistic in the left pane to view the ADSL line - Edimax AR-7211A V2 | Manual - Page 42
5.3.5. ARP Choose Status > ARP. In the Arp Table page, you can view the table that shows a list of learned MAC addresses. 5.4. Network In the navigation bar, click Network. The Network page that is displayed contains LAN and WAN. 5.4.1. LAN Choose Network > LAN. The LAN page that is displayed - Edimax AR-7211A V2 | Manual - Page 43
Field IP Address Subnet Mask Secondary IP LAN Port Link Speed/Duplex Mode Description Enter the IP address of LAN interface. It is recommended to use an address from a block that is reserved for private use. This address block is 192.168.2.1- 192.168.255.254. Enter the subnet mask of LAN interface. - Edimax AR-7211A V2 | Manual - Page 44
Field MAC Address Control Add Description Duplex,Auto Negotiation. Select this to enable access control based on MAC address. Only a host whose MAC address is listed in the Current Allowed MAC Address Table can access the modem. Enter a MAC address, and click "Add" to add it to the Current Allowed - Edimax AR-7211A V2 | Manual - Page 45
Server, the router can assign IP addresses, IP default gateway and DNS Servers to the host in Windows95, Windows NT and other operation systems that support the DHCP client. This specifies the first and the last IP address in the IP address pool. The router assigns an IP address that is - Edimax AR-7211A V2 | Manual - Page 46
Field IP Address MAC Address Expiry(s) Refresh Close Description The IP address assigned to the DHCP client from the router is displayed here. The MAC address of the DHCP client is displayed here. Each Ethernet device has a unique MAC address. The MAC address is assigned at the factory and consists - Edimax AR-7211A V2 | Manual - Page 47
In the DHCP Mode field, if you select None you will see the following page: In the DHCP Mode field, if you select DHCP Relay you will see the following page: Field DHCP Mode Relay Server Apply Changes Reset Description If set to DHCP Relay, the router acts a surrogate DHCP Server and relays the - Edimax AR-7211A V2 | Manual - Page 48
5.4.1.3. DHCP Static IP If you select DHCP Static IP in the left pane, you will see the following page. Here you can assign the IP addresses on the LAN to the specific individual PCs based on their MAC address. Field IP Address Mac Address Add Delete Selected Reset DHCP Static IP Table Description - Edimax AR-7211A V2 | Manual - Page 49
Field Default Route Selection VPI VCI Encapsulation Channel Mode Enable NAPT Description You can select Auto or Specified. The virtual path between two points in an ATM network, ranging from 0 to 255. The virtual channel between two points in an ATM network, ranging from 32 to 65535 (1 to 31 are - Edimax AR-7211A V2 | Manual - Page 50
by your ISP. Enter the correct password for PPP dial-up, which is provided by your ISP. You can choose Continuous, Connect on Demand or Manual. If set the type to Connect on Demand, you need to enter the idle timeout time. If the router does not detect the flow of - Edimax AR-7211A V2 | Manual - Page 51
Field Remote IP Address Netmask Unnumbered Add Modify Current ATM VC Table Description Enter the gateway IP address provided by your ISP. Enter the subnet mask of the local IP address. Check this box to enable IP unnumbered function. After configuring the parameters of this page, select "Add" to - Edimax AR-7211A V2 | Manual - Page 52
provided by your ISP. The password provided by your ISP. You can choose AUTO, CHAP, or PAP. You can choose Continuous, Connect on Demand, or Manual. If you choose Connect on Demand, you need to enter the idle timeout time. if the router does not detect the flow of the user - Edimax AR-7211A V2 | Manual - Page 53
1q Apply Changes Return Undo Source Mac address MACCLONE Description You can select Bridged Ethernet, Bridged PPPoE or Disable Bridge. The accessed equipment type. The service name is displayed here. You can select Disable or Enable. If enabled, you need to enter the VLAN ID. The value ranges from - Edimax AR-7211A V2 | Manual - Page 54
the router to an ADSL outlet using a telephone cable, click "Probe" and the router will perform auto detection of the PVCs the official end supports. The virtual path identifier of the ATM PVC. Enter a value between 0 and 255. The virtual channel identifier of the ATM PVC. Enter a value between - Edimax AR-7211A V2 | Manual - Page 55
this page, you can select the DSL modulation. Mostly, it is recommended that you do not alter the default factory default settings. The router supports the following modulations: G.Lite, G.Dmt, T1.413, ADSL2, ADSL2+, AnnexL, and AnnexM. The router negotiates the modulation modes with the DSLAM. 55 - Edimax AR-7211A V2 | Manual - Page 56
one, and so on, until the correct IP address is returned. Choose Service > DNS. The DNS page that is displayed contains DNS and DDNS. 5.5.1.1. in the following figure appears. Field Attain DNS Automatically Set DNS Manually Description When selected, the router accepts the first received DNS - Edimax AR-7211A V2 | Manual - Page 57
Field Apply Changes Reset Selected Description Click to save the settings of this page. Click to restart configuring the parameters in this page. 5.5.1.2. DDNS Click DDNS in the left pane, and you will see the following screen. This page is used to configure the dynamic DNS address from DynDNS.org - Edimax AR-7211A V2 | Manual - Page 58
5.5.2. Firewall Choose Service > Firewall. The Firewall page that is displayed contains IP/Port Filter, MAC Filter, URL Filter, Anti-DoS and Software Forbidden. 5.5.2.1. IP/Port Filter Click IP/ - Edimax AR-7211A V2 | Manual - Page 59
5.5.2.3. URL Filter Click URL Filter in the left pane, and you will see the following page. URL Filter is a function to block a domain name (such as tw.yahoo.com) or filtered keyword. You can add or delete FQDN and filtered keyword. The following table describes the parameters and buttons of this - Edimax AR-7211A V2 | Manual - Page 60
a row in the URL Blocking Table and click to delete the row. A list of the URL (s) to which access is blocked. 5.5.2.4. Anti-DoS A Denial-of-Service attack (DoS attack) is a type of attack on a network that is designed to disrupt a network by flooding it with useless traffic. Click Anti-DoS in - Edimax AR-7211A V2 | Manual - Page 61
of applications which are currently forbidden from accessing the network. Add Forbidden Software Select an application to be forbidden from accessing the network. 5.5.3. UPNP Choose Service > UPnP, the page shown in the following figure appears. This page is used to configure UPnP. 61 - Edimax AR-7211A V2 | Manual - Page 62
5.5.4. IGMP Proxy Choose Service > IGMP Proxy, and you will see the following page. An IGMP proxy enables the The system acts as a proxy for its hosts after you enable it. 5.5.5. TR-069 Choose Service > TR-069, and you will arrive at the following page. Here, you can configure the TR-069 CPE. 62 - Edimax AR-7211A V2 | Manual - Page 63
to the ACS to check whether the configuration updates. Specify the amount of time between connections to ACS. The connection username provided by TR-069 service. 63 - Edimax AR-7211A V2 | Manual - Page 64
Auto-Execution Description The connection password provided by TR-069 service. Select Enable to display ACS SOAP messages on the serial to automatically start the TR-069 after the router is powered on. 5.5.6. ACL Choose Service > ACL and you will arrive at the following screen. Here, you can permit - Edimax AR-7211A V2 | Manual - Page 65
Field Direction Select LAN ACL Switch IP Address Services Allowed Add Reset Description Select the router access the router. You can choose the following services from LAN: web, telnet, ssh, ftp, tftp, snmp or ping. You can also choose all of the services. After setting the parameters, click "Add" - Edimax AR-7211A V2 | Manual - Page 66
Direction Select WAN Setting WAN Interface IP Address Services Allowed Add Reset Description Select the router the router. You can choose the following services from WAN: web, telnet, ssh, ftp, tftp, snmp or ping. You can also choose all of the services. After setting the parameters, click "Add" - Edimax AR-7211A V2 | Manual - Page 67
5.6. Advanced In the navigation bar across the top of the screen, click Advanced. The Advanced page which is displayed contains Routing, NAT, IP QoS, SNMP and Others. 5.6.1. Routing Choose Advanced > Routing, and the page which is displayed contains Static Route and RIP. 5.6.1.1. Static Route Click - Edimax AR-7211A V2 | Manual - Page 68
Field Show Routes Static Route Table Description delete the row. Clicking "Show Routes" will display the IP Route Table. You can view a list of destination routes commonly accessed by your network. A list of the previously configured static IP routes. Clicking Show Routes will display the - Edimax AR-7211A V2 | Manual - Page 69
that the router receives RIP v2 messages. Choosing Both indicates that the router receives RIP v1 and RIP v2 messages. The working mode for DMZ A Demilitarized Zone (DMZ) is used to provide Internet services without sacrificing unauthorized access to its local private network. Typically, - Edimax AR-7211A V2 | Manual - Page 70
Virtual Server in the left pane to see the following screen: Field Service Type Description You can select a common service type, for example, AUTH, DNS or FTP. You can also define a service name. If Usual Service Name is selected, the corresponding parameter has the default settings. If User - Edimax AR-7211A V2 | Manual - Page 71
Port LAN IP Address Description Choose the transport layer protocol that the service type uses. You can choose TCP or UDP. You can choose . Choose the access port on the WAN. Enter the port number of the specified service type. Enter the IP address of the virtual server. It is in the same - Edimax AR-7211A V2 | Manual - Page 72
NAT ALG(Application Layer Gateways)function enables the router to support various special application protocols with payloads containing IP addresses and port Failure of the transformation of such information may results in problems. The NAT ALG function realizes payload detection and transformation - Edimax AR-7211A V2 | Manual - Page 73
5.6.2.5. NAT Exclude IP Click NAT Exclude IP in the left pane, the following screen will be displayed. Here, you can configure some source IP addresses which use the purge route mode when accessing internet through the specified interface. 5.6.2.6. Port Trigger Click Port Trigger in the left pane, - Edimax AR-7211A V2 | Manual - Page 74
If the application you want to set up is not listed, click the User-defined Application Name radio button and type in a name for the trigger in the Custom application field. Configure the Start Match Port, End Match Port, Trigger Protocol, Start Relate Port, End Relate Port, Open Protocol and Nat - Edimax AR-7211A V2 | Manual - Page 75
Entries in this table allow you to configure one IP pool for a specified source IP address from LAN, so one packet whose source IP is in the range of the specified address will select one IP address from the pool for NAT. 5.6.3. IP QoS Choose Advanced > IP QoS, and the page shown in the following - Edimax AR-7211A V2 | Manual - Page 76
Field IP QoS QoS Policy Schedule Mode Source IP Source Mask Destination IP Destination Mask Source Port Destination Port Protocol Phy Port Set priority Description Select to enable or disable IP QoS function. You need to enable IP QoS if you want to configure the parameters of this page. You can - Edimax AR-7211A V2 | Manual - Page 77
7 define the priority in the ToS of the IP data packet. The type of IP ToS for classifying the data package You can choose Normal Service, Minimize Cost, Maximize Reliability, Maximize Throughput, or Minimize Delay. You can choose from 0 to 7. Select a row in the QoS rule list and click it to - Edimax AR-7211A V2 | Manual - Page 78
Community name (read- The network administrators must use this password to only) read the information of this router. Community name (read- The network administrators must use this password to write) configure the information of the router. 5.6.5. Others Select Advanced > Others. The submenu - Edimax AR-7211A V2 | Manual - Page 79
5.6.5.2. Client Limit Click Client Limit in the left pane, the page shown in the following figure will appear. This page is used to configure the capability of force how many devices can access to Internet. 5.6.5.3. Others Click Others in the left pane, and you will see the following page. You can - Edimax AR-7211A V2 | Manual - Page 80
5.7. Admin In the navigation bar, click Admin. The Admin page that is displayed contains Commit/Reboot, Update, Log, Password and Time. 5.7.1. Commit/Reboot Choose Admin > Commit/Reboot. From here you can set the router reset to the default settings or set the router to commit the current settings - Edimax AR-7211A V2 | Manual - Page 81
5.7.2.1. Upgrade Firmware Click Upgrade Firmware in the left pane, and you will see the following page. Here, you can upgrade the firmware of the router. Field Select File Upload Reset Description Click Browse to select the firmware file. After selecting the firmware file, click Upload to starting - Edimax AR-7211A V2 | Manual - Page 82
5.7.3. Log Choose Admin > Log, from here you can enable or disable system log function and view the system log. 5.7.4. Password Choose Admin > Password, and you will see the following page. By default, the super user name and password are admin and 1234 respectively. The common user name and - Edimax AR-7211A V2 | Manual - Page 83
old password. Enter the new password again. 5.7.5. Time Choose Admin > Time, the page shown in the following figure appears. You can configure the system time manually or update the system time from a time server. Field System Time NTP Configuration State Description Set the system time - Edimax AR-7211A V2 | Manual - Page 84
Server Server2 Time Zone Description enable NTP if you want to configure the parameters of NTP. Set the primary NTP server manually. Set the secondary NTP server manually. Choose the time zone in which area you are from the drop down list. 5.8. Diagnostic In the navigation bar, click Diagnostic - Edimax AR-7211A V2 | Manual - Page 85
duration. Data packet size. A differentiated services code point in the TOS identification byte for service categories in the IP header of every OAM Loopback, and you will see the following page. Connectivity verification is supported by the use of the OAM loopback capability for both VP and VC - Edimax AR-7211A V2 | Manual - Page 86
5.8.4. ADSL Statistics Choose Diagnostic > ADSL Statistics. The page shown in the following figure will appear. This page is used for ADSL tone diagnostics. Click Start to start ADSL tone diagnostics. 5.8.5. Diag-Test Choose Diagnostic > Diag-Test, and you will arrive at the following page. Here, - Edimax AR-7211A V2 | Manual - Page 87
5.9.Trouble Shooting Question Answer Why are all the indicators off? Check the connection between the power adapter and the power socket. Check whether the power switch - Edimax AR-7211A V2 | Manual - Page 88
, Edimax Technology Co., LTD., declare under our sole responsibility, that the equipment described below complies with the requirements of the European Council directive (2004/108/EC, 92/31/EEC, 2006/95/EC). Equipment Model No. : Fast Ethernet ADSL2/2+ Modem Router : AR-7211A V2 / AR-7211B V2 The - Edimax AR-7211A V2 | Manual - Page 89
89
-
 1
1 -
 2
2 -
 3
3 -
 4
4 -
 5
5 -
 6
6 -
 7
7 -
8
-
9
-
10
-
11
-
12
-
13
-
14
-
15
-
16
-
17
-
18
-
19
-
20
-
21
-
22
-
23
-
24
-
25
-
26
-
27
-
28
-
29
-
30
-
31
-
32
-
33
-
34
-
35
-
36
-
37
-
38
-
39
-
40
-
41
-
42
-
43
-
44
-
45
-
46
-
47
-
48
-
49
-
50
-
51
-
52
-
53
-
54
-
55
-
56
-
57
-
58
-
59
-
60
-
61
-
62
-
63
-
64
-
65
-
66
-
67
-
68
-
69
-
70
-
71
-
72
-
73
-
74
-
75
-
76
-
77
-
78
-
79
-
80
-
81
-
82
-
83
-
84
-
85
-
86
-
87
-
88
-
89
 |
 |

1
AR-7211A V2 / AR-7211B V2
User Manual
10-2012 / v1.0