Epson WorkForce WF-3620 User Manual
Epson WorkForce WF-3620 Manual
 |
View all Epson WorkForce WF-3620 manuals
Add to My Manuals
Save this manual to your list of manuals |
Epson WorkForce WF-3620 manual content summary:
- Epson WorkForce WF-3620 | User Manual - Page 1
Administrator's Guide - Epson WorkForce WF-3620 | User Manual - Page 2
- Epson WorkForce WF-3620 | User Manual - Page 3
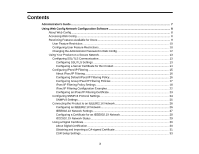
Contents Administrator's Guide...7 Using Web Config Network Configuration Software 8 About Web Config ...8 Accessing Web Config ...8 Restricting Features Available for Users 9 User Feature Restriction...10 Configuring User Feature Restrictions 10 Changing the Administrator Password in - Epson WorkForce WF-3620 | User Manual - Page 4
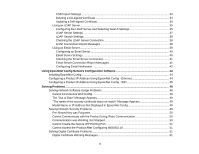
Email Notification 42 Using EpsonNet Config Network Configuration Software 44 Installing EpsonNet Config ...44 Configuring a Product IP Address Using EpsonNet Config - Ethernet 44 Configuring a Product IP Address Using EpsonNet Config - WiFi 45 Solving Problems ...48 Solving Network Software - Epson WorkForce WF-3620 | User Manual - Page 5
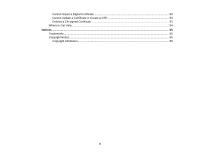
Cannot Import a Digital Certificate 53 Cannot Update a Certificate or Create a CSR 53 Deleted a CA-signed Certificate ...53 Where to Get Help...54 Notices ...55 Trademarks ...55 Copyright Notice...55 Copyright Attribution ...56 5 - Epson WorkForce WF-3620 | User Manual - Page 6
- Epson WorkForce WF-3620 | User Manual - Page 7
Administrator's Guide Welcome to the Administrator's Guide. For a printable PDF copy of this guide, click here. 7 - Epson WorkForce WF-3620 | User Manual - Page 8
lock the settings you select by setting up an administrator password for your product. See the product's User's Guide for instructions. Parent topic: Using Web Config Network Configuration Software Accessing Web Config You can access Web Config from your browser using HTTP or HTTPS. By default you - Epson WorkForce WF-3620 | User Manual - Page 9
instead of the product IP address to access Web Config. Parent topic: Using Web Config Network Configuration Software Restricting Features Available for Users Follow the instructions in these sections to restrict users from using certain product features and create an administrator password to lock - Epson WorkForce WF-3620 | User Manual - Page 10
to log into the printing or scanning software, and allow the software to authenticate the users, before printing or scanning proceeds. For instructions on setting up software restrictions, see the help utility in the printing or scanning software. Parent topic: Restricting Features Available for - Epson WorkForce WF-3620 | User Manual - Page 11
• Web services such as Epson Connect or Google Cloud Print • Smartphones in the Password field following the guidelines on the screen. Note: If you need to reset a password, leave the password field blank. 9. Select the checkbox for each function you help utility in the software for instructions. 11 - Epson WorkForce WF-3620 | User Manual - Page 12
all cases. Note: See your product's User's Guide for instructions on setting an administrator password using the control panel. If you forget your administrator password, contact Epson for support, as described in the product's User's Guide. 1. Access Web Config, select Administrator Settings, and - Epson WorkForce WF-3620 | User Manual - Page 13
an IEEE802.1X Network Using a Digital Certificate Using an LDAP Server Using an Email Server Parent topic: Using Web Config Network Configuration Software Configuring SSL/TLS Communication Follow the instructions in these sections to configure SSL/TLS communication using Web Config. Configuring SSL - Epson WorkForce WF-3620 | User Manual - Page 14
You see a window like this: 3. Select one of the following options for the Encryption Strength setting: • High for AES256/3DES • Middle for AES256/3DES/AES128/RC4 4. Select Enable or Disable for the Redirect HTTP to HTTPS setting as necessary. 5. Click Next. You see a confirmation message. 6. Click - Epson WorkForce WF-3620 | User Manual - Page 15
Click Next. You see a confirmation message. 5. Click OK. Parent topic: Configuring SSL/TLS Communication Configuring IPsec/IP Filtering Follow the instructions in these sections to configure IPsec/IP traffic filtering using Web Config. About IPsec/IP Filtering Configuring Default IPsec/IP Filtering - Epson WorkForce WF-3620 | User Manual - Page 16
filter traffic to the product over the network based on IP address, service, and port by configuring a default policy that applies to every users or user groups, you can configure group policies. Note: IPsec is supported only by computers running Windows Vista or later, or Windows Server 2008 or - Epson WorkForce WF-3620 | User Manual - Page 17
Configuring Group IPsec/IP Filtering Policies You can configure group policies for IPsec/IP traffic filtering using Web Config. 1. Access Web Config and select Network Security Settings. 2. Select IPsec/IP Filtering and select Basic. 3. Click a tab number for the policy number you want to configure. - Epson WorkForce WF-3620 | User Manual - Page 18
IPsec/IP Filtering Policy Settings Default Policy Settings Setting Access Control Authentication Method Pre-Shared Key Encapsulation Remote Gateway(Tunnel Mode) Security Protocol Options/Description Permit Access to permit IP packets to pass through Refuse Access to prevent IP packets from passing - Epson WorkForce WF-3620 | User Manual - Page 19
Group Policy Settings Setting Access Control Local Address(Printer) Remote Address(Host) Method of Choosing Port Service Name Transport Protocol Options/Description Permit Access to permit IP packets to pass through Refuse Access to prevent IP packets from passing through IPsec to - Epson WorkForce WF-3620 | User Manual - Page 20
Setting Local Port Remote Port Authentication Method Pre-Shared Key Encapsulation Remote Gateway(Tunnel Mode) Options/Description If you selected Port Number as the Method of Choosing Port option, and TCP or UDP for the Transport Protocol option, enter the port numbers that control receiving - Epson WorkForce WF-3620 | User Manual - Page 21
WSD WS-Discovery Network Scan TCP UDP TCP Network Push Scan TCP 515/Any port 9100/any port 631/Any port Any port/5357 3702/Any port 1865/Any port Any port/2968 Controls these operations All services Searching for a product from applications such as printer or scanner drivers, or EpsonNet Config - Epson WorkForce WF-3620 | User Manual - Page 22
push scanning from Document Capture Pro Forwarding FTP printing data to FTP server Controlling FTP printing to FTP server Forwarding scan data and with Epson Connect, Google Cloud Printer, firmware update, and root certificate update on a HTTP or HTTPS client * To control forwarding of scan and - Epson WorkForce WF-3620 | User Manual - Page 23
-Shared Key: Enter a key up to 127 characters long Receiving Printing Data and Printer Settings Use this example to allow communication of printing data and printer settings from specified services. Default policy: • IPsec/IP Filtering: Enable • Access Control: Refuse Access Group policy: • Access - Epson WorkForce WF-3620 | User Manual - Page 24
. 5. Click Next. You see a confirmation message. 6. Click OK. Parent topic: Configuring IPsec/IP Filtering Configuring SNMPv3 Protocol Settings If your product supports the SNMPv3 protocol, you can monitor and control access to your product using that protocol. 1. Access Web Config and select Wi-Fi - Epson WorkForce WF-3620 | User Manual - Page 25
You see a window like this: 3. Select the Enable SNMPv3 checkbox to enable SNMPv3 settings. 4. Select the settings you want in SNMPv3 Settings section. 5. Click Next. You see a confirmation message. 6. Click OK. SNMPv3 Settings Parent topic: Using Your Product on a Secure Network SNMPv3 Settings - Epson WorkForce WF-3620 | User Manual - Page 26
Settings Connecting the Product to an IEEE802.1X Network Follow the instructions in these sections to connect the product to an IEEE802.1X Product on a Secure Network Configuring an IEEE802.1X Network If your product supports IEEE802.1X, you can use it on a network with authentication provided by - Epson WorkForce WF-3620 | User Manual - Page 27
the IEEE802.1X (Wired LAN) setting. 4. To use the product on a Wi-Fi network, enable your product's Wi-Fi settings. See your product's User's Guide for instructions. The status of the connection shown in the IEEE802.1X (Wi-Fi) setting. Note: You can share the network settings for Ethernet and Wi-Fi - Epson WorkForce WF-3620 | User Manual - Page 28
/AES128/RC4 Parent topic: Connecting the Product to an IEEE802.1X Network Configuring a Certificate for an IEEE802.1X Network If your product supports IEEE802.1X, you can configure a certificate for the network using Web Config. 1. Access Web Config and select Network Security Settings. 2. Select - Epson WorkForce WF-3620 | User Manual - Page 29
a status sheet from your product. See the product's User's Guide for instructions on printing a network status sheet. The network status sheet displays the ID Disable EAP Success Authenticating Config Error Client Certificate Error Timeout Error Status description IEEE802.1X is disables IEEE802 - Epson WorkForce WF-3620 | User Manual - Page 30
Status ID User ID Error Server ID Error Server Certificate Error CA Certificate Error EAP Failure Status description Authentication the Product to an IEEE802.1X Network Using a Digital Certificate Follow the instructions in these sections to configure and use digital certificates using Web Config. - Epson WorkForce WF-3620 | User Manual - Page 31
Parent topic: Using a Digital Certificate Obtaining and Importing a CA-signed Certificate You can obtain a CA-signed certificate by creating a CSR (Certificate Signing Request) using Web Config and submitting it to a certificate authority. The CSR created in Web Config is in PEM/DER format. You can - Epson WorkForce WF-3620 | User Manual - Page 32
matches the format specified by your certificate authority to download the CSR. Caution: Do not generate another CSR and date settings are correct on your product. See the product's User's Guide for instructions. 11. Select Network Security Settings, select your network security option, and select - Epson WorkForce WF-3620 | User Manual - Page 33
or static IP address from 1 to 128 characters long; for example, Reception printer or https://10.152.12.225 Enter information in each field as necessary, from ; separate any multiple names with commas Enter a two-digit country code number as specified by the ISO-3166 standard Parent topic: Using - Epson WorkForce WF-3620 | User Manual - Page 34
. 3. Click Delete. You see a completion message. 4. Click OK. Parent topic: Using a Digital Certificate Updating a Self-signed Certificate If your product supports the HTTPS server feature, you can update a self-signed certificate using Web Config. 1. Access Web Config and select Network Security - Epson WorkForce WF-3620 | User Manual - Page 35
verify the certificate information. Parent topic: Using a Digital Certificate Using an LDAP Server Follow the instructions in these sections to use an LDAP server to provide fax and email destination information using Web Config. Configuring the LDAP Server and Selecting Search Settings LDAP Server - Epson WorkForce WF-3620 | User Manual - Page 36
1. Access Web Config and select Wi-Fi/Network Settings. 2. Select LDAP Server and select Basic. You see a window like this: 3. Select Use as the Use LDAP Server setting. 4. Select the LDAP server settings. 5. Click OK. 6. Select Wi-Fi/Network Settings and select LDAP Server again. 7. Select Search - Epson WorkForce WF-3620 | User Manual - Page 37
8. Select the LDAP search settings you want to use. 9. Click OK. Parent topic: Using an LDAP Server LDAP Server Settings You can configure these LDAP server settings in Web Config. Setting LDAP Server Address LDAP server Port Number Search Timeout (sec) Authentication Method User Name Password - Epson WorkForce WF-3620 | User Manual - Page 38
(Unicode (UTF-8) Specify the maximum number of search entries before an error message appears, from 1 to 500 Enter the attribute name to display when A-Z Leave blank or enter the attribute name to display when searching for email addresses from 0 to 255 characters long in Unicode (UTF-8); the first - Epson WorkForce WF-3620 | User Manual - Page 39
can review the connection report messages to diagnose LDAP connection problems in printer or server. Authentication failed. Check the settings. Cannot access the printer Email Server Follow the instructions in these sections to use an email server to send scan and fax data by email, or use email - Epson WorkForce WF-3620 | User Manual - Page 40
Server and select Basic. You see a window like this: 3. Select the email server settings. 4. Click OK. Parent topic: Using an Email Server Email Server Settings You can configure these email server settings in Web Config. Setting Authentication Method Options/Description Select the authentication - Epson WorkForce WF-3620 | User Manual - Page 41
long in ASCII using A-Z, a-z, 0-9, and these characters: Enter the sender's email address from 0 to 255 characters long in ASCII; do not use a period Email Server Email Server Connection Report Messages You can review the connection report messages to diagnose email server connection problems - Epson WorkForce WF-3620 | User Manual - Page 42
settings. Cannot access the printer until processing is complete. Description One of the following has occurred: • The email server address or port number is incorrect • A timeout has occurred The product is busy. Parent topic: Using an Email Server Configuring Email Notification You can configure - Epson WorkForce WF-3620 | User Manual - Page 43
6. Select the checkboxes to indicate the events for which you want to receive email notifications. 7. Click OK. Parent topic: Using an Email Server 43 - Epson WorkForce WF-3620 | User Manual - Page 44
's Guide for instructions. Installing EpsonNet Config Configuring a Product IP Address Using EpsonNet Config - Ethernet Configuring a Product IP Address Using EpsonNet Config - WiFi Installing EpsonNet Config To install EpsonNet Config, download the software from the product's support page at epson - Epson WorkForce WF-3620 | User Manual - Page 45
, and enter proxy settings by selecting Internet from the TCP/IP menu. 7. Select Transmit. Parent topic: Using EpsonNet Config Network Configuration Software Configuring a Product IP Address Using EpsonNet Config - WiFi You can configure the product's IP address using EpsonNet Config. 1. Turn on the - Epson WorkForce WF-3620 | User Manual - Page 46
or Start, and select All Programs or Programs. Select EpsonNet and click EpsonNet Config. • OS X: Open the Applications folder, open the Epson Software folder, select EpsonNet, select EpsonNet Config, and double-click the EpsonNet Config icon. After a few moments, the program displays the connected - Epson WorkForce WF-3620 | User Manual - Page 47
Transmit. 10. Confirm the Wi-Fi connection to the product and disconnect the Ethernet cable from the product. Parent topic: Using EpsonNet Config Network Configuration Software 47 - Epson WorkForce WF-3620 | User Manual - Page 48
using your product control panel or print a network status sheet. See your product's User's Guide for instructions. • If you selected High as the Encryption Strength setting in Web Config, your browser must support AES (256-bit) or 3DES (168-bit) encryption. Check your browser's encryption - Epson WorkForce WF-3620 | User Manual - Page 49
, and increase the time option for the Communication Error setting. This may cause EpsonNet Config to run slower, however. Parent topic: Solving Network Software Usage Problems Solving Network Security Problems Check these sections if you have problems using the network security features. Pre-Shared - Epson WorkForce WF-3620 | User Manual - Page 50
policy. Parent topic: Solving Network Security Problems Cannot Communicate with the Product Using IPsec Communication Make sure your computer is using one of these supported algorithms for communicating with the product: Security method Supported algorithms Consistency Algorithm AES-CBC 128 AES - Epson WorkForce WF-3620 | User Manual - Page 51
using Web Config. • If you are using a CA certificate, make sure it is imported to the computer that is accessing the printer. Parent topic: Solving Network Security Problems Cannot Access the Product After Configuring IEEE802.1X If you cannot access the product after configuring it for IEEE802.1X - Epson WorkForce WF-3620 | User Manual - Page 52
has expired. Check if the certificate Make sure the product time and date are set is valid, or check the date and time on your printer. correctly and, if the certificate is out of date, obtain and import a new certificate. Private key is required. Do one of the following to pair - Epson WorkForce WF-3620 | User Manual - Page 53
the CA-signed certificate file size it 5KB or less. • Make sure you are entering the correct password. Parent topic: Solving Digital Certificate Problems Cannot Update a Certificate or Create a CSR If you cannot update a self-signed certificate or create a CSR for a CA-signed certificate, try these - Epson WorkForce WF-3620 | User Manual - Page 54
contact Epson for technical support services, use the following support options. Internet Support Visit Epson's support website at epson.com/support (U.S.) or epson.ca/support (Canada) for solutions to common problems. You can download drivers and documentation, get FAQs and troubleshooting advice - Epson WorkForce WF-3620 | User Manual - Page 55
or alterations to this product, or (excluding the U.S.) failure to strictly comply with Seiko Epson Corporation's operating and maintenance instructions. Seiko Epson Corporation shall not be liable for any damages or problems arising from the use of any options or any consumable products other than - Epson WorkForce WF-3620 | User Manual - Page 56
from electromagnetic interference that occurs from the use of any interface cables other than those designated as Epson approved Products by Seiko Epson Corporation. This information is subject to change without notice. Copyright Attribution Parent topic: Notices Copyright Attribution © 2014
-
 1
1 -
 2
2 -
 3
3 -
 4
4 -
 5
5 -
 6
6 -
 7
7 -
8
-
9
-
10
-
11
-
12
-
13
-
14
-
15
-
16
-
17
-
18
-
19
-
20
-
21
-
22
-
23
-
24
-
25
-
26
-
27
-
28
-
29
-
30
-
31
-
32
-
33
-
34
-
35
-
36
-
37
-
38
-
39
-
40
-
41
-
42
-
43
-
44
-
45
-
46
-
47
-
48
-
49
-
50
-
51
-
52
-
53
-
54
-
55
-
56
 |
 |

Administrator's Guide