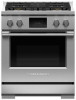
Fisher and Paykel RDV3-304-N User Guide Dual Fuel Cooker - Page 54
Care and cleaning, ALWAYS, NEVER, WHAT?, IMPORTANT, Manual cleaning
 |
View all Fisher and Paykel RDV3-304-N manuals
Add to My Manuals
Save this manual to your list of manuals |
Page 54 highlights
CARE AND CLEANING ALWAYS NEVER • Read these instructions and the 'Safety and warnings' section before you start cleaning your range. • Before cleaning or removing any part, make sure that everything on the range has been turned off. • Unless suggested otherwise in the chart following, allow any part to cool to a safe temperature before cleaning. If you do need to handle a warm or hot part take extreme care. Wear long protective mitts to avoid burns from steam or hot surfaces. • Try using any cleaner on a small area first, to ensure it doesn't stain. • See the pages following this chart for instructions on removing and replacing different parts of the range for cleaning or maintenance. • Ensure the anti-tip device is re-engaged if you move the range for cleaning. Failure to do this may result in the oven tipping which may cause death. • Use aerosol cleaners until the range has completely cooled. The propellant substance in these cleaners could catch fire in the presence of heat. • Let soiling or grease accumulate anywhere in or on the range. This will make future cleaning more difficult and may present a fire hazard. • Use any abrasive or harsh cleaners, cloths, scouring pads or steel wool. These will scratch your range and damage its appearance. • Use a steam cleaner to clean any part of the range. • Lift the black grill and griddle frames off the cooktop. Manual cleaning WHAT? Door frame exterior Control panel Sump area around cooktop burners Back trim Control dials Oven handles Toe kick 54 HOW? • Soften any stubborn stains using a hot soapy cloth before cleaning with a solution of mild detergent and hot water. Wipe dry with a microfiber cloth. • For extra shine, use a suitable stainless steel cleaner and polish, following manufacturer's instructions. Always rub the stainless steel in the direction of the polish lines. • Wipe with a damp cloth using a solution of mild detergent and hot water then dry thoroughly with microfiber cloth. • If desired, the dials can be removed for cleaning. Before removing, ensure that dial is set to OFF. Remove only one dial at a time ensuring that you refit completely and correctly. IMPORTANT! • Always read the label to ensure your stainless steel cleaner does not contain chlorine compounds as these are corrosive and may damage the appearance of your cooktop. • Do not use stainless steel cleaner on the dials, oven handles, or the toe kick. These are not stainless steel parts and their surface may be damaged by stainless steel cleaner. • When cleaning the back trim and the top of the oven door, ensure liquid does not run down the vents. • Do not use stainless steel cleaner on these parts, as doing so may damage their coating. • The dials are not interchangeable: if removed for cleaning, do so one at a time. This is to ensure that they are replaced correctly.
-
 1
1 -
2
-
3
-
4
-
5
-
6
-
7
-
8
-
9
-
10
-
11
-
12
-
13
-
14
-
15
-
16
-
17
-
18
-
19
-
20
-
21
-
22
-
23
-
24
-
25
-
26
-
27
-
28
-
29
-
30
-
31
-
32
-
33
-
34
-
35
-
36
-
37
-
38
-
39
-
40
-
41
-
42
-
43
-
44
-
45
-
46
-
47
-
48
-
 49
49 -
 50
50 -
 51
51 -
 52
52 -
 53
53 -
 54
54 -
 55
55 -
 56
56 -
 57
57 -
 58
58 -
 59
59 -
60
-
61
-
62
-
63
-
64
-
65
-
66
-
67
-
68
-
69
-
70
-
71
-
72
 |
 |
