HP 2500 HP Color LaserJet 2500 series - Getting Started Guide - Page 15
Schließen Sie die obere Abdeckung. Drücken Sie
 |
View all HP 2500 manuals
Add to My Manuals
Save this manual to your list of manuals |
Page 15 highlights
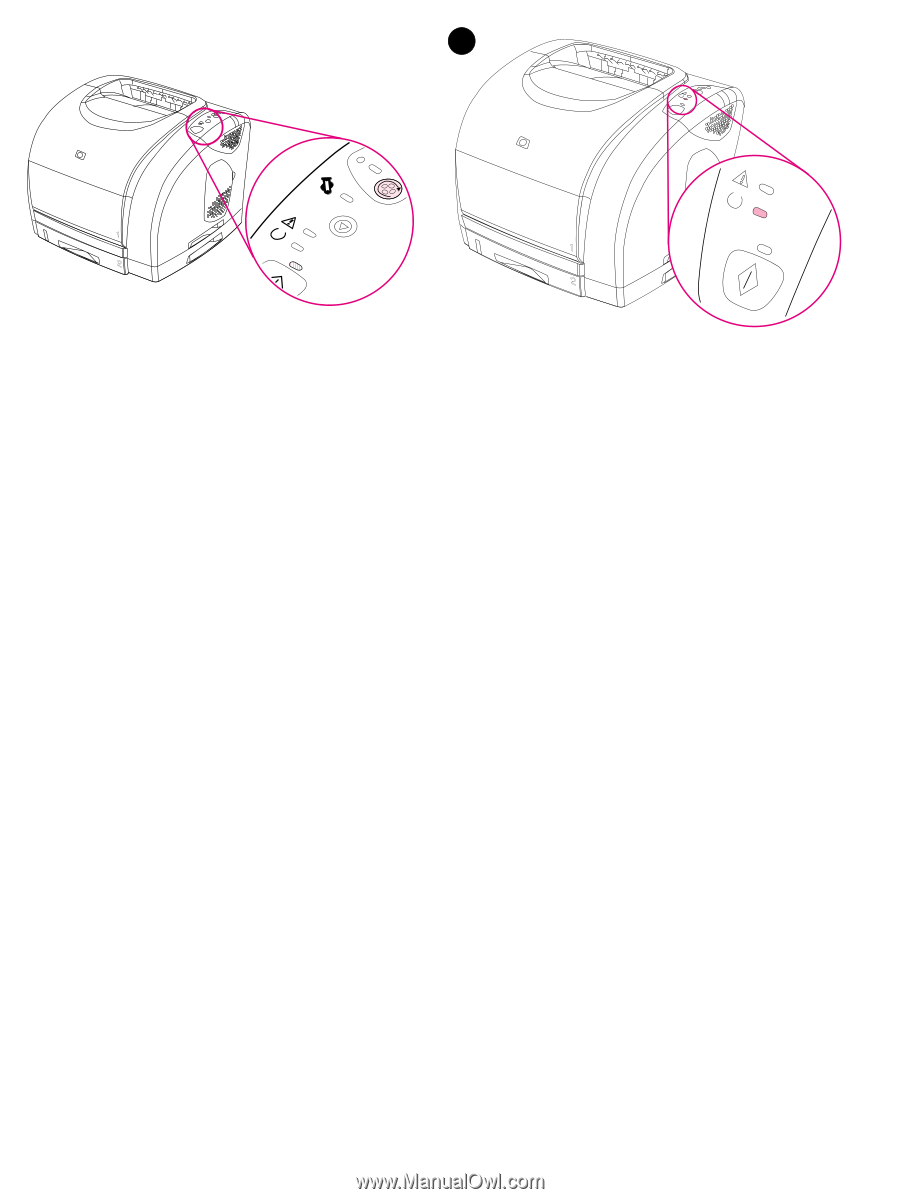
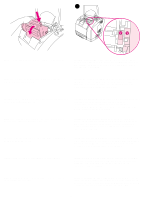
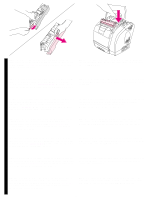
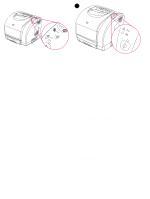
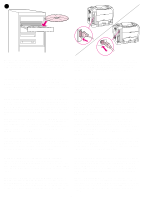
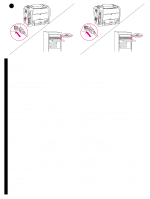
19 6) Close the top cover. When the green Go light begins blinking, press ROTATE CAROUSEL. Repeat this process (step 18) to install the other three print cartridges. Bring the printer to the Ready state. Close the top cover. After 60 seconds, the green Ready light turns on. 6) Fermez le capot. Lorsque le voyant Reprise vert clignote, appuyez sur FAIRE PIVOTER LE CARROUSEL. Répétez cette opération (étape 18) pour installer les trois autres cartouches d'encre. Rétablissez l'état Prêt de l'imprimante. Fermez le capot. Au bout d'une minute, le voyant Prêt vert s'allume. 6) Schließen Sie die obere Abdeckung. Drücken Sie PATRONENWECHSLER DREHEN, wenn die grüne Start-LED blinkt. Wiederholen Sie diesen Vorgang (Schritt 18) zum Einsetzen der restlichen drei Druckpatronen. Wechseln in den Bereitschaftszustand. Schließen Sie die obere Abdeckung. Nach 60 Sekunden leuchtet die grüne Bereit-LED auf. 6) Chiudere il coperchio superiore. Quando la spia verde Continua inizia a lampeggiare, premere ROTAZIONE CARTUCCE. Ripetere le operazioni appena descritte (punto 18) per installare le altre tre cartucce di stampa. Impostazione della stampante sullo stato Pronta. Chiudere il coperchio superiore. Trascorsi 60 secondi, la spia Pronta (verde) si accende. 6) Cierre la cubierta superior. Cuando la luz Continuar verde empiece a parpadear, pulse GIRAR CARRO. Repita este proceso (paso 18) para instalar los otros tres cartuchos de impresión. Ponga la impresora en el estado Preparada. Cierre la cubierta superior. Pasados 60 segundos, la luz Preparada verde se encenderá. 6) Sluit de printerkap. Druk op HOUDER DRAAIEN wanneer het groene Start-lichtje begint te knipperen. Herhaal deze procedure (stap 18) om de overige drie tonercassettes te installeren. Zet de printer weer in de status Klaar. Sluit de printerkap. Na 60 seconden gaat het groene Klaar-lichtje branden. 6) Feche a tampa superior. Quando a luz Continuar começar a piscar, pressione GIRAR CARROSSEL. Repita esse processo (etapa 18) para instalar os outros três cartuchos de impressão. Coloque a impressão no estado Pronta. Feche a tampa superior. Após 60 segundos, a luz Pronta verde se acenderá. 14
-
 1
1 -
2
-
3
-
4
-
5
-
6
-
7
-
8
-
9
-
 10
10 -
 11
11 -
 12
12 -
 13
13 -
 14
14 -
 15
15 -
 16
16 -
 17
17 -
 18
18 -
 19
19 -
 20
20 -
21
-
22
-
23
-
24
-
25
-
26
-
27
-
28
-
29
-
30
-
31
-
32
-
33
-
34
-
35
-
36
 |
 |