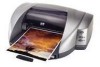
HP 5550 HP Deskjet 5550 Series printers - (English) Windows User's Guide - Page 85
not_printing, printer makes a loud noise after a print cartridge is installed
 |
UPC - 808736333603
View all HP 5550 manuals
Add to My Manuals
Save this manual to your list of manuals |
Page 85 highlights
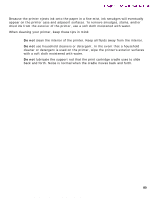
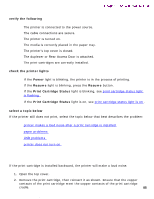
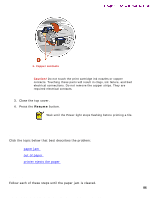
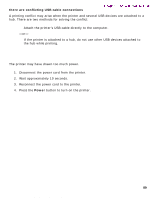
not_printing printer is not printing verify the following Newport ROW Windows UG Final q The printer is connected to the power source. q The cable connections are secure. q The printer is turned on. q The media is correctly placed in the paper tray. q The printer's top cover is closed. q The duplexer or Rear Access Door is attached. q The print cartridges are correctly installed. check the printer lights q If the Power light is blinking, the printer is in the process of printing. q If the Resume light is blinking, press the Resume button. q If the Print Cartridge Status light is blinking, see print cartridge status light is flashing . q If the Print Cartridge Status light is on, see print cartridge status light is on . select a topic below If the printer still does not print, select the topic below that best describes the problem: q printer makes a loud noise after a print cartridge is installed q paper problems q USB problems q printer does not turn on printer makes a loud noise after a print cartridge is installed If the print cartridge is installed backward, the printer will make a loud noise. 1. Open the top cover. 2. Remove the print cartridge, then reinsert it as shown. Ensure that the copper contacts of the print cartridge meet the copper contacts of the print cartridge cradle. 85 file:///C|/Projects/Newport/Win_UG_ROW/ug_notprinting_fs.html (1 of 5) [5/9/2002 10:19:03 AM]
-
 1
1 -
2
-
3
-
4
-
5
-
6
-
7
-
8
-
9
-
10
-
11
-
12
-
13
-
14
-
15
-
16
-
17
-
18
-
19
-
20
-
21
-
22
-
23
-
24
-
25
-
26
-
27
-
28
-
29
-
30
-
31
-
32
-
33
-
34
-
35
-
36
-
37
-
38
-
39
-
40
-
41
-
42
-
43
-
44
-
45
-
46
-
47
-
48
-
49
-
50
-
51
-
52
-
53
-
54
-
55
-
56
-
57
-
58
-
59
-
60
-
61
-
62
-
63
-
64
-
65
-
66
-
67
-
68
-
69
-
70
-
71
-
72
-
73
-
74
-
75
-
76
-
77
-
78
-
79
-
 80
80 -
 81
81 -
 82
82 -
 83
83 -
 84
84 -
 85
85 -
 86
86 -
 87
87 -
 88
88 -
 89
89 -
 90
90 -
91
-
92
-
93
-
94
-
95
-
96
-
97
-
98
-
99
-
100
-
101
-
102
-
103
-
104
-
105
-
106
-
107
-
108
-
109
-
110
-
111
-
112
-
113
-
114
-
115
-
116
-
117
-
118
-
119
-
120
-
121
-
122
-
123
-
124
-
125
 |
 |