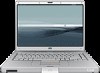
HP G5050XX Notebook PC User Guide - Windows Vista
HP G5050XX Manual
 |
View all HP G5050XX manuals
Add to My Manuals
Save this manual to your list of manuals |
HP G5050XX manual content summary:
- HP G5050XX | Notebook PC User Guide - Windows Vista - Page 1
Notebook PC User Guide User Guide - HP G5050XX | Notebook PC User Guide - Windows Vista - Page 2
to change without notice. The only warranties for HP products and services are set forth in the express warranty statements accompanying such products and services. Nothing herein should be construed as constituting an additional warranty. HP shall not be liable for technical or editorial errors - HP G5050XX | Notebook PC User Guide - Windows Vista - Page 3
preferences 16 Keyboard ...17 Hotkeys ...17 Hotkey quick reference 18 Hotkey procedures 18 Displaying and clearing system information (fn+esc 18 Opening Help and Support (fn+f1 19 Opening the Print Options window (fn+f2 19 Opening a Web browser (fn+f3 19 Switching the screen image (fn+f4 20 - HP G5050XX | Notebook PC User Guide - Windows Vista - Page 4
plan 26 Customizing power plans 26 Setting password protection on wakeup 26 Using battery power ...27 Using Battery Health in Help and Support 27 Displaying the remaining battery charge 27 Inserting or removing the battery 28 Charging a battery ...29 Managing low battery levels 29 Identifying - HP G5050XX | Notebook PC User Guide - Windows Vista - Page 5
Drive care ...36 IDE drive light ...37 Hard drive ...38 Optical drives ...41 Inserting an optical disc ...42 Removing an optical disc (with power 43 Removing an optical disc (without power 44 Avoiding the Sleep state or Hibernation 45 5 Multimedia Multimedia hardware ...46 Using the optical drive - HP G5050XX | Notebook PC User Guide - Windows Vista - Page 6
vi ENWW - HP G5050XX | Notebook PC User Guide - Windows Vista - Page 7
1 Notebook Tour Components This chapter explains the hardware features of the computer. To see a list of installed hardware in the computer: 1. Select Start > Computer > System properties. 2. In the left pane, click Device Manager. You can also add hardware or modify device configurations using - HP G5050XX | Notebook PC User Guide - Windows Vista - Page 8
Top components Keys Component (1) esc key (2) fn key (3) Windows® logo key (4) Embedded numeric keypad keys (5) Windows applications key (6) Function keys Description Displays system information when pressed in combination with the fn key. Executes frequently used system functions when pressed in - HP G5050XX | Notebook PC User Guide - Windows Vista - Page 9
TouchPad Component Description (1) TouchPad* Moves the pointer and selects or activates items on the screen. Can be set to perform other mouse functions, such as scrolling, selecting, and double-clicking. (2) Left TouchPad button* (3) TouchPad horizontal scroll zone* (4) Right TouchPad button* - HP G5050XX | Notebook PC User Guide - Windows Vista - Page 10
Buttons and switches Component (1) Wireless button* (2) Power button* (3) Volume down button (4) Volume up button (5) Volume mute button *This table describes default settings. Description Turns the wireless functionality on or off, but does not create a wireless connection. NOTE To establish a - HP G5050XX | Notebook PC User Guide - Windows Vista - Page 11
Lights Component Description (1) Wireless light On: An integrated wireless device, such as a wireless local area network (LAN), is turned on. (2) Power lights* (2) On: The computer is on. Blinking: The computer is in the Sleep state. (3) Caps lock light (4) Battery light Off: The computer - HP G5050XX | Notebook PC User Guide - Windows Vista - Page 12
Display components Component (1) Display release button (2) Internal display switch Front components Description Opens the computer. Initiates Sleep if the display is closed while the notebook is turned on. CAUTION The internal display switch is magnetic. Keep diskettes and other magnetic media - HP G5050XX | Notebook PC User Guide - Windows Vista - Page 13
Rear components Component Vent* Description Provides airflow to cool internal components. CAUTION To prevent overheating, do not obstruct vents. Use the computer only on a hard, flat surface. Do not allow another hard surface, such as an adjoining optional printer, or a soft surface, such as - HP G5050XX | Notebook PC User Guide - Windows Vista - Page 14
Right-side components Component (1) Audio-out (headphone) jack (2) Audio-in (microphone) jack (3) USB port (select models only) (4) Optical drive (5) RJ-11 (modem) jack (6) Power connector Description Produces system sound when connected to optional powered stereo speakers, headphones, ear buds, a - HP G5050XX | Notebook PC User Guide - Windows Vista - Page 15
Left-side components Component (1) Security cable slot (2) External monitor port (3) S-Video-out jack (4) RJ-45 (network) jack (5) USB ports (2) Description Attaches an optional security cable to the computer. NOTE The security cable is designed to act as a deterrent, but may not prevent the - HP G5050XX | Notebook PC User Guide - Windows Vista - Page 16
Bottom components Component (1) Battery bay (2) Battery pack release latch (3) Memory module compartment (4) Hard drive bay (5) Vents (2)† Description Holds the primary battery pack.* Releases the battery pack from the battery bay. Contains the memory module slots. Holds the hard drive. Enable - HP G5050XX | Notebook PC User Guide - Windows Vista - Page 17
outside of the computer. To see wireless regulatory notices, refer to your country's section of the Regulatory, Safety and Environmental Notices located in Help and Support. NOTE For optimal transmission, keep the areas immediately around the antennae free from obstructions. ENWW Components 11 - HP G5050XX | Notebook PC User Guide - Windows Vista - Page 18
Additional hardware components Component Description (1) Battery pack* Powers the computer when the computer is not connected to external power. (2) AC adapter Converts AC power to DC power. (3) Power cord* Connects an AC adapter to an AC outlet. *Battery packs and power cords vary in - HP G5050XX | Notebook PC User Guide - Windows Vista - Page 19
Labels The labels affixed to the computer provide information you may need when you troubleshoot system problems or travel internationally with the computer. ● Service tag-Provides the product name, serial number (S/N), and other specifics about the computer. Have this information available when you - HP G5050XX | Notebook PC User Guide - Windows Vista - Page 20
Specifications Operating environment The operating environment information in the following table may be helpful if you plan to use or transport the computer in extreme environments. Factor Metric Temperature Operating Nonoperating 10˚C to 35˚C -20˚C to 60˚C Relative humidity (noncondensing) - HP G5050XX | Notebook PC User Guide - Windows Vista - Page 21
2 TouchPad and Keyboard TouchPad The following illustration and table describe the computer TouchPad. Component Description (1) TouchPad* (2) Left TouchPad button* (3) TouchPad horizontal scroll zone* Moves the pointer and selects or activates items on the screen. Can be set to perform other - HP G5050XX | Notebook PC User Guide - Windows Vista - Page 22
Using the TouchPad To move the pointer, slide your finger across the TouchPad surface in the direction you want the pointer to go. Use the left and right TouchPad buttons as you would the left and right buttons on an external mouse. To scroll up and down using the TouchPad vertical scroll zone, - HP G5050XX | Notebook PC User Guide - Windows Vista - Page 23
Keyboard The following sections provide information on the keyboard features of the notebook. Hotkeys Hotkeys are combinations of the fn key (1) and either the esc key (2) or one of the function keys (3). The icons on the f1 through f12 keys represent the hotkey functions. Hotkey functions and - HP G5050XX | Notebook PC User Guide - Windows Vista - Page 24
Hotkey quick reference Function Display and clear system information. Open Help and Support. Open the Print Options window. Open a Web browser. Switch the screen image between the computer display and an external display. Initiate Hibernation. Initiate QuickLock. Decrease - HP G5050XX | Notebook PC User Guide - Windows Vista - Page 25
computer. ● Checkups for computer functionality. ● Automated and interactive troubleshooting, repair solutions, and system recovery procedures. ● Links to support specialists. You can also access Help and Support by selecting Start > Help and Support. Opening the Print Options window (fn+f2) Press - HP G5050XX | Notebook PC User Guide - Windows Vista - Page 26
video information from the computer, such as S-Video. The following video transmission types, with examples of devices that use them, are supported by the fn+f4 hotkey: ● LCD (computer display) ● External VGA (most external monitors) ● S-Video (televisions, camcorders, VCRs, and video capture cards - HP G5050XX | Notebook PC User Guide - Windows Vista - Page 27
or a Windows administrator password is entered. NOTE Before you can use QuickLock, you must set a Windows user password or a Windows administrator password. For instructions, refer to Help and Support. To use QuickLock, press fn+f6 to display the Log On window and lock the computer. Then follow the - HP G5050XX | Notebook PC User Guide - Windows Vista - Page 28
Keypads The computer has an embedded numeric keypad and also supports an optional external numeric keypad or an optional external keyboard that includes a numeric keypad. Component (1) fn key (2) num lock light (3) num lk key (4) Embedded numeric - HP G5050XX | Notebook PC User Guide - Windows Vista - Page 29
Switching key functions on the embedded numeric keypad You can temporarily alternate the functions of keys on the embedded numeric keypad between their standard keyboard functions and their keypad functions by using the fn key or the fn+shift key combination. ● To change the function of a keypad key - HP G5050XX | Notebook PC User Guide - Windows Vista - Page 30
3 Power management Setting power options Using power-saving states Windows has two power-saving states enabled at the factory: Sleep and Hibernation. When you initiate Sleep, the power lights blink and the screen clears. Your work is saved to memory, letting you exit Sleep faster than exiting - HP G5050XX | Notebook PC User Guide - Windows Vista - Page 31
● Press a key on the keyboard. ● Activate the TouchPad. When the computer exits Sleep, the power lights turn on and your work returns to the screen where you stopped working. NOTE If you have set a password to be required on wakeup, you must enter your Windows password before your work will return - HP G5050XX | Notebook PC User Guide - Windows Vista - Page 32
3. Under System icons, clear the Power check box to hide the battery meter icon, or select the Power check box to display the battery meter icon. 4. Click OK. Using power plans A power plan is a collection of system settings that manages how the computer uses power. Power plans can help you conserve - HP G5050XX | Notebook PC User Guide - Windows Vista - Page 33
or a compatible battery purchased from HP. Computer battery life varies, depending on power management settings, programs running on the computer, display brightness, external devices connected to the computer, and other factors. Using Battery Health in Help and Support The Battery Health section of - HP G5050XX | Notebook PC User Guide - Windows Vista - Page 34
Inserting or removing the battery CAUTION To prevent loss of information when removing a battery that is the sole power source, initiate Hibernation or turn off the computer before removing the battery. To insert the battery: 1. Turn the computer upside down on a flat surface, with the battery bay - HP G5050XX | Notebook PC User Guide - Windows Vista - Page 35
Charging a battery WARNING! Do not charge the computer battery while you are onboard aircraft. The battery charges whenever the computer is plugged into external power through an AC adapter, an optional power adapter, an optional expansion product, or an optional docking device. The battery charges - HP G5050XX | Notebook PC User Guide - Windows Vista - Page 36
The computer takes the following actions for a critical battery level: ● If Hibernation is enabled and the computer is on or in the Sleep state, the computer initiates Hibernation. ● If Hibernation is disabled and the computer is on or in the Sleep state, the computer remains briefly in the Sleep - HP G5050XX | Notebook PC User Guide - Windows Vista - Page 37
Step 1: Fully charge the battery WARNING! Do not charge the computer battery while you are onboard aircraft. NOTE The battery charges whether the computer is off or in use, but it charges faster when the computer is off. To fully charge the battery: 1. Insert the battery into the computer. 2. - HP G5050XX | Notebook PC User Guide - Windows Vista - Page 38
Step 3: Discharge the battery The computer must remain on while the battery is being discharged. The battery can discharge whether or not you are using the computer, but the battery will discharge faster while you are using it. ● If you plan to leave the computer unattended during the discharge, - HP G5050XX | Notebook PC User Guide - Windows Vista - Page 39
7. Click OK. 8. Click Save changes. Conserving battery power ● Select low power-use settings through Power Options in Windows Control Panel. ● Turn off wireless and local area network (LAN) connections and exit modem applications when you are not using them. ● Disconnect external devices that are - HP G5050XX | Notebook PC User Guide - Windows Vista - Page 40
! To reduce potential safety issues, use only the AC adapter provided with the computer, a replacement AC adapter provided by HP, or a compatible AC adapter purchased from HP. ● AC adapter included with the computer ● Optional docking device or expansion product ● Optional power adapter Connect the - HP G5050XX | Notebook PC User Guide - Windows Vista - Page 41
3. Plug the other end of the power cord into the AC outlet (3). Shutting down the computer CAUTION Unsaved information will be lost when the computer is shut down. The Shut Down command closes all open programs, including the operating system, and then turns off the display and computer. Shut down - HP G5050XX | Notebook PC User Guide - Windows Vista - Page 42
4 Drives Drive care Drives are fragile computer components that must be handled with care. The following cautions apply to all drives. Additional cautions are included with the procedures to which they apply. CAUTION To reduce the risk of damage to the computer, damage to a drive, or loss - HP G5050XX | Notebook PC User Guide - Windows Vista - Page 43
IDE drive light The IDE drive light blinks when either the primary hard drive or an optical drive is being accessed. ENWW IDE drive light 37 - HP G5050XX | Notebook PC User Guide - Windows Vista - Page 44
Hard drive CAUTION To prevent system lockup and loss of information: Shut down the computer before removing the hard drive from the hard drive bay. Do not remove the hard drive while the computer is on, in the Sleep state, or in Hibernation. If you are not sure whether the computer is off or in - HP G5050XX | Notebook PC User Guide - Windows Vista - Page 45
7. Lift the hard drive away from the computer (2). To install a hard drive: 1. Lower the hard drive into the hard drive bay (1). 2. Slide the hard drive toward the hard drive connector (2) until it is fully seated. 3. Align the tabs (1) on the hard drive cover with the notches on the computer. 4. - HP G5050XX | Notebook PC User Guide - Windows Vista - Page 46
5. Tighten the hard drive cover screws (3). 40 Chapter 4 Drives ENWW - HP G5050XX | Notebook PC User Guide - Windows Vista - Page 47
Optical drives An optical drive, such as a DVD-ROM drive, supports optical discs (CDs and DVDs). These discs are used to store or transport data and No Yes Yes Yes Yes NOTE Some of the optical drives listed may not be supported by your computer. The listed drives are not necessarily all of the - HP G5050XX | Notebook PC User Guide - Windows Vista - Page 48
Inserting an optical disc 1. Turn on the computer. 2. Press the release button (1) on the drive bezel to release the media tray. 3. Pull out the tray (2). 4. Hold the CD or DVD by the edges to avoid touching the flat surfaces, and position the disc over the tray spindle, with the label-side up. NOTE - HP G5050XX | Notebook PC User Guide - Windows Vista - Page 49
Removing an optical disc (with power) If the computer is running on external or battery power: 1. Turn on the computer. 2. Press the release button (1) on the drive bezel to release the media tray, and then pull out the tray (2). 3. Remove the disc (3) from the tray by gently pressing down on the - HP G5050XX | Notebook PC User Guide - Windows Vista - Page 50
Removing an optical disc (without power) If external or battery power is unavailable: 1. Insert the end of a paper clip (1) into the release access in the front bezel of the drive. 2. Press in gently until the tray is released, and then pull out the tray (2). 3. Remove the disc (3) from the tray by - HP G5050XX | Notebook PC User Guide - Windows Vista - Page 51
Avoiding the Sleep state or Hibernation CAUTION To prevent possible audio and video degradation, or loss of audio or video playback functionality, do not initiate Sleep or Hibernation while reading or writing to a CD or DVD. To prevent loss of information, do not initiate Sleep or Hibernation when - HP G5050XX | Notebook PC User Guide - Windows Vista - Page 52
5 Multimedia Multimedia hardware Using the optical drive The optical drive allows you to play, copy, and create CDs or DVDs, depending on the type of installed drive and installed software. Identifying the installed optical drive To view the type of optical drive installed in the computer: ▲ Select - HP G5050XX | Notebook PC User Guide - Windows Vista - Page 53
Inserting an optical disc 1. Turn on the computer. 2. Press the release button (1) on the drive bezel to release the media tray. 3. Pull out the tray (2). 4. Hold the CD or DVD by the edges to avoid touching the flat surfaces, and position the disc over the tray spindle, with the label-side up. NOTE - HP G5050XX | Notebook PC User Guide - Windows Vista - Page 54
Removing an optical disc (with power) If the computer is running on external or battery power: 1. Turn on the computer. 2. Press the release button (1) on the drive bezel to release the media tray, and then pull out the tray (2). 3. Remove the disc (3) from the tray by gently pressing down on the - HP G5050XX | Notebook PC User Guide - Windows Vista - Page 55
Removing an optical disc (without power) If external or battery power is unavailable: 1. Insert the end of a paper clip (1) into the release access in the front bezel of the drive. 2. Press in gently until the tray is released, and then pull out the tray (2). 3. Remove the disc (3) from the tray by - HP G5050XX | Notebook PC User Guide - Windows Vista - Page 56
Using media activity hotkeys Media activity hotkeys are combinations of the fn key (1) and 4 of the function keys. You can use these keys to control the play of an audio CD or a DVD that is inserted in the optical drive. NOTE To control the play of an inserted video CD, use the media activity - HP G5050XX | Notebook PC User Guide - Windows Vista - Page 57
computer sound. Using the audio-in (microphone) jack The computer is equipped with a microphone jack that supports an optional monaural (single sound channel) microphone. Select models support a stereo (dual sound channel) microphone. NOTE When connecting a microphone to the microphone jack, use - HP G5050XX | Notebook PC User Guide - Windows Vista - Page 58
Adjusting the volume You can adjust the volume using the following controls: ● Computer volume buttons: ● To mute or restore volume, press the volume mute button. ● To decrease the volume, press the volume down button. ● To increase the volume, press the volume up button. NOTE The tapping sound made - HP G5050XX | Notebook PC User Guide - Windows Vista - Page 59
Using the video features The computer includes the following video features: ● S-Video-out jack that connects a range of video components that allow you to maximize your multimedia features ● External monitor port that connects a television, monitor, or projector to the computer Using the external - HP G5050XX | Notebook PC User Guide - Windows Vista - Page 60
support one S-Video device connected to the S-Video-out jack, while simultaneously supporting an image on the computer display or on any other supported . 2. Connect the other end of the cable to the video device, as instructed in the documentation included with the device. 3. Press the fn+f4 keys to - HP G5050XX | Notebook PC User Guide - Windows Vista - Page 61
, the following multimedia tasks may be supported: ● Playing digital media, including audio guides. These guides may be provided on CD or as online Help files within the specific application. User guides installation wizard opens, follow the installation instructions on the screen. 3. Restart the - HP G5050XX | Notebook PC User Guide - Windows Vista - Page 62
Media Player. NOTE Some applications may be located in subfolders. 2. Insert the media disc, such as an audio CD, into the optical drive. 3. Follow the instructions on the screen. - or - 1. Insert the media disc, such as an audio CD, into the optical drive. An AutoPlay dialog box opens. 2. Click - HP G5050XX | Notebook PC User Guide - Windows Vista - Page 63
Preventing playback disruptions To reduce the possibility of playback disruption: ● Save your work and close all open applications before playing a CD or a DVD. ● Do not connect or disconnect hardware while playing a disc. Do not initiate Hibernation or Sleep while playing a disc. Otherwise, you may - HP G5050XX | Notebook PC User Guide - Windows Vista - Page 64
Changing DVD region settings Most DVDs that contain copyrighted files also contain region codes. The region codes help protect copyrights internationally. You can play a DVD containing a region code only if the region code on the DVD matches the region setting on your DVD drive. If the region code - HP G5050XX | Notebook PC User Guide - Windows Vista - Page 65
of the computer. A third USB port on the right side of the computer is available on select models only. The USB ports on the computer support USB 2.0 and USB 1.1 devices. Connecting a USB device CAUTION To prevent damage to the USB connectors, use minimal force to connect a USB device. To connect - HP G5050XX | Notebook PC User Guide - Windows Vista - Page 66
Hardware icon, click Show Hidden Icons in the notification area. 3. Click Stop, and then click OK. Required USB software Some USB devices may require additional support software, which is usually included with the device. For more information about device-specific software, refer to the user - HP G5050XX | Notebook PC User Guide - Windows Vista - Page 67
7 Memory Modules Adding or replacing memory modules The computer has one memory module compartment, which is located on the bottom of the computer. The memory capacity of the computer can be upgraded by adding a memory module to the vacant expansion memory module slot or by upgrading the existing - HP G5050XX | Notebook PC User Guide - Windows Vista - Page 68
9. Lift the memory module compartment cover (2) away from the computer. 10. To remove a memory module: a. Pull away the retention clips (1) on each side of the memory module . (The memory module tilts up.) b. Grasp the edge of the memory module (2) and gently pull the module out of the memory - HP G5050XX | Notebook PC User Guide - Windows Vista - Page 69
c. Press the memory module (3) down until the retention clips snap into place. 12. Align the tabs (1) on the memory module compartment cover with the notches on the computer. 13. Close the cover (2). 14. Tighten the memory module compartment cover screw (3). 15. Replace the battery pack. 16. - HP G5050XX | Notebook PC User Guide - Windows Vista - Page 70
17 identifying 2 function keys hotkeys 17 identifying 2 H hard drive installing 39 removing 38 hard drive bay, identifying 10 headphone (audio-out) jack 8 Help and Support hotkey 18, 19 Hibernation exiting 25 hotkey 18, 20 initiating 25 writing to CD or DVD 45 hotkeys audio CD or DVD controls 18, 21 - HP G5050XX | Notebook PC User Guide - Windows Vista - Page 71
labels Microsoft Certificate of Authenticity 13 modem approval 13 regulatory 13 service tag 13 wireless certification 13 WLAN 13 latches battery pack release removing, without power 44, 49 optical drive identifying 8, 46 supported types 41 P pointing devices.. See TouchPad ports external monitor - HP G5050XX | Notebook PC User Guide - Windows Vista - Page 72
-out jack 9, 53, 54 screen brightness hotkeys 18, 21 screen image, switching 18, 20 scroll zones, TouchPad 3, 15 security cable slot 9 serial number, computer 13 service tag 13 shutdown 35 shutting down 35 Sleep exiting 24 initiating 24 writing to CD or DVD 45 slots memory module 10 security cable - HP G5050XX | Notebook PC User Guide - Windows Vista - Page 73
-
 1
1 -
 2
2 -
 3
3 -
 4
4 -
 5
5 -
 6
6 -
 7
7 -
8
-
9
-
10
-
11
-
12
-
13
-
14
-
15
-
16
-
17
-
18
-
19
-
20
-
21
-
22
-
23
-
24
-
25
-
26
-
27
-
28
-
29
-
30
-
31
-
32
-
33
-
34
-
35
-
36
-
37
-
38
-
39
-
40
-
41
-
42
-
43
-
44
-
45
-
46
-
47
-
48
-
49
-
50
-
51
-
52
-
53
-
54
-
55
-
56
-
57
-
58
-
59
-
60
-
61
-
62
-
63
-
64
-
65
-
66
-
67
-
68
-
69
-
70
-
71
-
72
-
73
 |
 |

Notebook PC User Guide
User Guide